Domain Whois Lookup and History:
The Complete Guide

Updated Dec. 1, 2025
In the rapidly evolving digital landscape, understanding the background and history of a domain name is crucial for professionals across various fields — whether you're involved in digital marketing, cybersecurity, domain investment, or legal affairs.
A comprehensive domain Whois lookup can provide invaluable insights, helping you verify ownership, assess security, and understand the domain's history.
In this guide, we'll take you through a detailed process for performing a domain Whois lookup and uncovering its history using the Deep Whois app on iOS and command line tool in Terminal on macOS, Linux, and FreeBSD.
We'll explore everything from basic Whois data to advanced features like historical Whois records, Ethereum Name Service (ENS) data, Registration Data Access Protocol (RDAP) information, and much more.
Here are the steps for performing a full domain investigation:
→ Step #1: Perform a Basic Whois Lookup
→ Step #2: Verify Domain Ownership and Contact Information
→ Step #3: Analyze Domain Registrar, Name Servers and DNS
→ Step #4: Investigate Hosting Provider
→ Step #5: Investigate Historical Whois Data
→ Step #6: Retrieve RDAP Data for In-Depth Information
→ Step #7: Access ENS Data for Ethereum and DNS Domains
→ Step #8: Analyze Age, Domain Expiration and Renewal Dates
→ Step #9: Monitor Domain Changes Over Time
→ Step #10: Analyze WHOIS Abuse Contact Information
→ Step #11: Save and Export Whois Data
Let's dive into the complete guide.

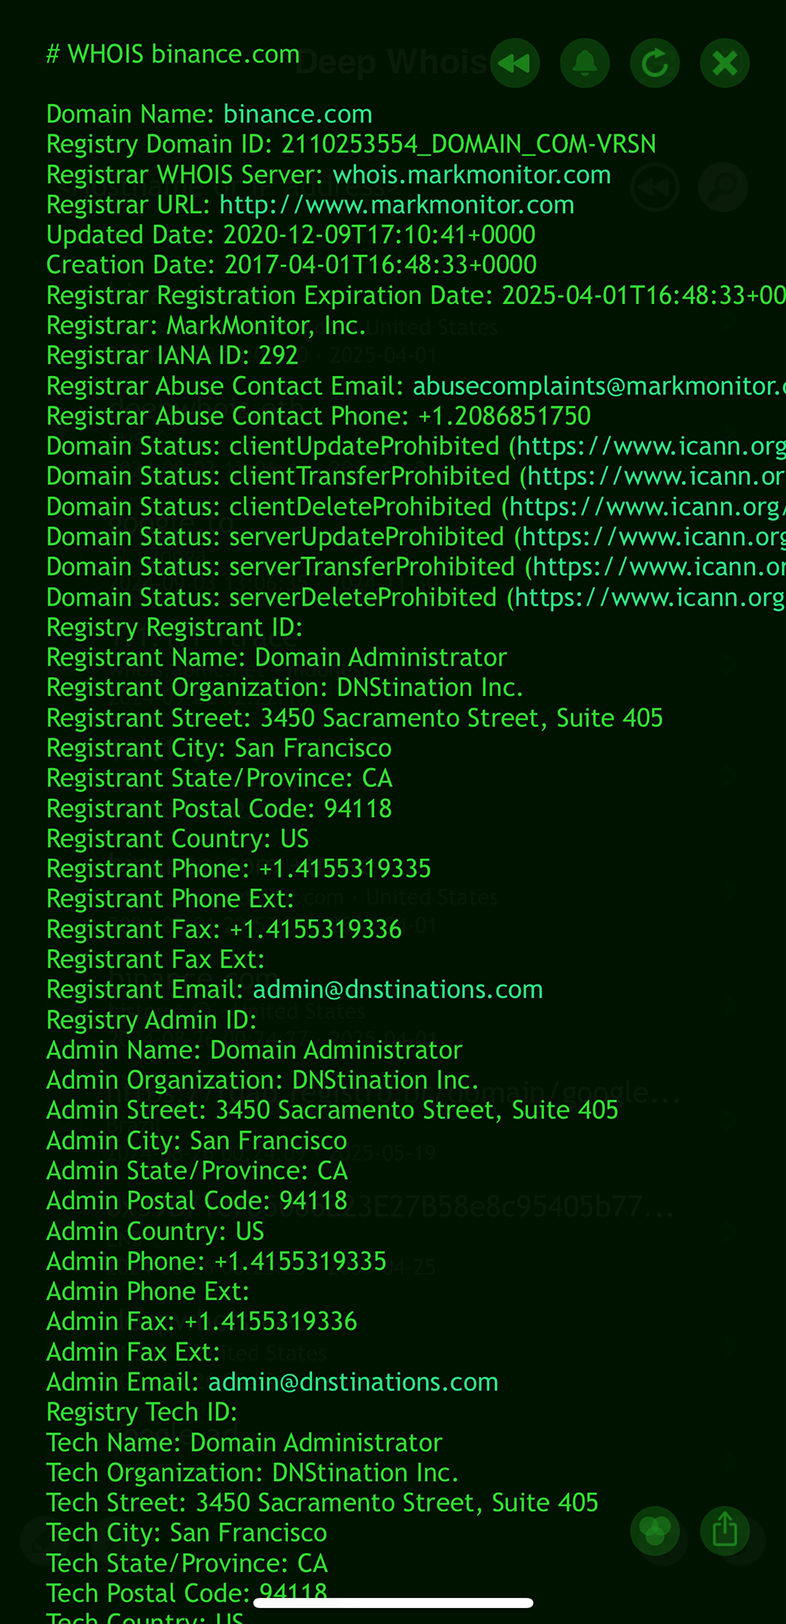
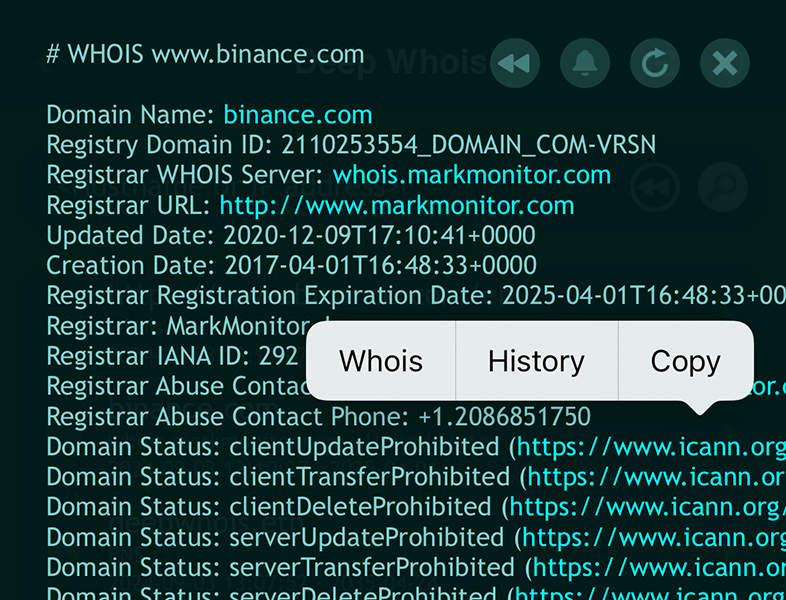
Step #1: Perform a Basic Whois Lookup
The foundation of any domain investigation begins with a basic Whois lookup. This step provides essential details about the domain, such as the registrar, registration and expiration dates, name servers, and the domain owner's contact information (unless masked by privacy services).
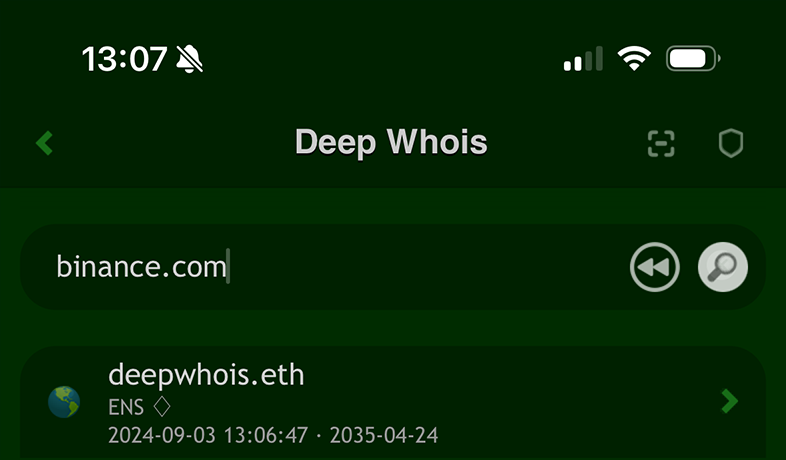
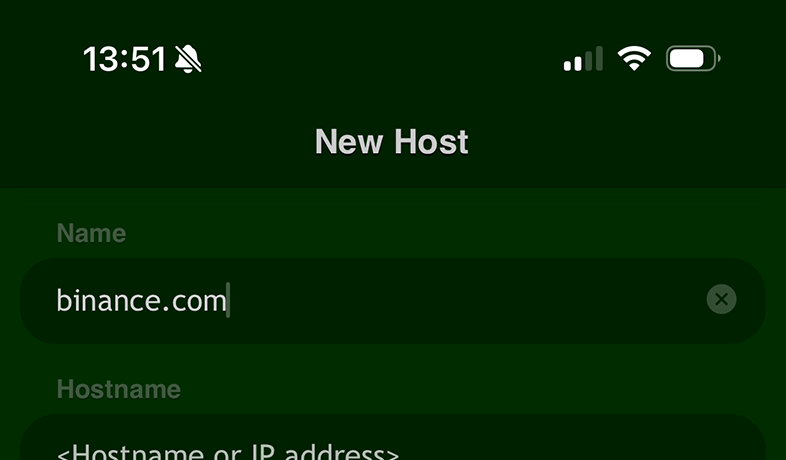
Using Deep Whois on iOS:
Open the Deep Whois app, enter the domain name in the search field, and tap 'Lookup' button to retrieve the Whois data.
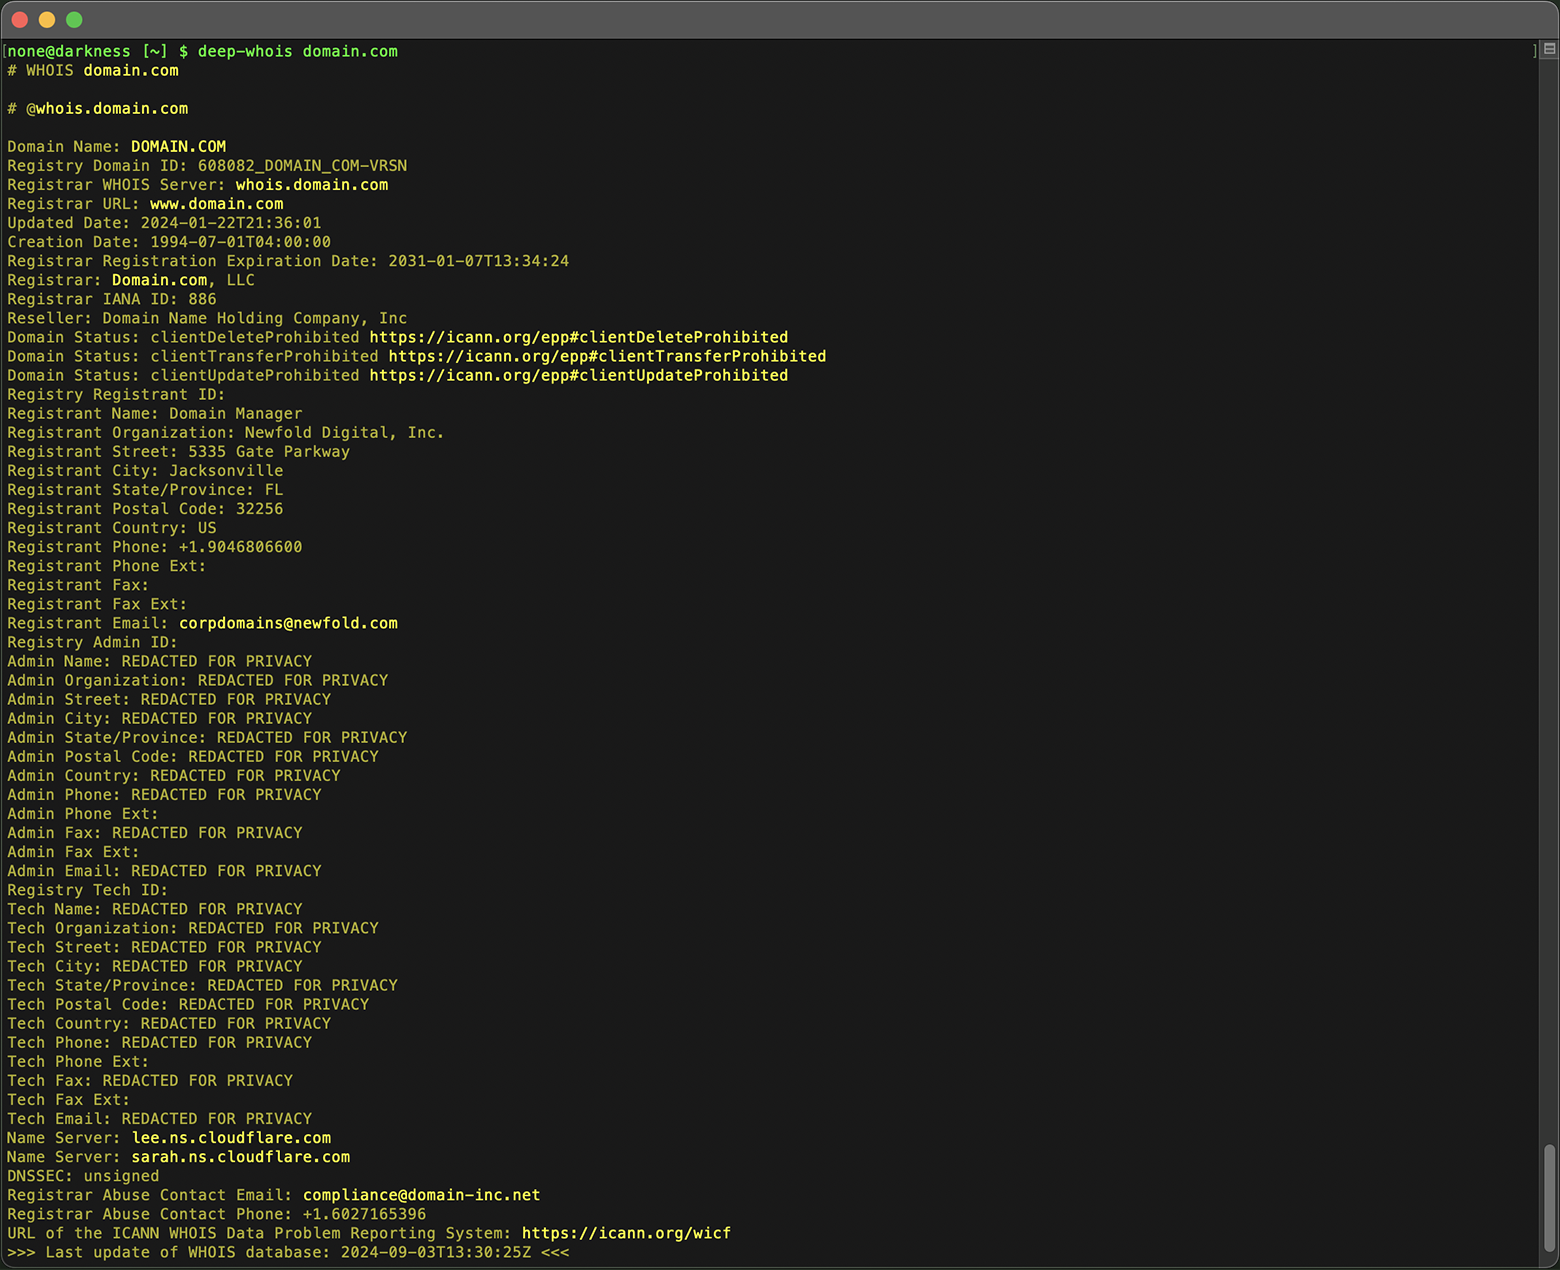
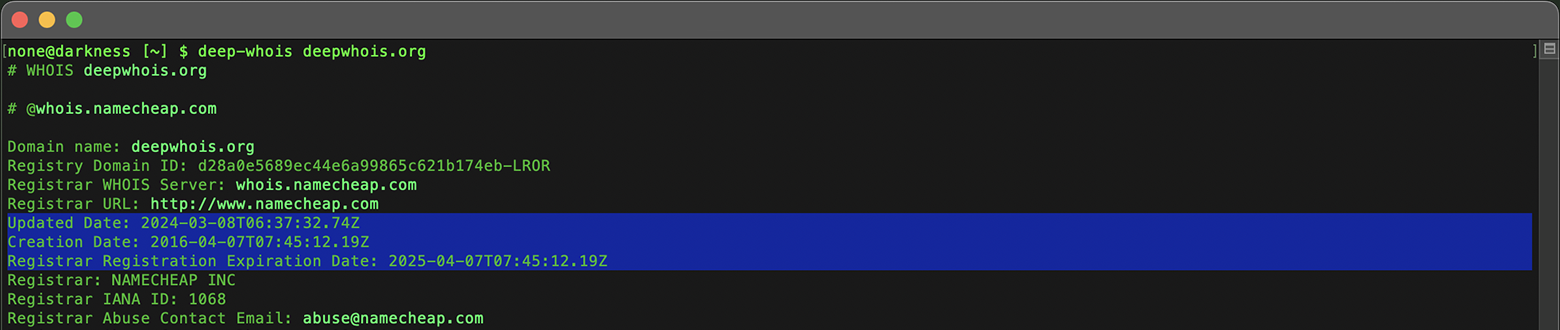
Using Deep Whois in Terminal:
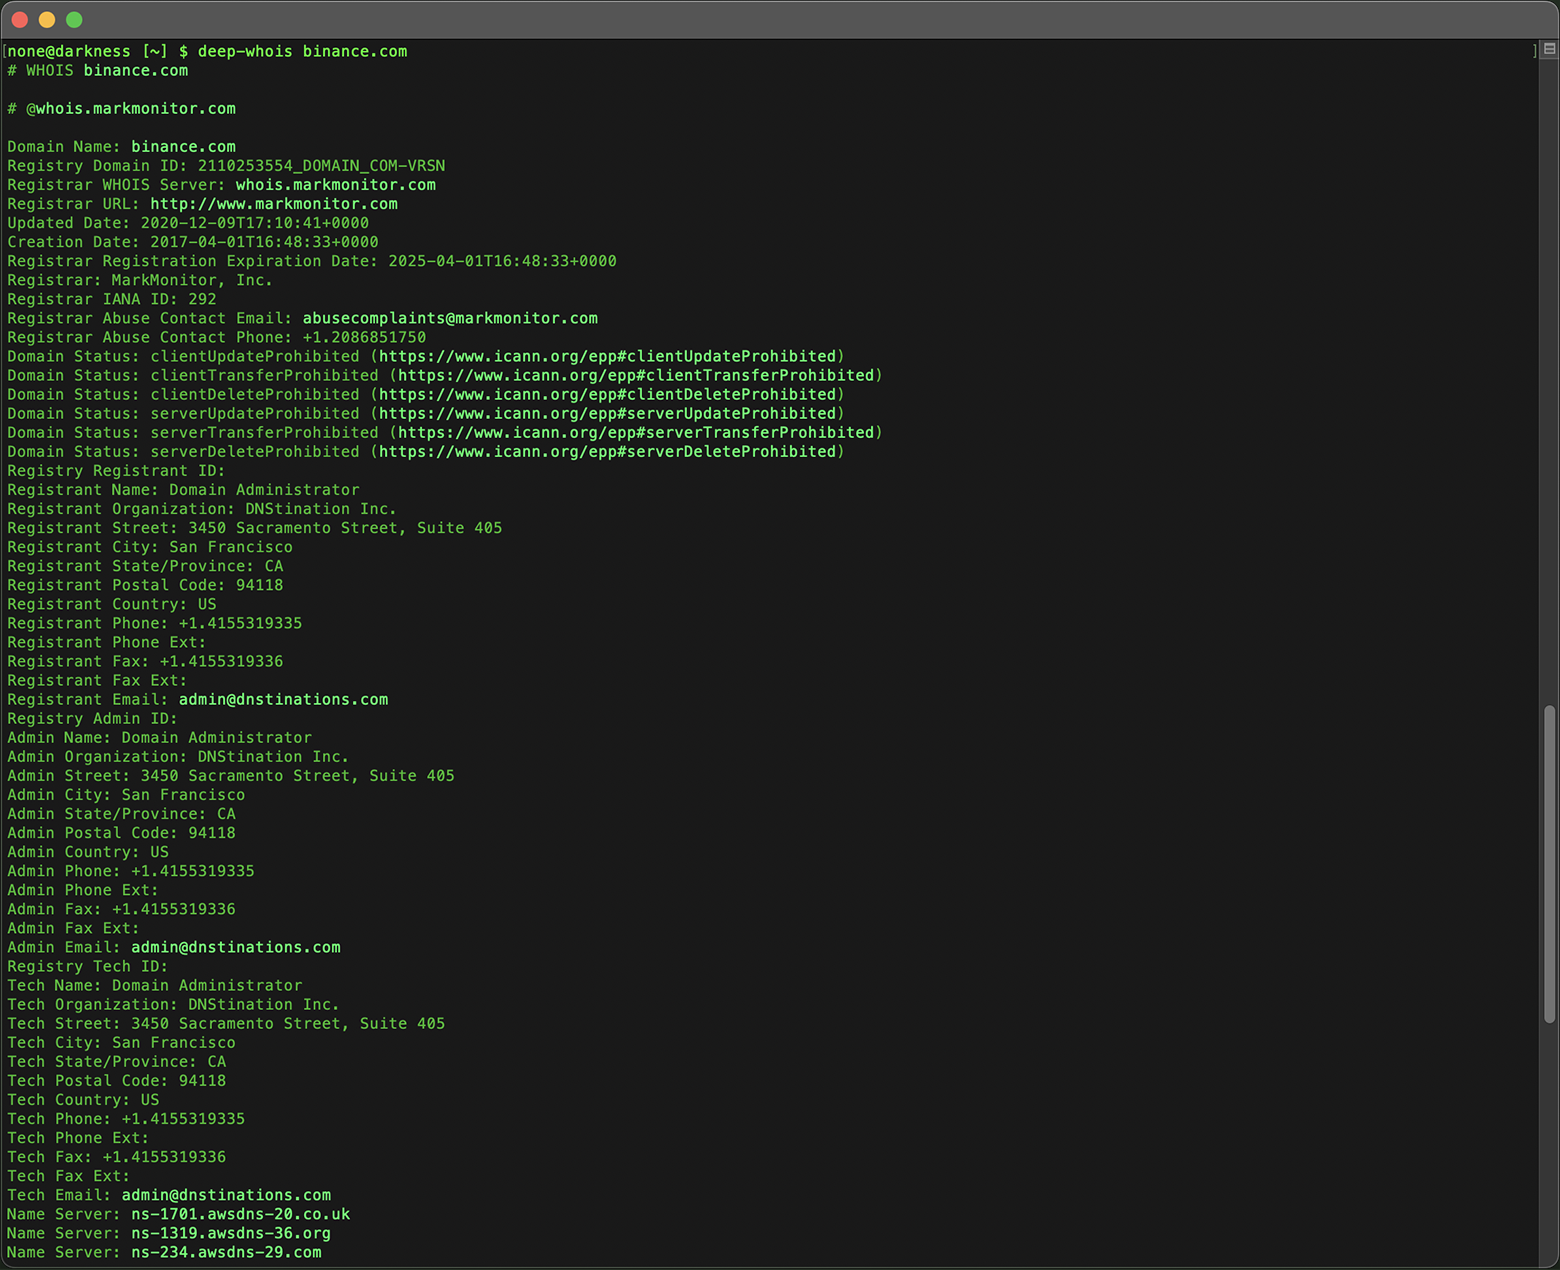
Execute the following command:
deep-whois binance.com
This basic lookup gives you a snapshot of the domain's current status and the technical details needed to proceed with a deeper investigation.
Bonus Tips:
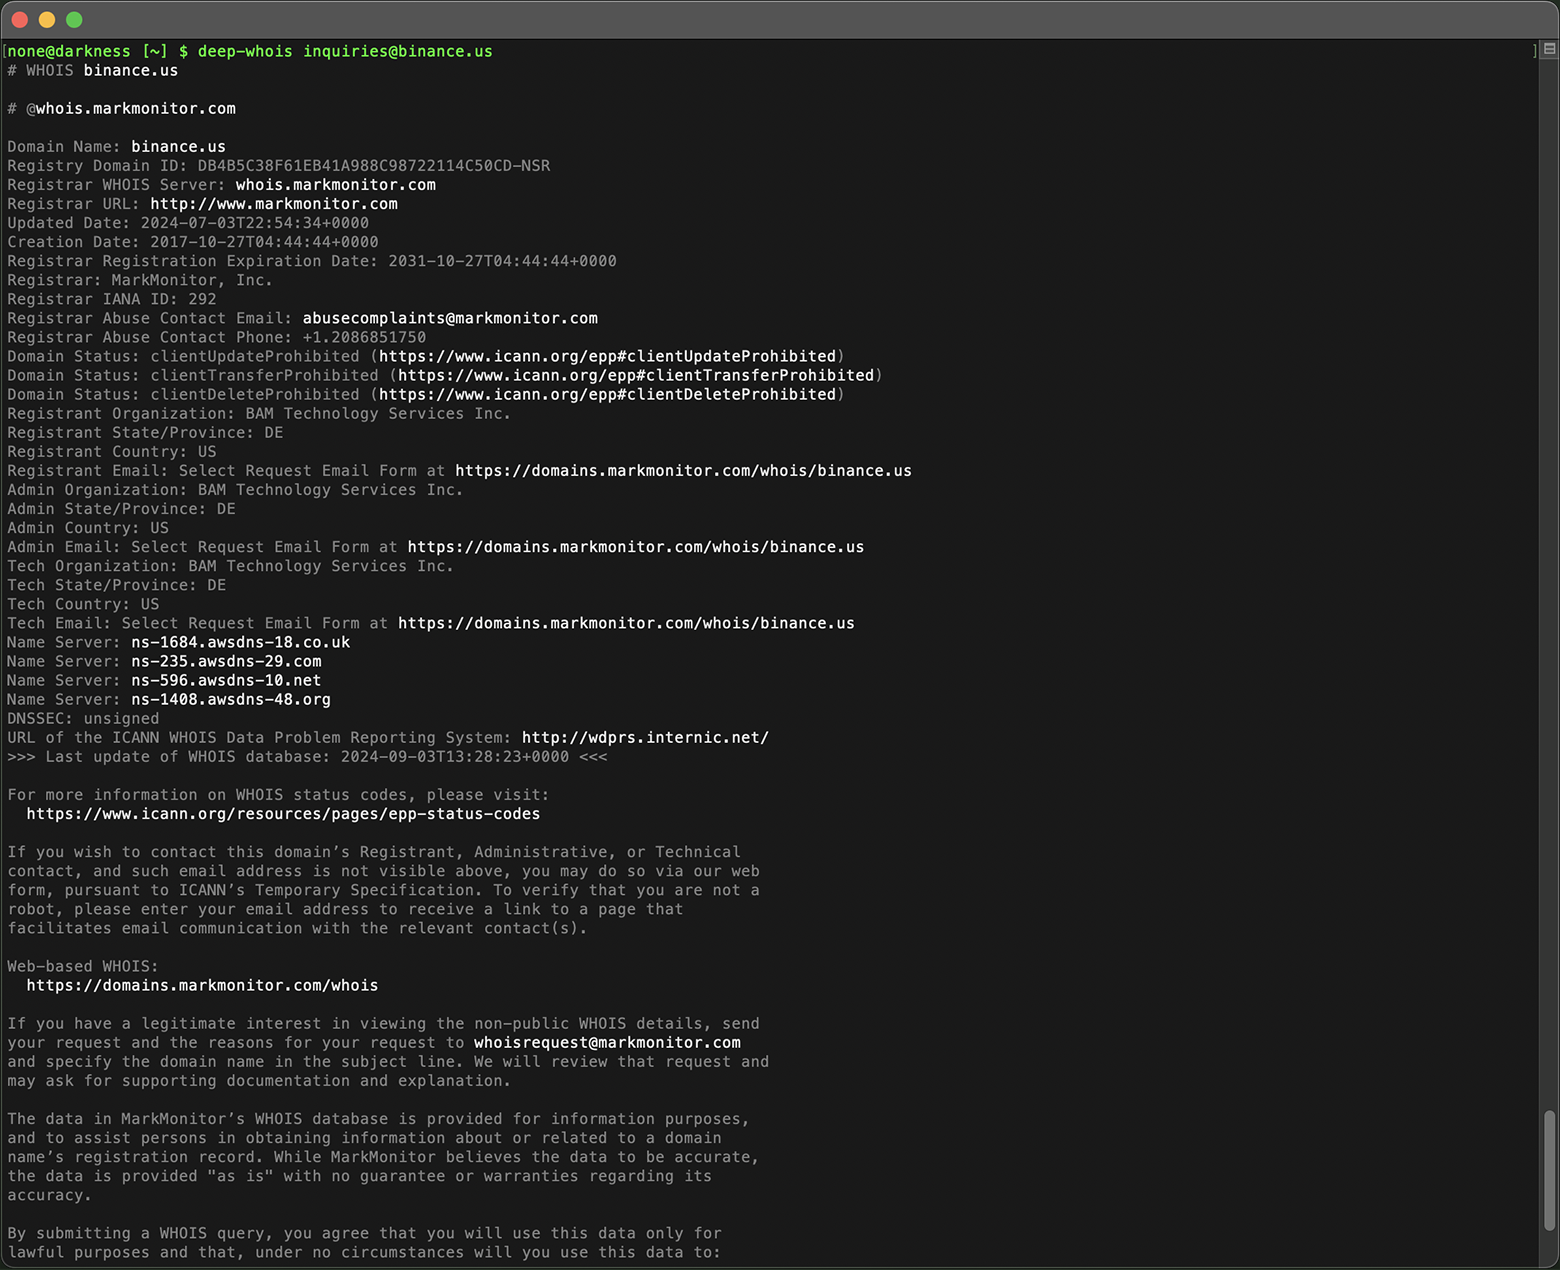
#1: Query Whois using a hostname, website link or email
When entering a domain name into the tool, you have the flexibility to input the information in various formats, making it easier and more convenient to retrieve Whois data.
In addition to directly typing the domain name, you can also enter or paste a hostname, web link/URL, or even an email address.

The tool is designed to intelligently extract the correct domain name from these inputs, automatically identifying the proper domain from the provided data.

These additional options allow you to quickly obtain domain information without needing to manually strip down URLs or email addresses, streamlining the process of accessing Whois data.
#2: Easy Whois Browsing on iOS
On iOS, you can seamlessly browse Whois information just like navigating through web pages with clickable links.
The app intelligently recognizes and highlights important data, such as domain names, hostnames, web links, URLs, and email addresses, using a brighter color for easy identification.
To follow such a link, you simply need to tap on it, bringing up a context menu.
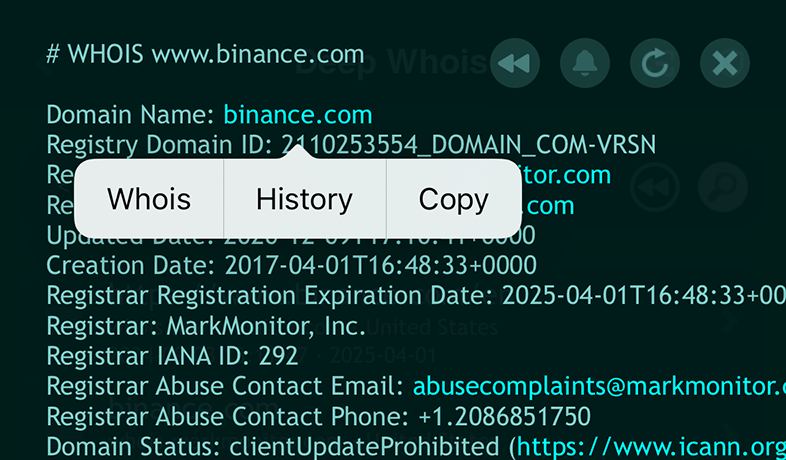
From this menu, selecting the 'Whois' option allows you to instantly query Whois data for the related link, making the process of exploring domain information both intuitive and efficient.
Step #2: Verify Domain Ownership and Contact Information
Verifying who owns a domain is critical, especially if you're considering purchasing it, dealing with a legal matter, or ensuring the domain is registered to the correct entity.
Whois lookups provide this information, unless the domain owner has opted for privacy protection, which masks their details.
Using Deep Whois on iOS:
Ownership details are included in the Whois data unless privacy protection is enabled.
Using Deep Whois in Terminal:
Use the same basic Whois command to reveal ownership details:
deep-whois domain.com
If privacy protection is in place, you may need to contact the registrar directly or use other methods to uncover the true owner.
Bonus Tips:
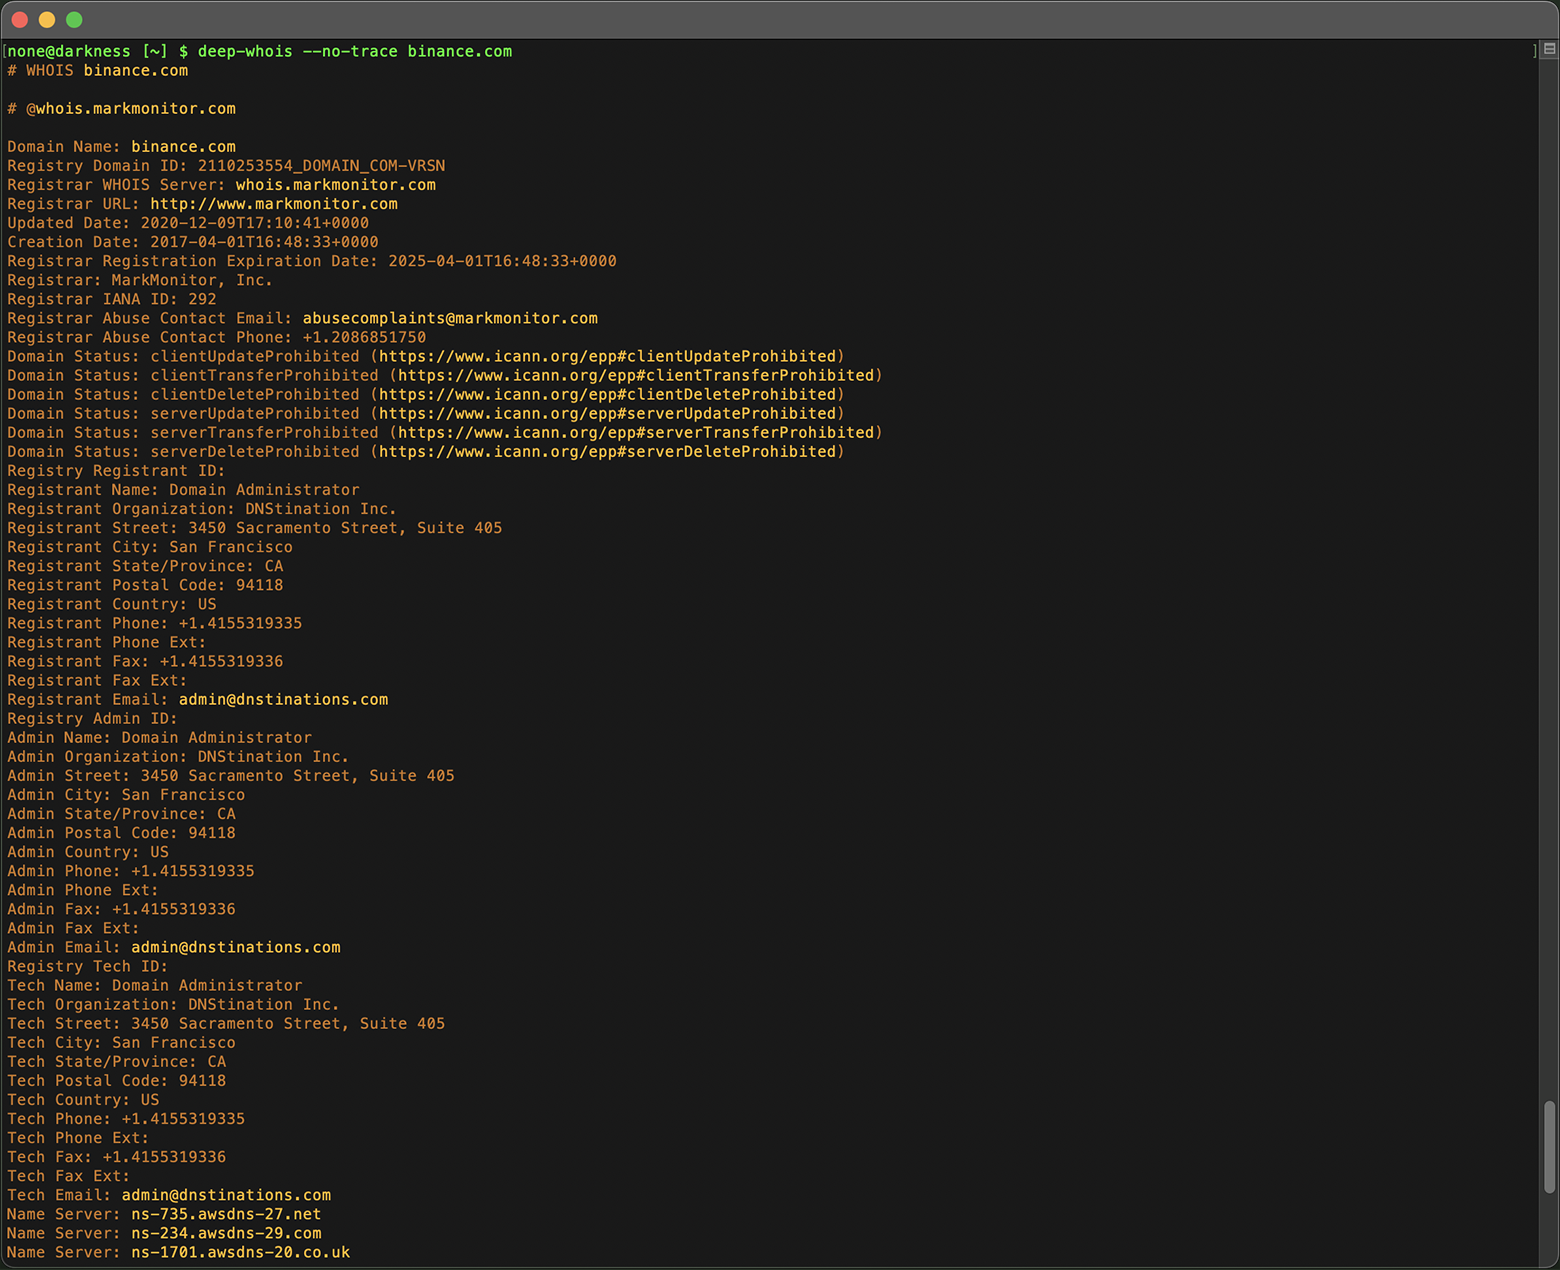
#1: Uncovering Hidden Whois Data with Trace Options
Even if domain data and ownership details are hidden behind Whois privacy protection, there is still a possibility to uncover more information by querying other Whois servers in the lookup chain.
On iOS, you can add the '+trace' option to a query to reveal intermediary Whois information, which may expose additional data that is otherwise concealed.

In the Terminal version, this tracing feature is enabled by default, allowing you to automatically retrieve intermediary Whois data.
If you prefer not to see this extra information, you can use the '--no-trace' option to hide it.
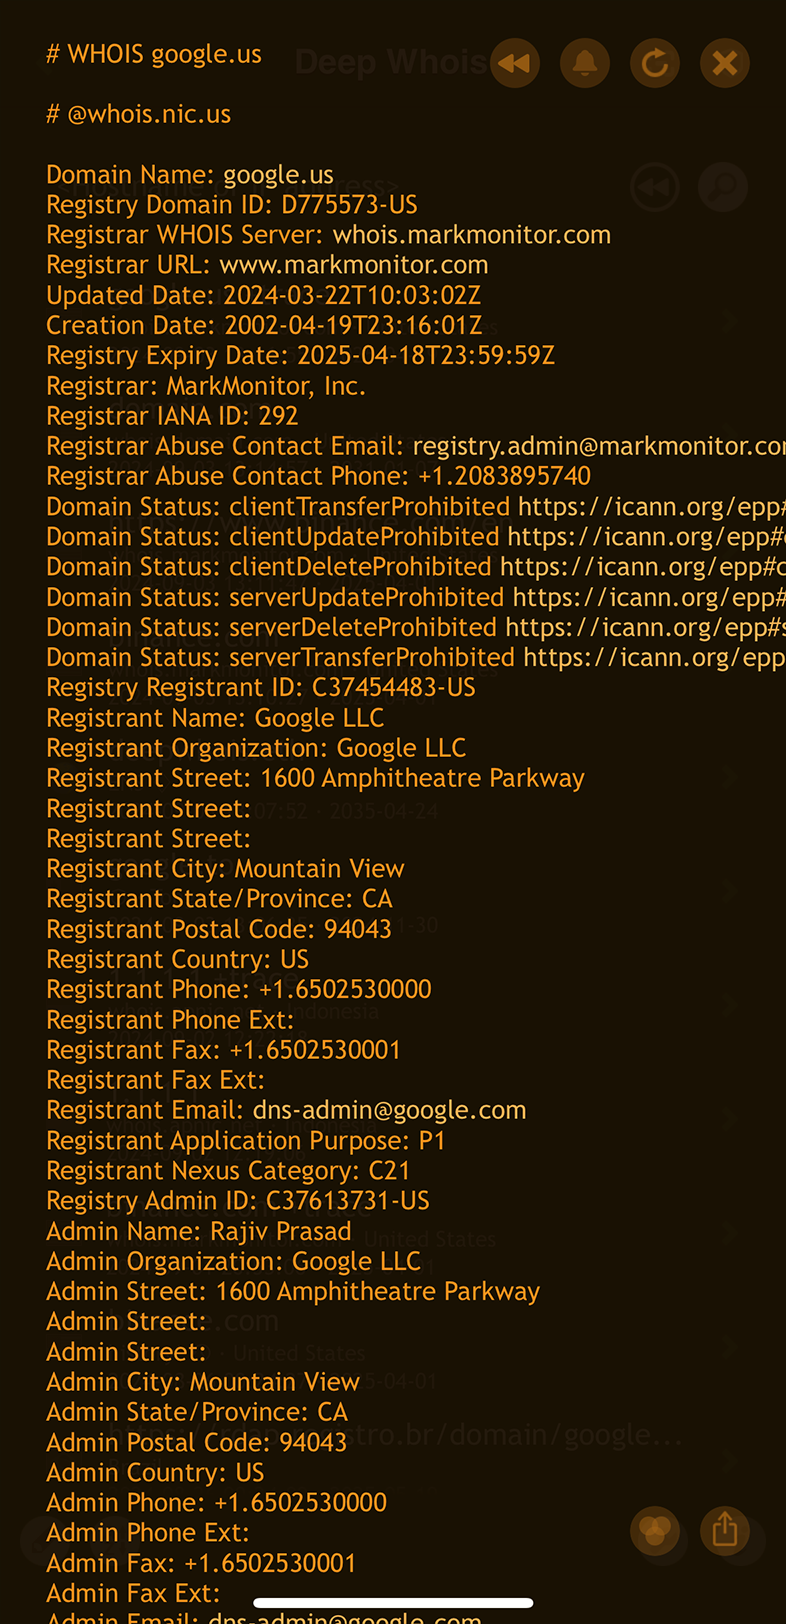
This approach is particularly useful in certain domain zones, such as .US, where owner data is required to be present and cannot be obfuscated, potentially revealing more detailed ownership information.
Step #3: Analyze Domain Registrar, Name Servers and DNS
From a simple Whois query, you can obtain valuable information such as the registrar domain and name servers associated with a domain.
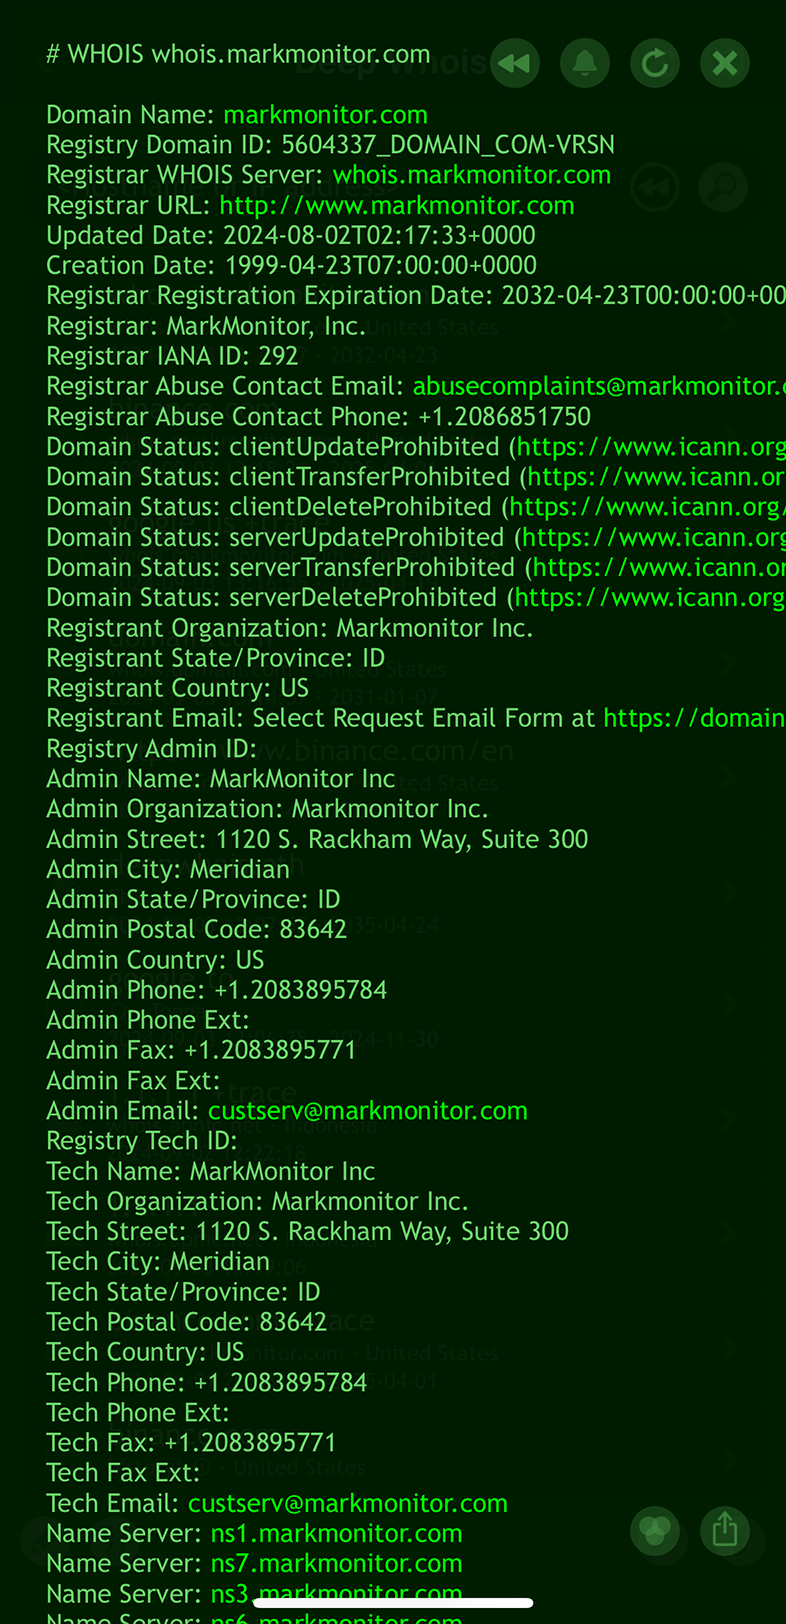
Start by examining the registrar domain information obtained from your Whois query.
For instance, if the registrar is identified as markmonitor.com, performing a Whois query on the registrar domain can provide you with detailed contact information for the registrar.
Using Deep Whois on iOS:
Simply tap on any of the registrar related links (whois server, website or email) and select the 'Whois' option.
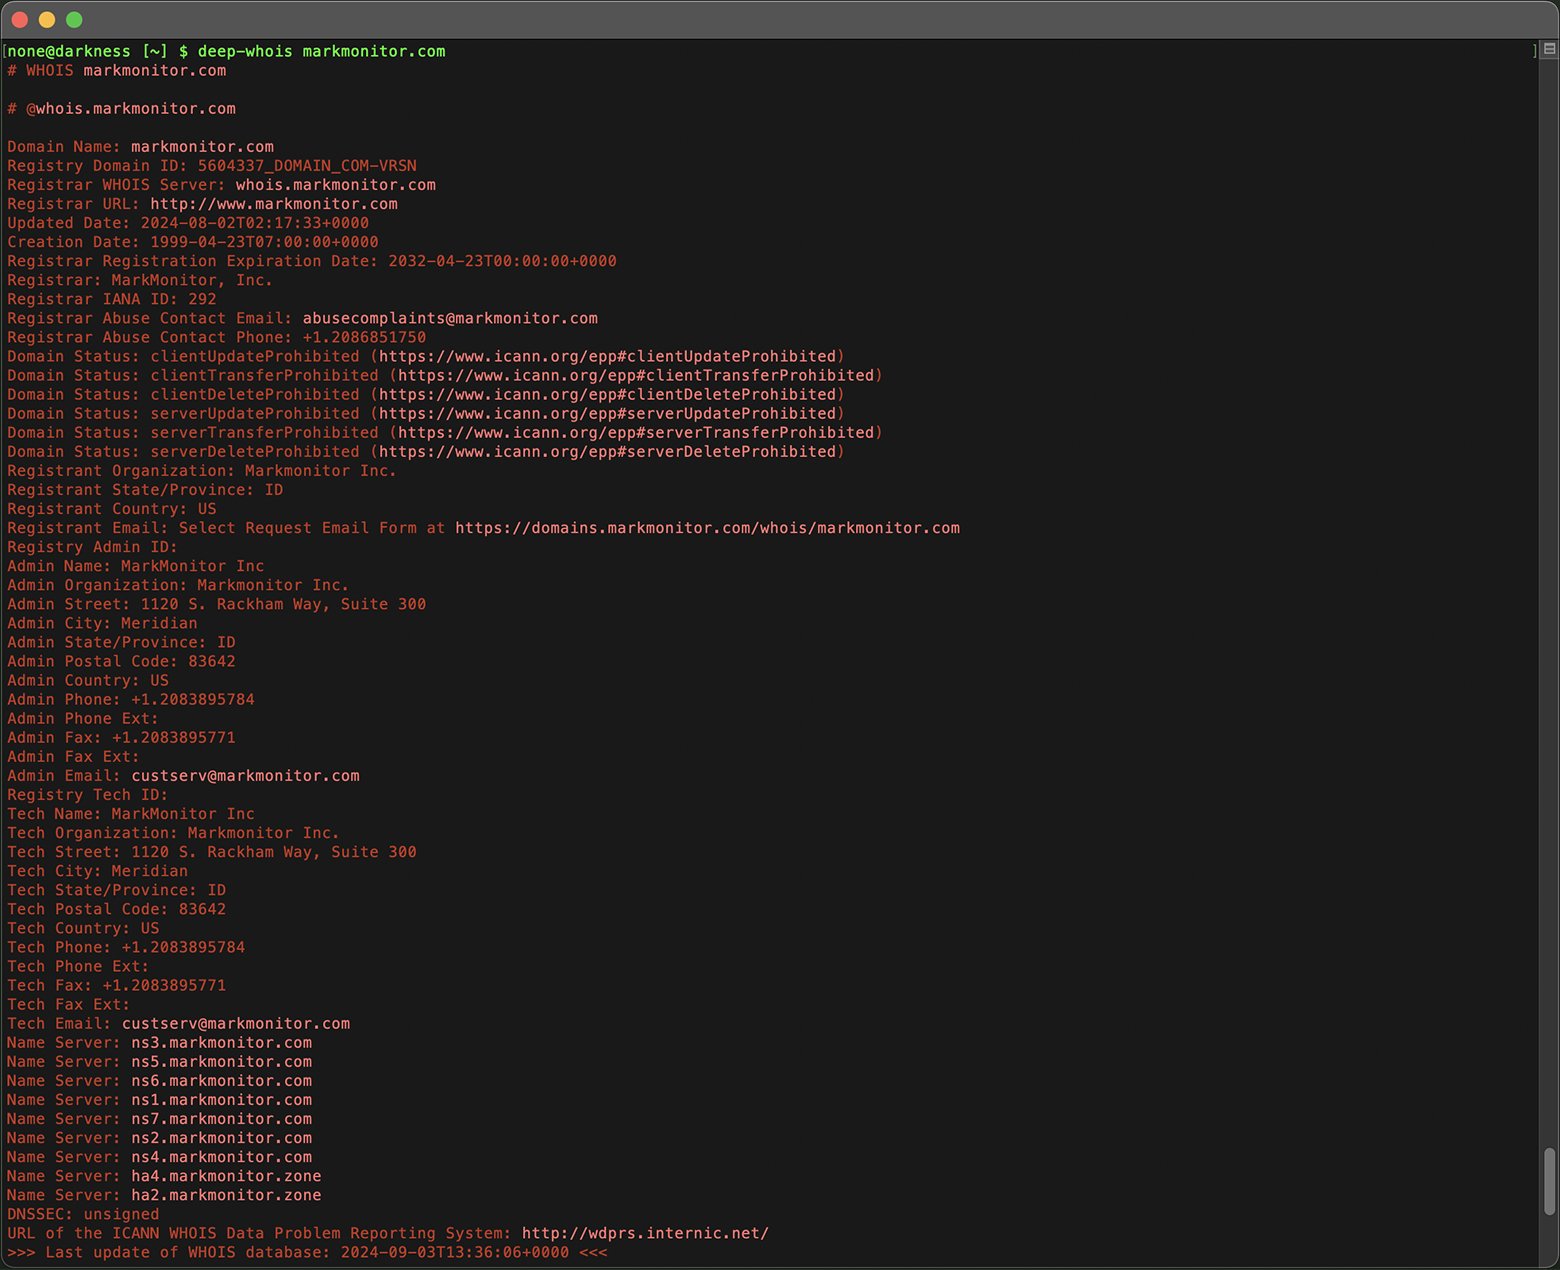
Using Deep Whois in Terminal:
Copy the registrar domain, link or email and pass it as an argument to the command line tool.
deep-whois markmonitor.com
This can include administrative, technical, and abuse contacts that might be necessary if issues arise with the domain.
Similarly, performing a Whois query on a name server (e.g., ns-234.awsdns-29.com) can provide valuable information about the hosting provider, including the provider's name and contact details.
deep-whois ns-234.awsdns-29.com
Name servers are crucial to a domain's operation, as they direct internet traffic to the correct web hosting servers, making this information essential for understanding the domain's infrastructure.

Step #4: Investigate Hosting Provider
Tracing the Physical Location of Web and Mail Servers
To find out the physical location of a website's servers, you can follow a straightforward process using tools available on iOS or in the terminal.
First, resolve the domain to its corresponding IP address.
on iOS:
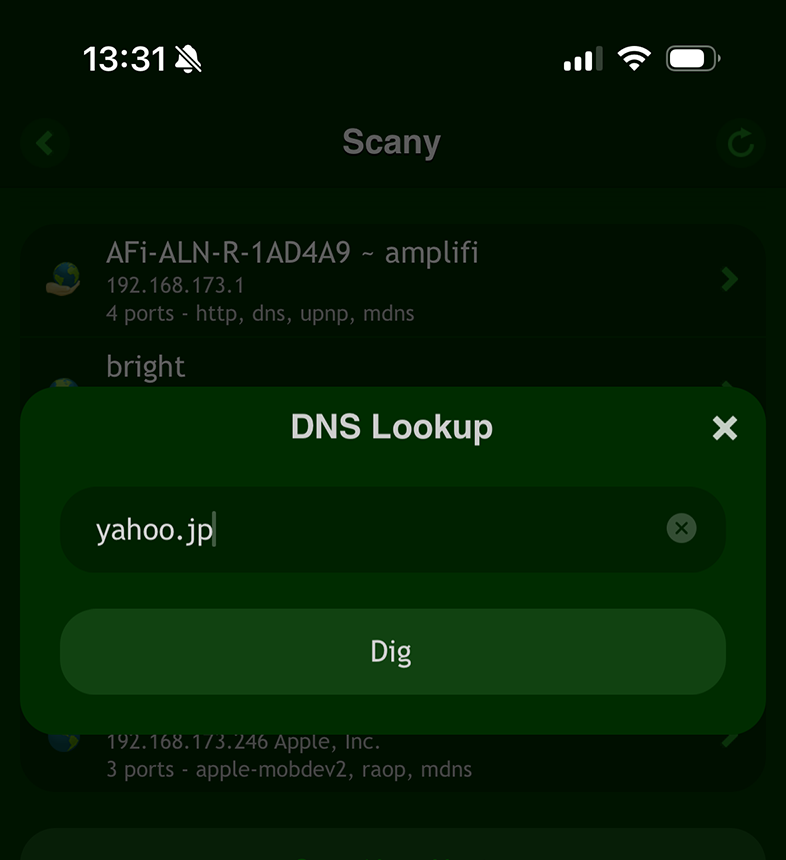
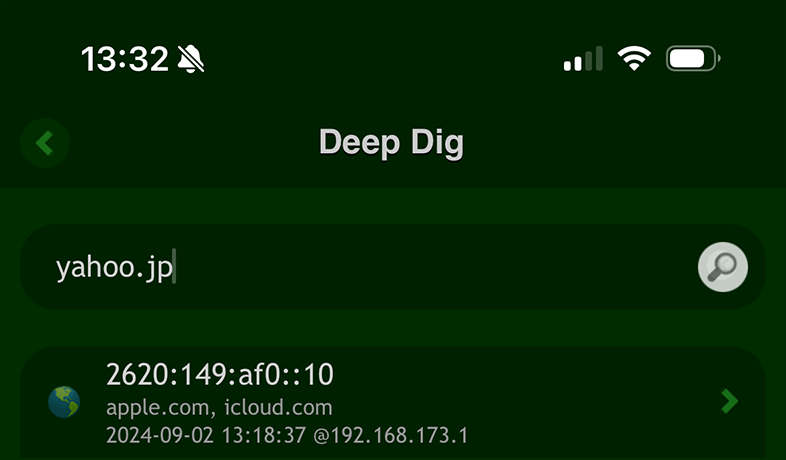
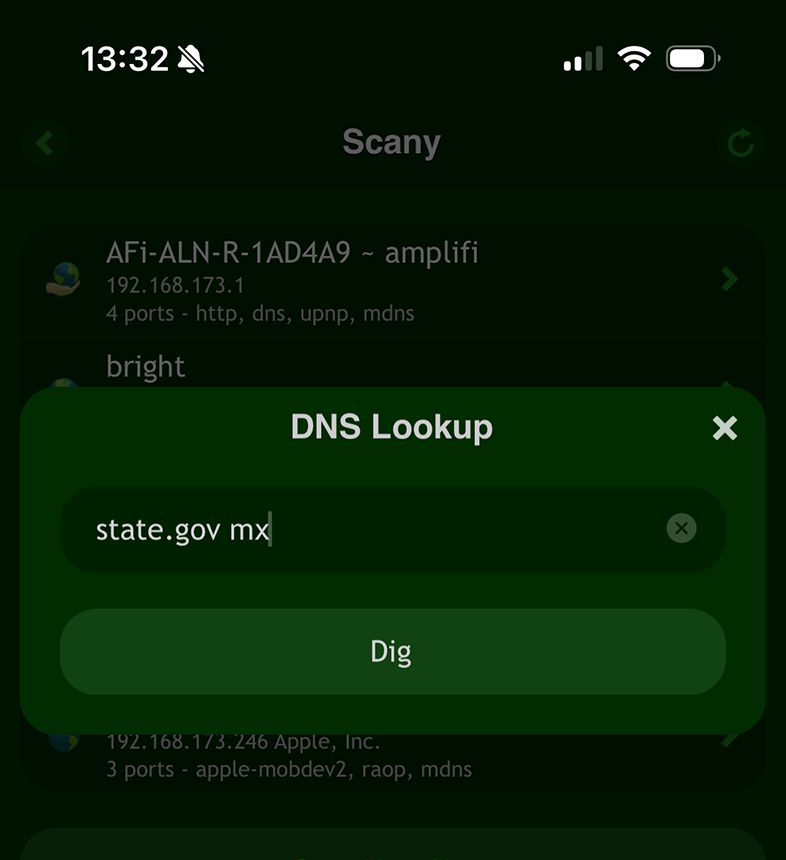
Use the 'DNS Lookup' tool in the 'Scany' app.
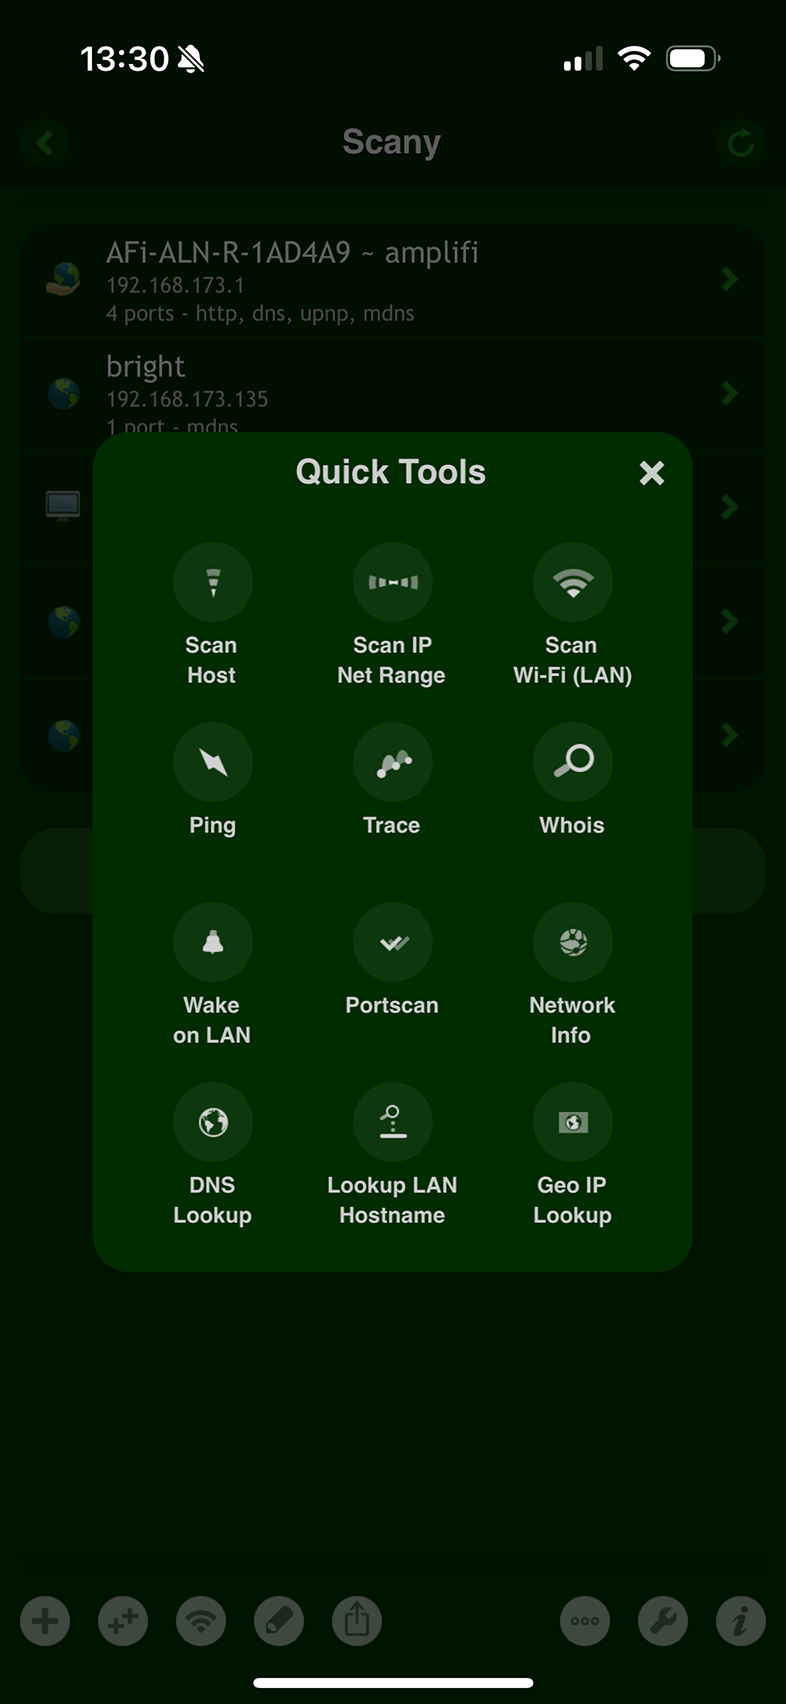
Or use simply the 'Deep Dig' app.
in Terminal:
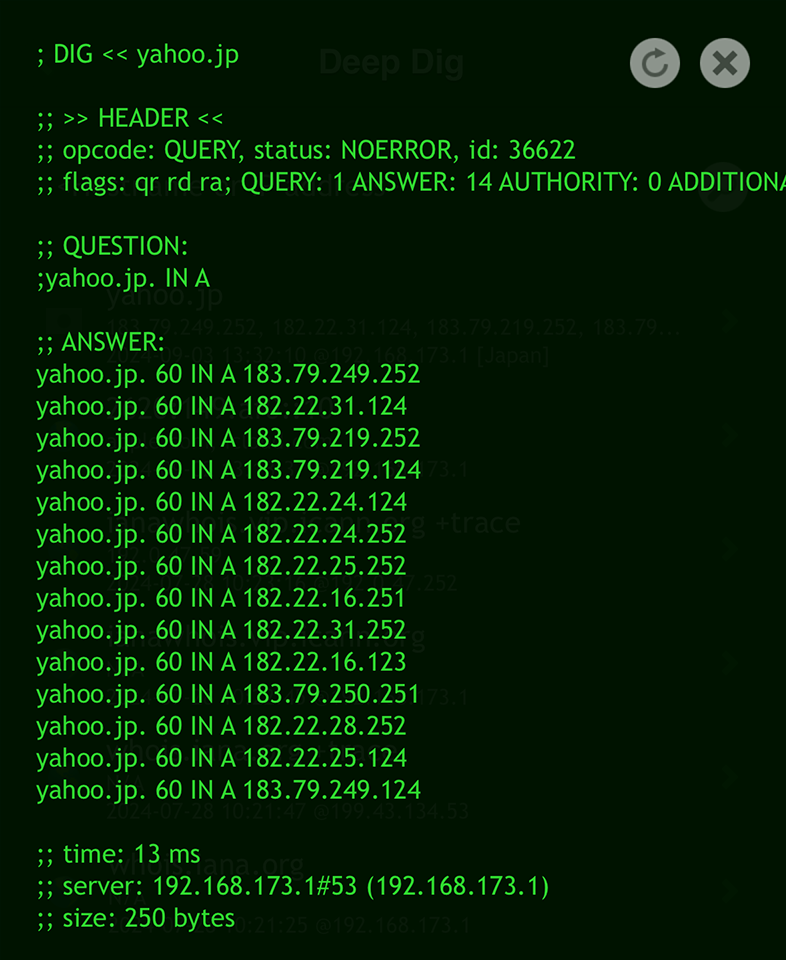
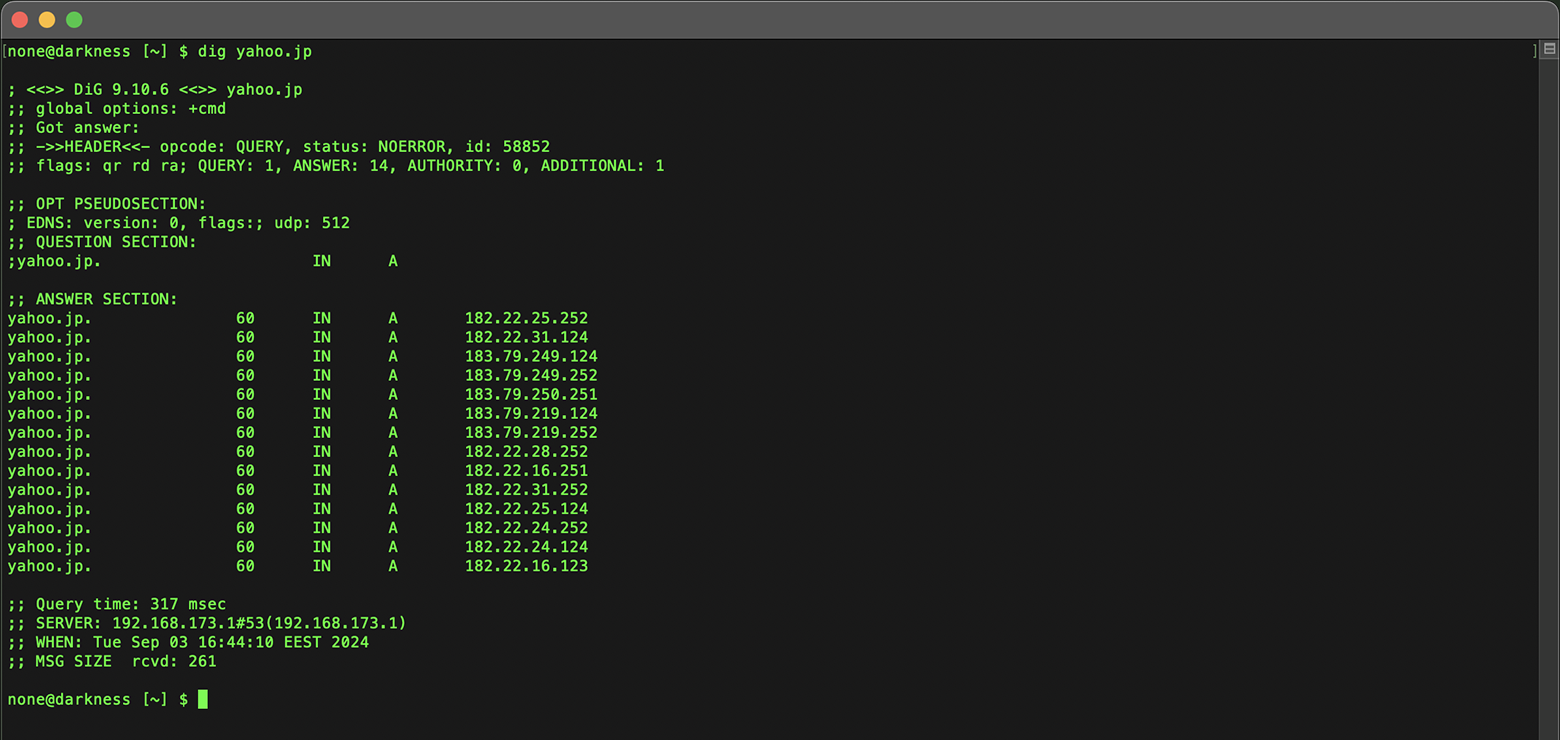
Use the 'dig' command, using the domain as the query:
dig yahoo.jp
Similarly, you can can look up mail servers by adding 'mx' to their query when using the Scany or Deep Dig app on iOS or the 'dig' command in the terminal.
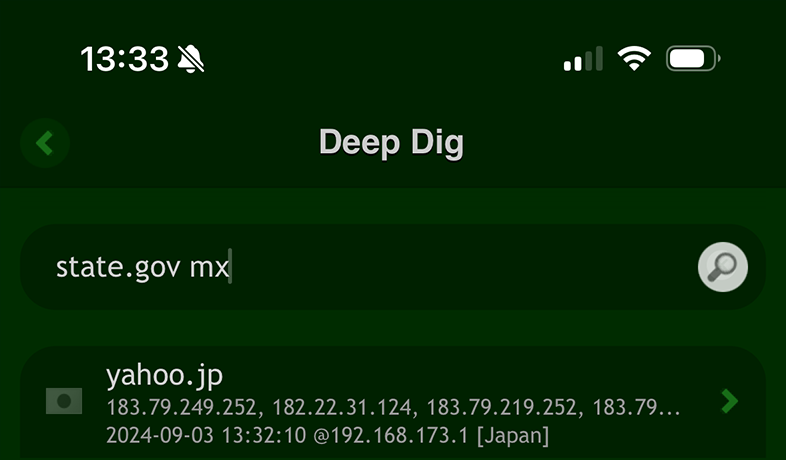
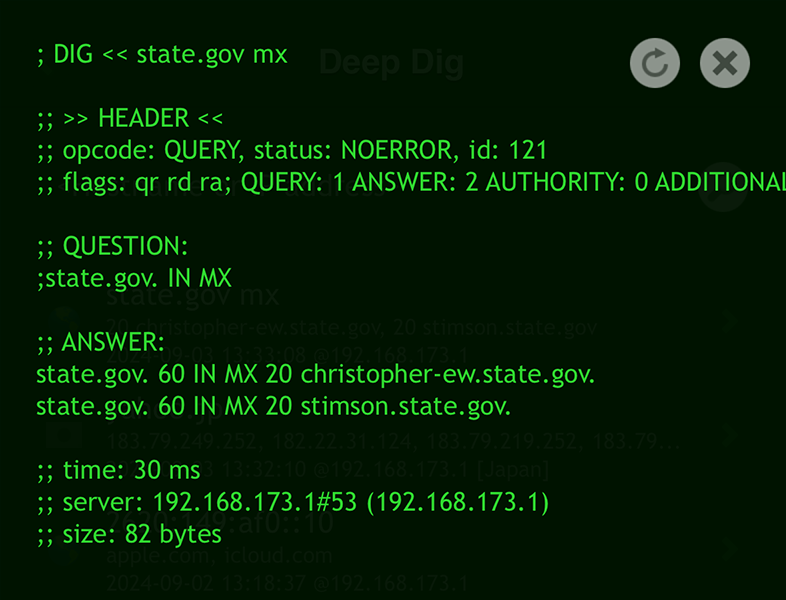
This will resolve the domain to its corresponding IP address, which is a crucial step in identifying the server's location.
Once you have the IP address, you can perform a full investigation by conducting a Whois lookup on the IP address itself.
This IP Whois lookup will provide detailed information about the web or email hosting provider, including the geographical location of the servers, the organization managing them, and relevant contact information.
This method allows you to trace the physical infrastructure behind a domiain, website or email, giving you insights into where its servers are actually located.
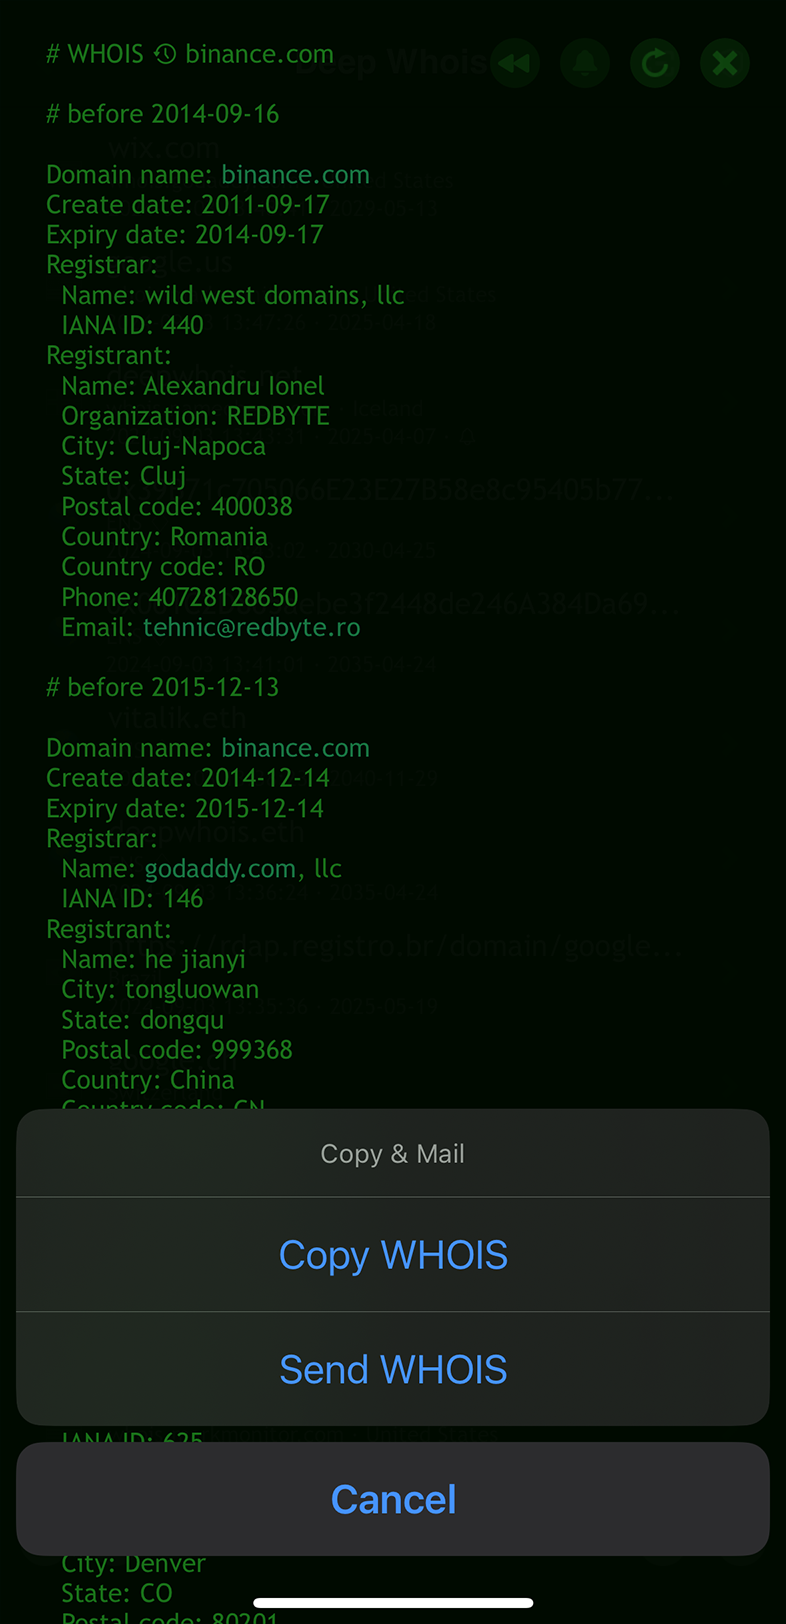
Step #5: Investigate Historical Whois Data
Domains often change hands over time, and understanding the historical context of a domain can be just as important as knowing its current status.
Historical Whois data allows you to see past ownership, name server changes, and other significant events that may impact the domain's reputation or value.
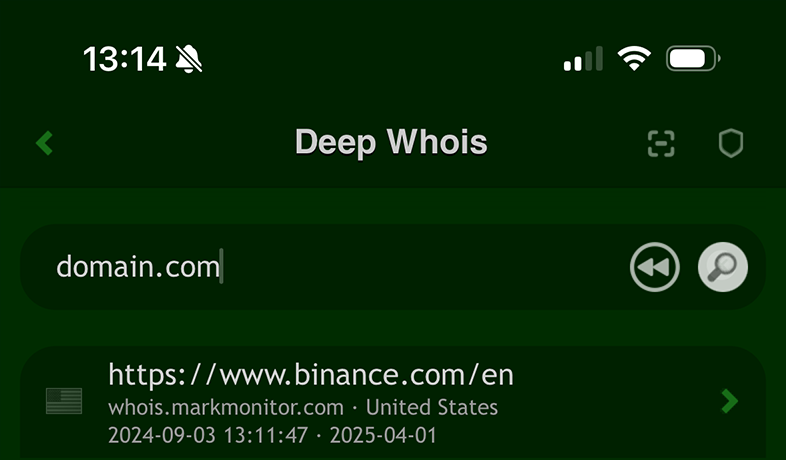
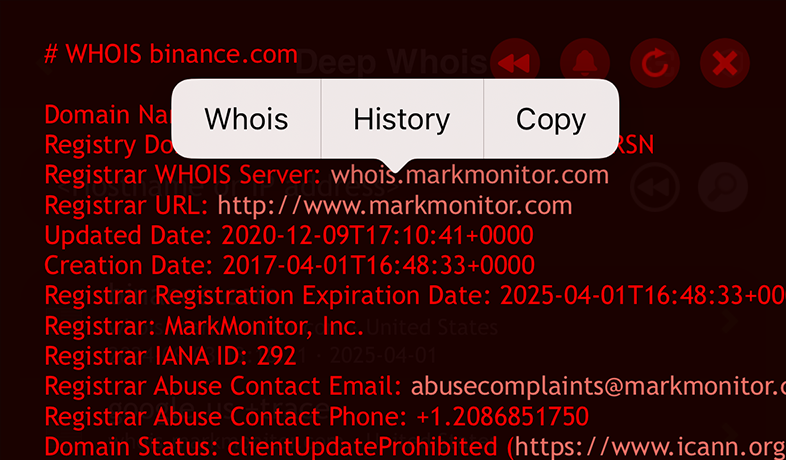
Using Deep Whois on iOS:
Tap the 'Rewind' button to access historical records in the domain Whois data.

Or use the 'Rewind' button on the main app screen.

From the historical Whois data for binance.com on iOS, we discovered that the domain was initially owned by someone other than the current Binance owners.
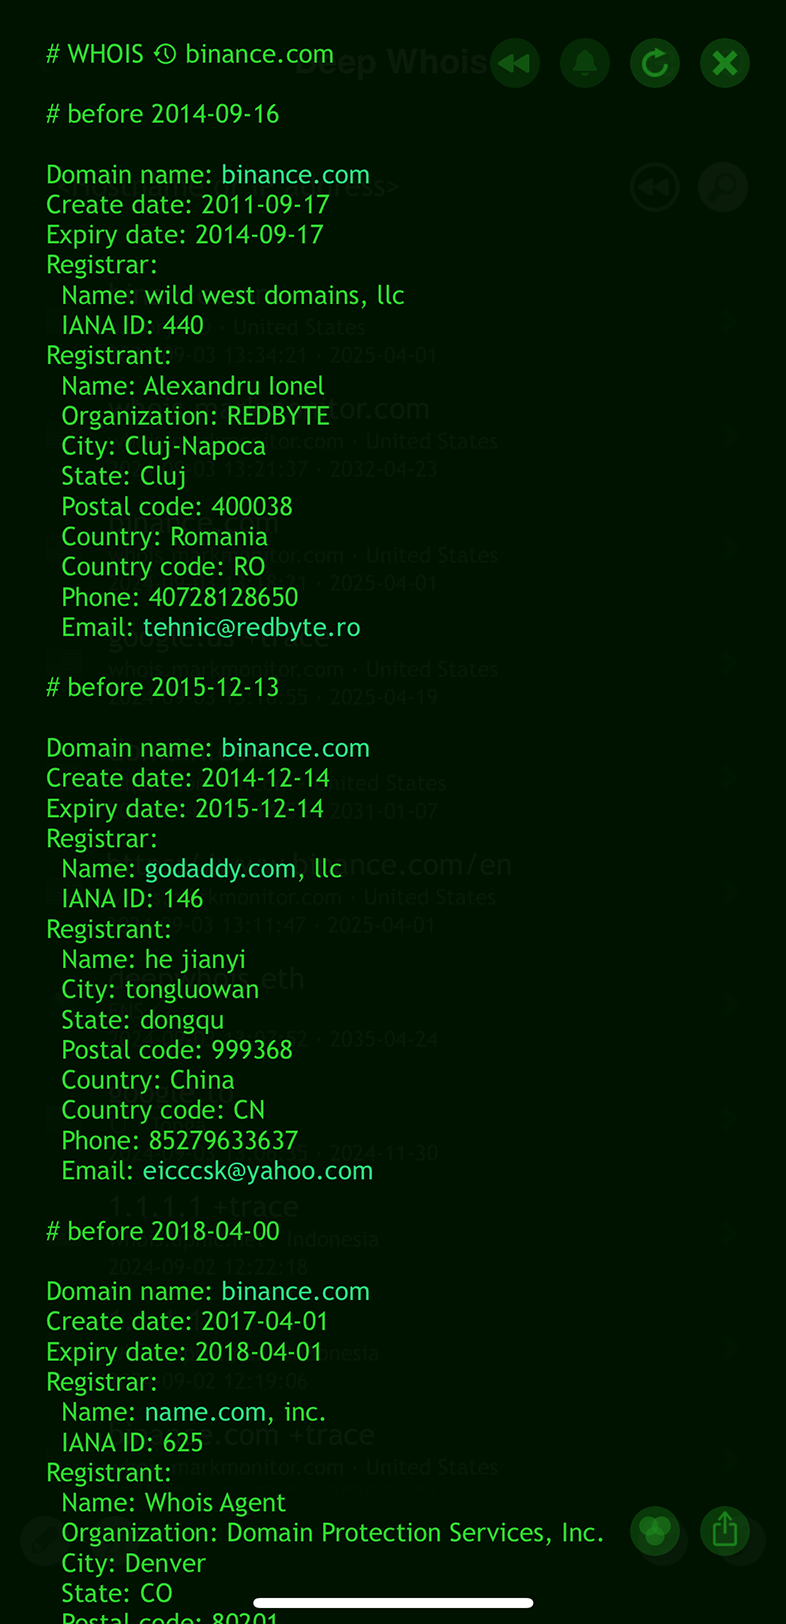
This insight highlights the domain's ownership history before Binance took control, providing valuable context for understanding its background and evolution.
Using Deep Whois in Terminal:
Use the '@history' or '@h' argument to view historical Whois data:
deep-whois @history crypto.com
From the historical Whois data for crypto.com retrieved in Terminal, we discovered that the domain was originally owned by a different individual before it was eventually sold to its current owners for millions of dollars.
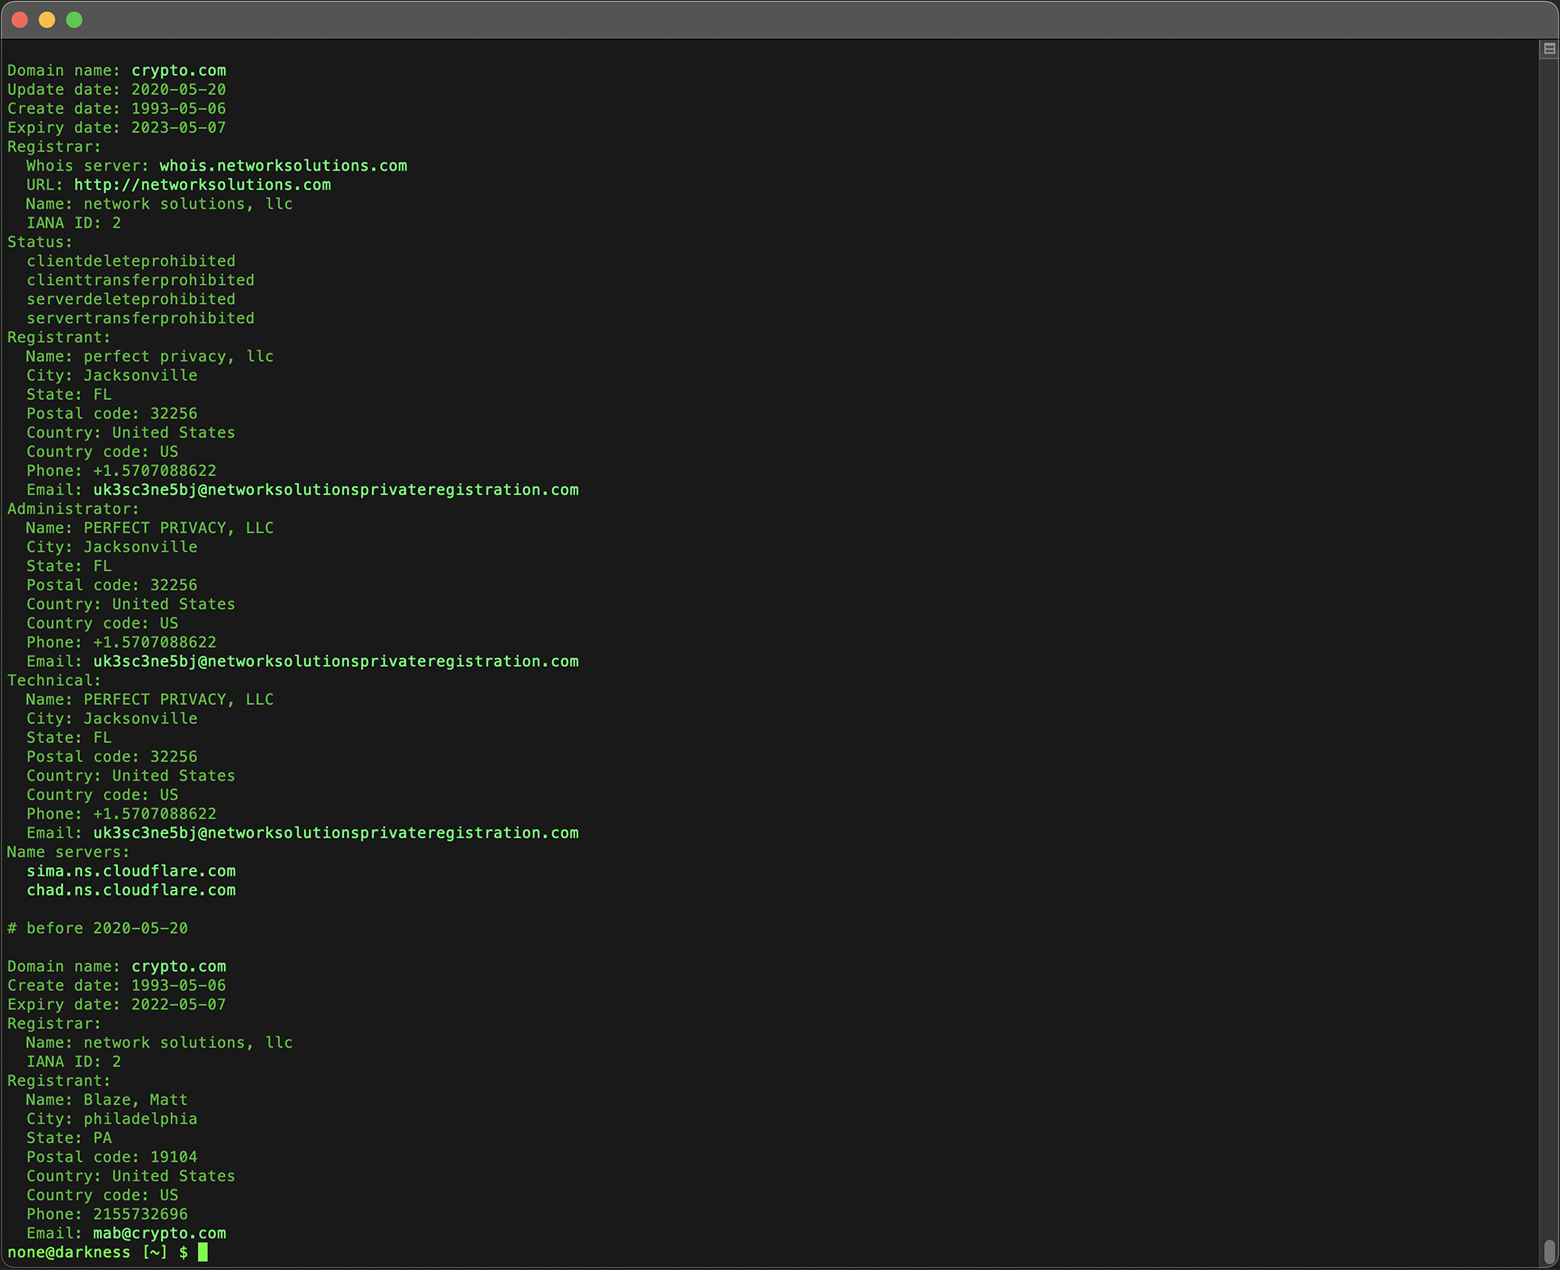
This provides valuable insight into the domain's history and significant ownership change.
Historical Whois data is especially valuable when assessing domains for acquisition or when investigating potential security concerns.
Step #6: Retrieve RDAP Data for In-Depth Information
The Registration Data Access Protocol (RDAP) is a more modern and structured protocol designed to replace the traditional Whois system.
RDAP is particularly useful for domains under newer TLDs or those that have migrated from Whois, providing additional information like status codes, secure access levels, and support for internationalized domain names (IDNs).
Stock Whois Client Limitations
As RDAP adoption grows, more domain zones are moving away from the traditional Whois protocol, making it inaccessible to older Whois clients that do not support RDAP.

This limitation means that stock and simple Whois clients cannot retrieve Whois data for these domains, leaving a gap in their functionality.
Seamless RDAP Queries in Deep Whois
In both the Deep Whois iOS app and the Deep Whois console command line utility, querying Whois data via RDAP for domains that have migrated to RDAP, like .CH, works automatically and seamlessly.
There is no need for the user to specify any special options or commands.
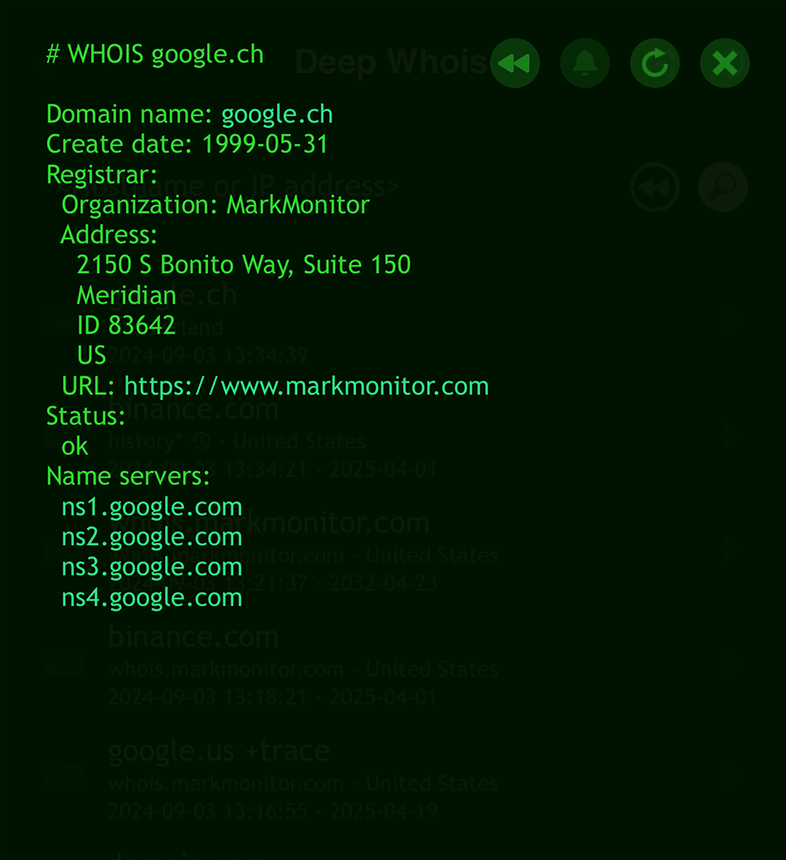
Simply type in the domain name as you would for a standard WHOIS query.
deep-whois google.ch
Deep Whois is designed to detect when a domain requires RDAP and automatically performs the query using the appropriate protocol.
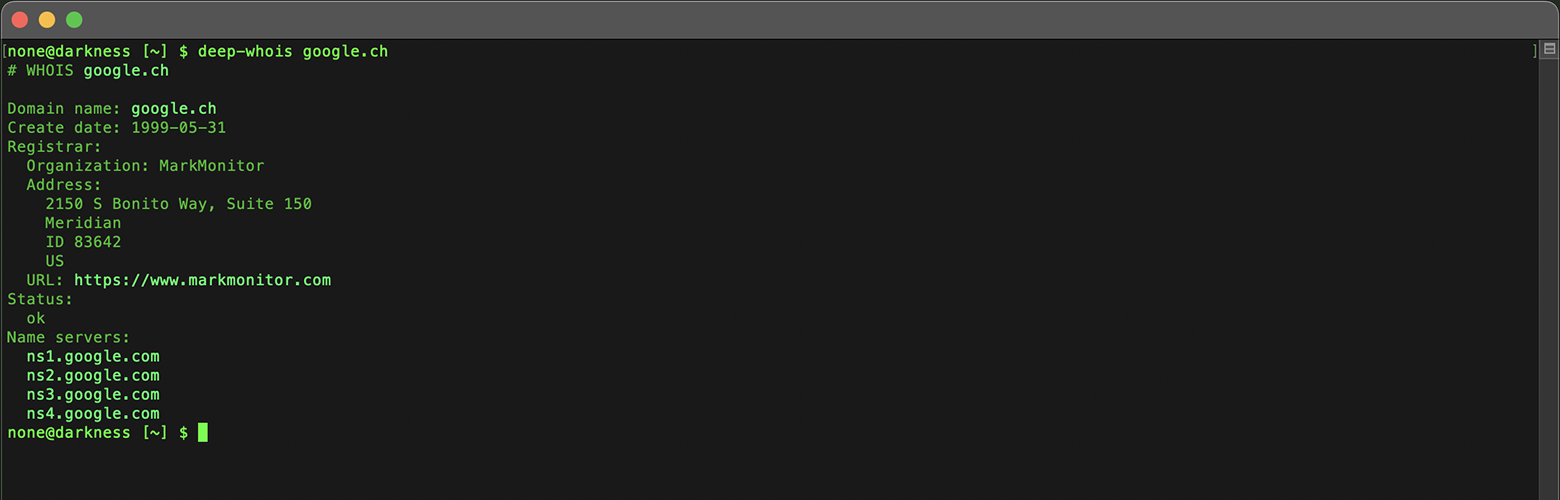
This ensures that you always receive the correct and most up-to-date registration data, regardless of whether the domain is still using traditional Whois or has transitioned to RDAP.
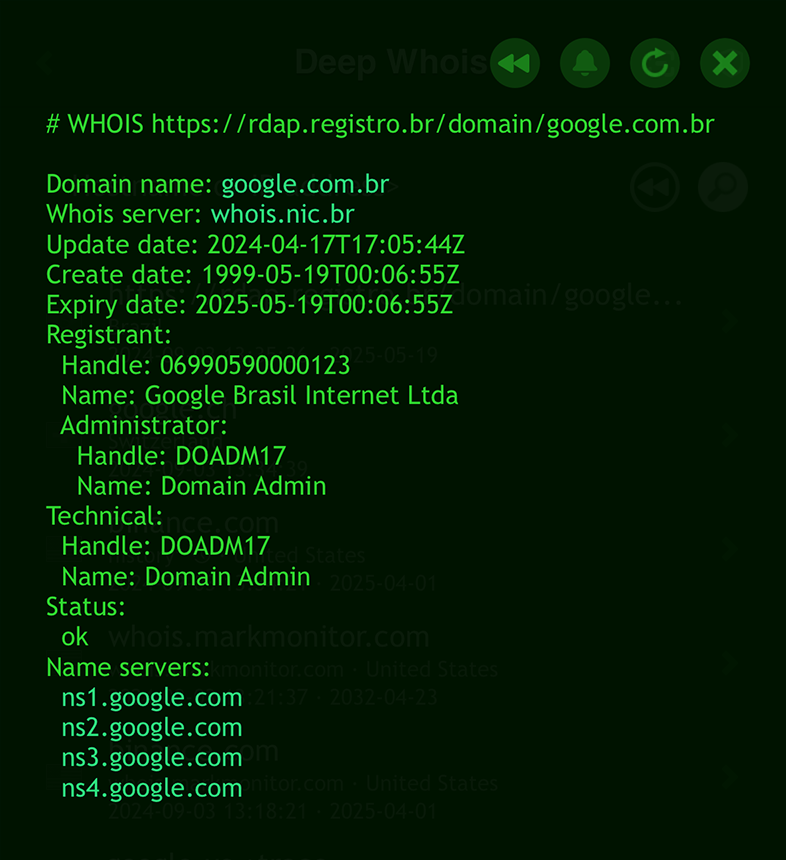
Explicit RDAP Queries
In addition to the automatic handling of RDAP queries, Deep Whois also allows you to explicitly query RDAP for domains that support it.
This can be useful for users who want to ensure that they are retrieving data directly from an RDAP server or when performing more advanced domain investigations.
In Deep Whois, you can specify the '@rdap' option in your query along with the '-f' option to force an RDAP lookup, ensuring that you receive detailed and structured data from the RDAP source.
This allows for more detailed and structured data retrieval, which can be particularly useful for advanced investigations or when more specific information is required.
For .BR domain names, RDAP is the only method that provides more precise details on domain expiration, change, and creation times, down to the exact second.
deep-whois -f @rdap https://rdap.registro.br/domain/google.com.br
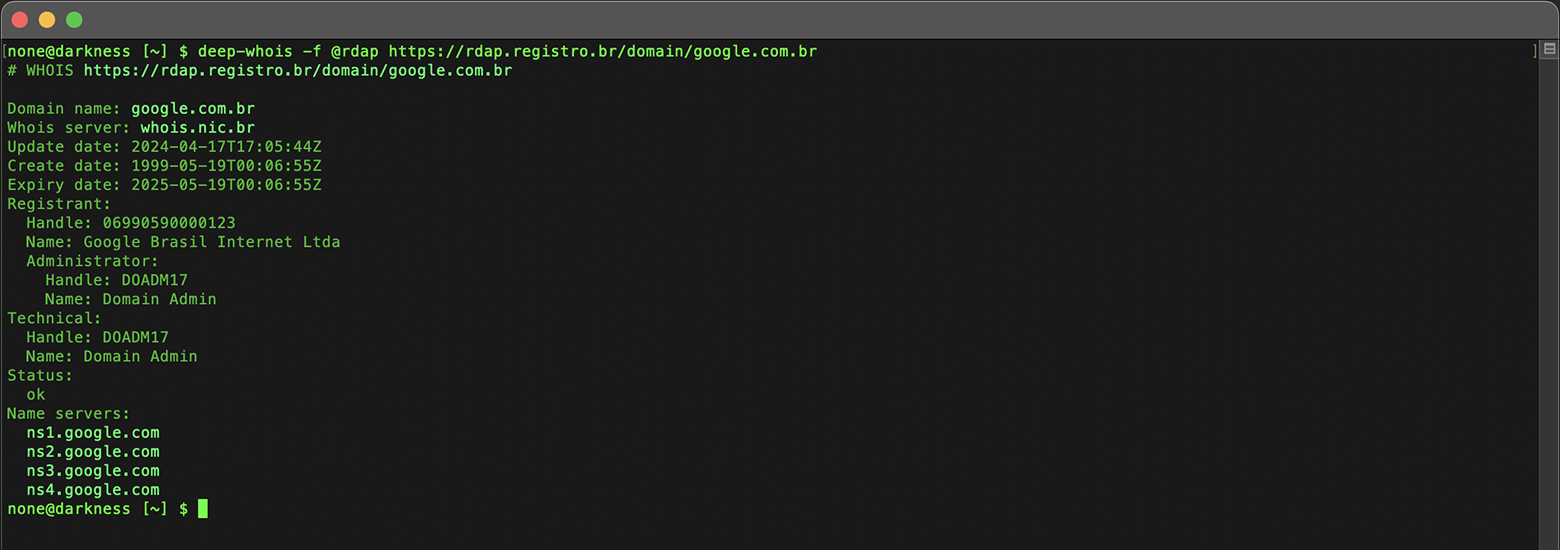
The traditional Whois protocol, which is still supported, only displays this information with day-level precision, without specifying the exact time.

For domains like .MS, the data provided by both Whois and RDAP protocols is generally similar.
In some cases, such as with microsoft.ms, RDAP might reveal additional details, like a fax number, that are not always available through Whois.
While the data for such domains is mostly similar, RDAP acts as a useful alternative when the primary Whois server is inaccessible, ensuring you can still obtain essential domain information.
Step #7: Access ENS Data for Ethereum and DNS Domains
The Ethereum Name Service (ENS) allows to register human-readable domain names on the Ethereum blockchain.
ENS is designed to map simple, easy-to-remember handles, such as domain names, to Ethereum wallet addresses, and vice versa.
This allows you to easily associate and manage Ethereum addresses through memorable names, making transactions and interactions on the blockchain more user-friendly and accessible.
If the domain you're investigating is associated with ENS, retrieving this data can reveal wallet addresses, smart contracts, and other blockchain-based information.
Limitations of Standard Whois Clients
It's important to note that stock and simple Whois clients are not equipped to access data for Ethereum Name Service (ENS) domains, such as those ending in .ETH.
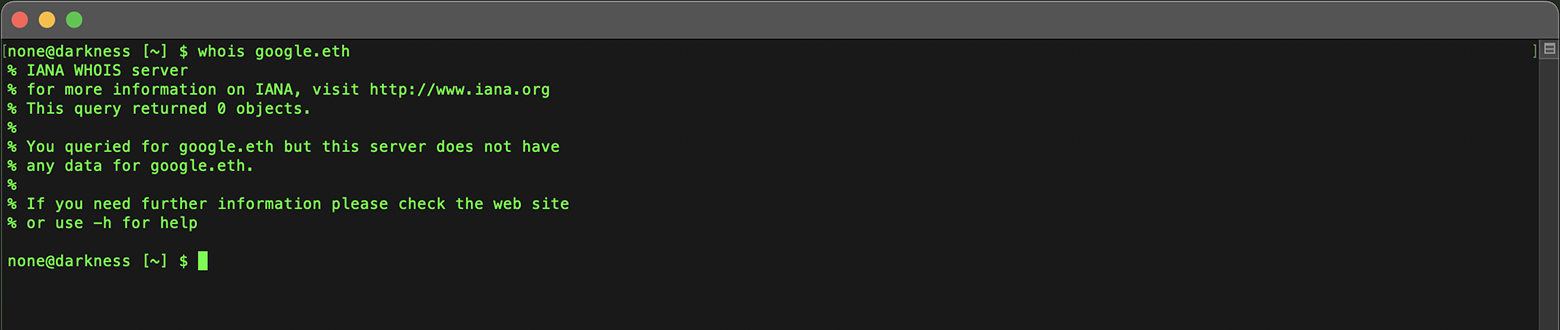
These traditional clients are designed for conventional DNS systems and lack the capability to interact with blockchain-based naming systems like ENS.
ENS Whois Lookups with Deep Whois
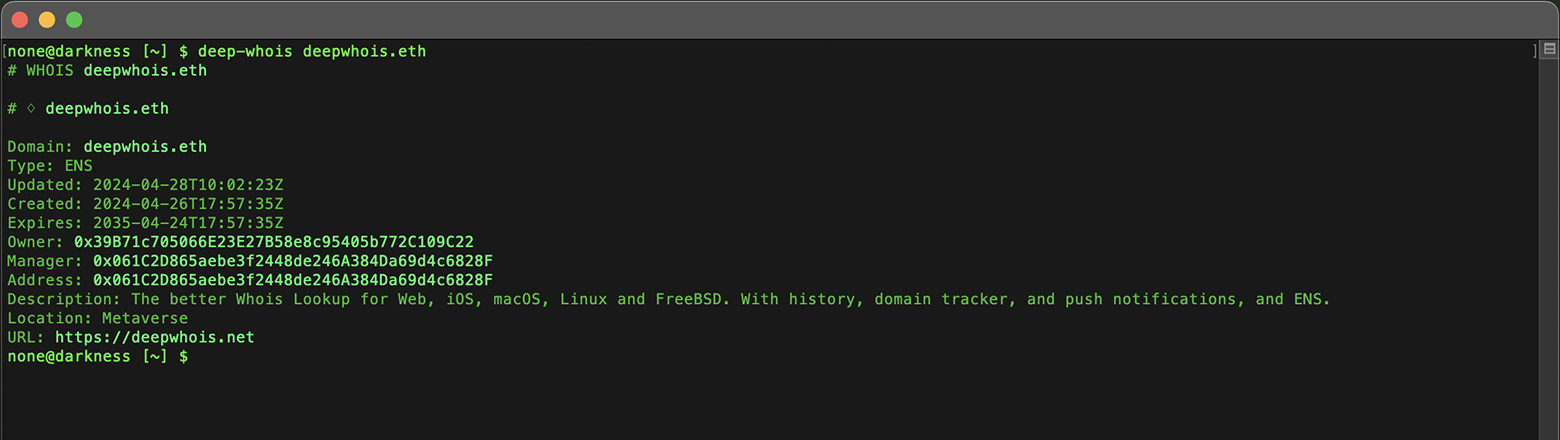
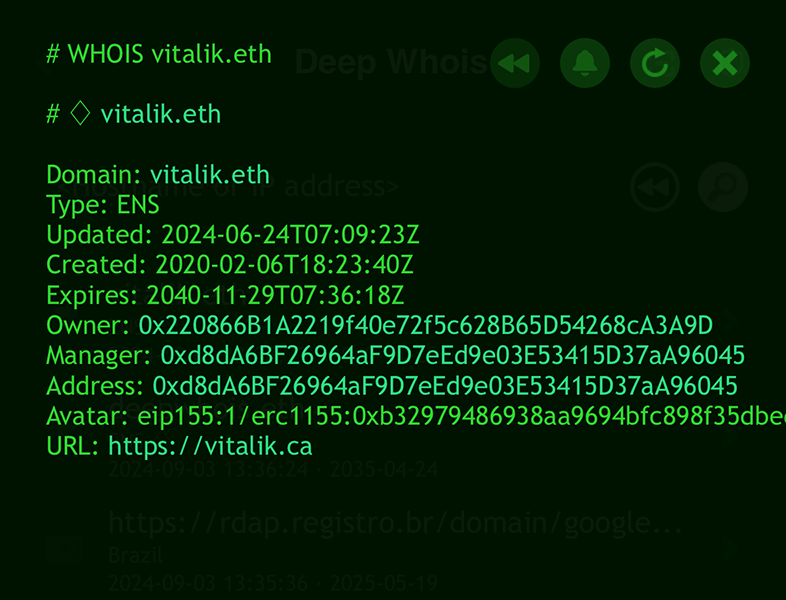
You can directly look up Whois data for .ETH domains from the Ethereum network using the Deep Whois app on iOS or the command line tool in Terminal.

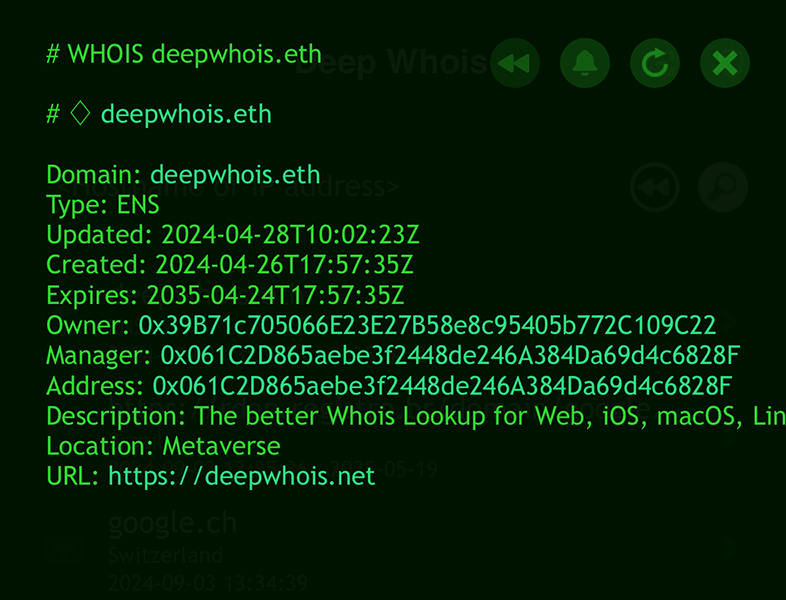
This process is seamless and does not require any additional options—just enter the domain as you would with any standard Whois query.
deep-whois deepwhois.eth
ENS Data for DNS Domains
ENS is not limited to .ETH domains.
It also provides information for traditional DNS domains, such as those ending in .COM, .NET, .ME, and others.
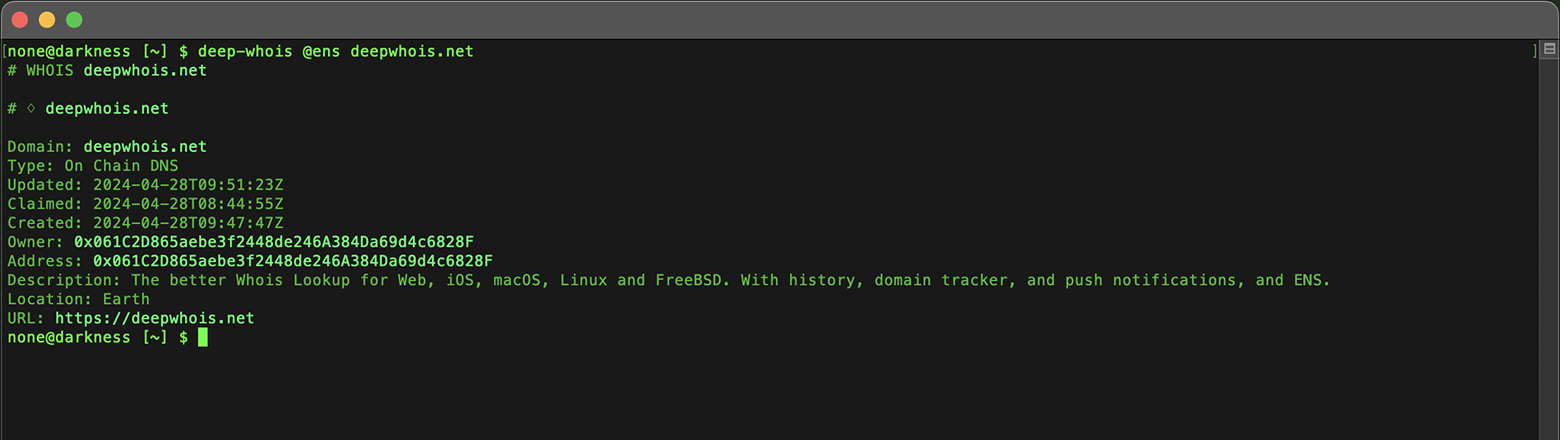
To access ENS-specific data, such as the associated Ethereum wallet address or other related information, you simply need to add the '@ens' option to your query when using Deep Whois on iOS or in Terminal command line on macOS, Linux or FreeBSD.
This allows the tool to explicitly query the ENS for the desired DNS domain.
Seamless Support for Multiple Domain Types
Deep Whois supports several types of domains in a single, streamlined query:
Native Ethereum ENS domains from the .ETH top-level domain zone.
On-chain DNS domains, such as 'deepwhois.net', which are integrated with the Ethereum blockchain.
Off-chain DNS domains, like 'opscurum.me', which are traditional DNS domains linked to ENS.

Reverse ENS Whois Lookup
Additionally, Deep Whois offers the ability to perform a reverse ENS Whois lookup using an Ethereum wallet address.
There is no need to add any extra options when performing a reverse ENS Whois lookup.
You can simply use a standard Ethereum wallet address as the query, and Deep Whois will automatically retrieve all ENS domains associated with that address.
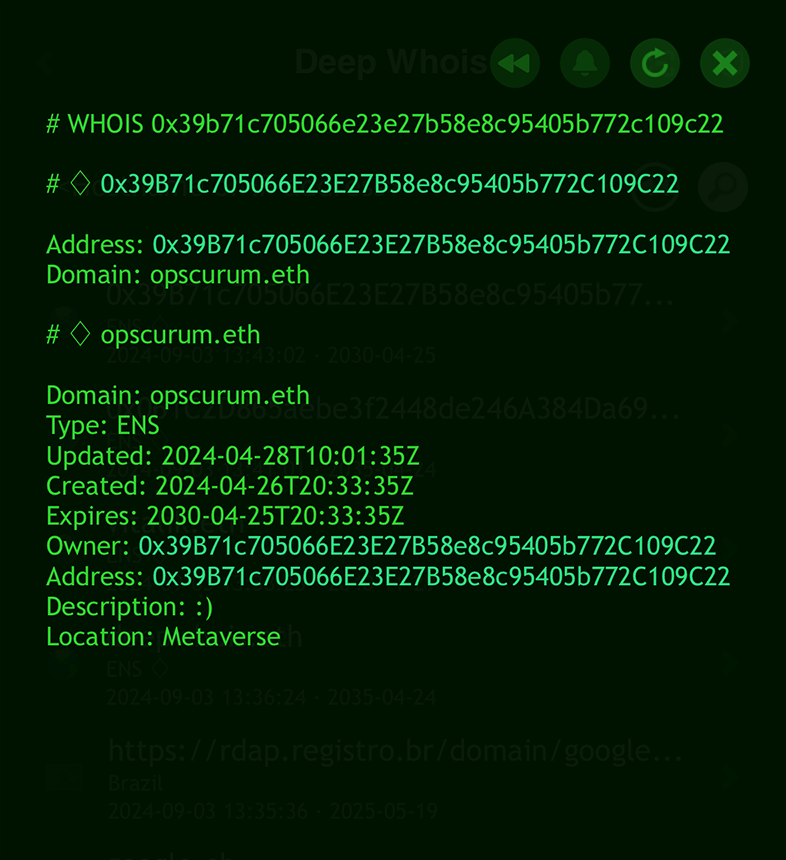
This makes the process straightforward and user-friendly, whether you're using the app on iOS or the command line tool in Terminal.
deep-whois 0x061C2D865aebe3f2448de246A384Da69d4c6828F
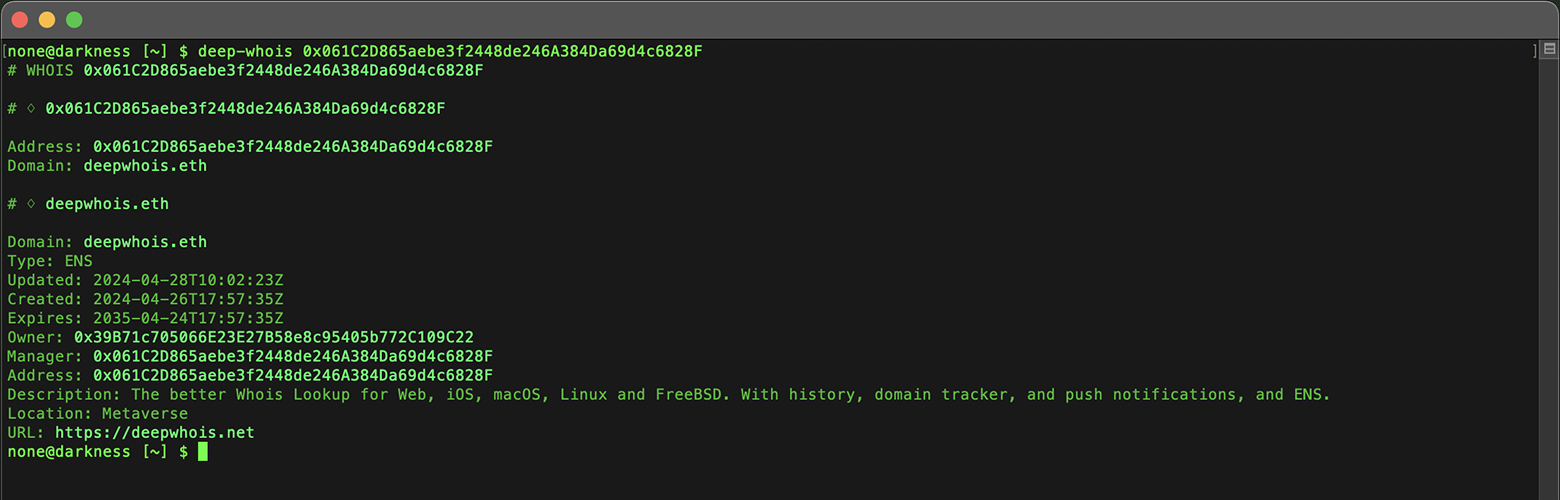
This feature allows you to discover ENS domains associated with a particular Ethereum address, providing a powerful tool for exploring and managing blockchain-based domain assets.
ENS lookups are vital for understanding the ownership and management of blockchain-related assets, particularly in the rapidly growing decentralized web.
Step #8: Analyze Age, Domain Expiration and Renewal Dates
This critical data is easily accessible through a basic WHOIS query, providing you with the necessary details to manage your domain effectively.
It also aids in planning if you're considering acquiring the domain, either by making a purchase offer or by re-registering it after expiration.
Understanding the age of a domain, along with its expiration and renewal dates, is crucial for assessing its stability and future availability.
The domain's age can provide insights into its history and credibility, as older domains often have more established reputations.
Monitoring the expiration date is essential to avoid unintentional lapses in ownership, which could lead to the loss of the domain.
Tracking these dates allows you to anticipate when a domain might expire or require closer attention.
Renewal dates are equally important, as they indicate when the domain was last renewed and how far into the future it is secured.
Regularly checking these dates helps ensure that the domain remains under your control and can prevent potential disruptions in service due to expired registrations.
Step #9: Monitor Domain Changes Over Time
Regular monitoring of a domain's Whois data can help you stay informed of any changes in ownership, DNS settings, or expiration dates.
This is particularly important for domains you own or are considering purchasing.
It's worth noting that with Deep Whois, you can monitor the expiration and changes for any domain, not just those you own.
You can track critical updates for competitors' domains, potential acquisitions, or other domains of interest, ensuring you stay informed and ready to act when necessary.
Using Deep Whois on iOS:
Enable monitoring by tapping the 'Bell' icon to receive notifications.

When a domain is about to expire or when there are changes to its Whois data, you will receive a push notification directly to your device.
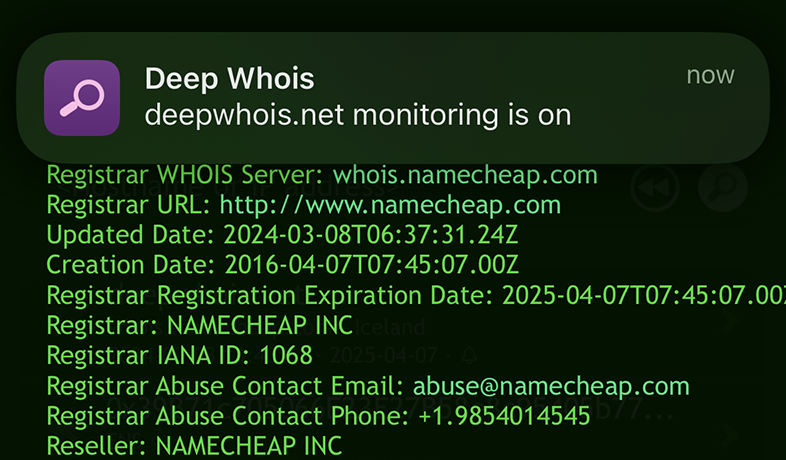
Ongoing monitoring ensures that you stay informed and ahead of any significant changes that could impact the domain's value or your interest in it.
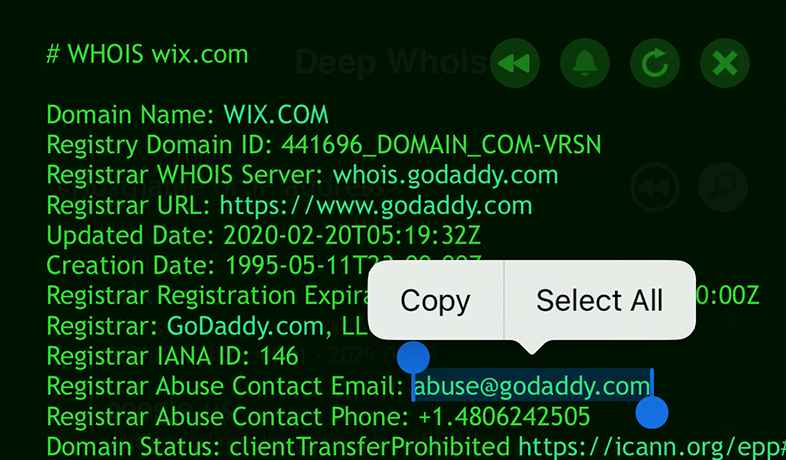
Step #10: Analyze WHOIS Abuse Contact Information
Abuse contact information is often provided in Whois records for reporting issues such as spam, phishing, or other malicious activities associated with a domain.
Knowing how to access and use this information can be crucial in handling security incidents.
Using Deep Whois on iOS:
Look for abuse contact details in the Whois data.
Using Deep Whois in Terminal:
Find abuse contacts with:
deep-whois --no-trace wix.com | grep -i abuse

Reporting abuse to the appropriate contacts can help mitigate risks associated with malicious domains.
Step #11: Save and Export Whois Data
After completing your domain analysis, it's important to save and export the data for future reference or reporting purposes.
This documentation can be invaluable when making decisions about the domain or presenting your findings to stakeholders.
Using Deep Whois on iOS:
Export results directly from the app in a format that suits your needs.
Using Deep Whois in Terminal:
Save the Whois output to a file for easy reference:
deep-whois @history binance.com > whois-history-results.txt
Having a saved record of your findings allows you to revisit the data at any time and ensures that your analysis is well-documented.
Bonus Step: Regularly Review Domain Reputation and Blacklist Status
A domain's reputation can change over time, especially if it's been involved in activities like spamming or phishing.
Regularly checking the domain's reputation and blacklist status helps ensure that it remains trustworthy and doesn't negatively impact your business or security posture.
On iOS, you can easily monitor domain reputation and blacklist status using the RBL Status app.
This app provides real-time insights into whether a domain is listed on any blacklists, helping you maintain a clean and reputable online presence.
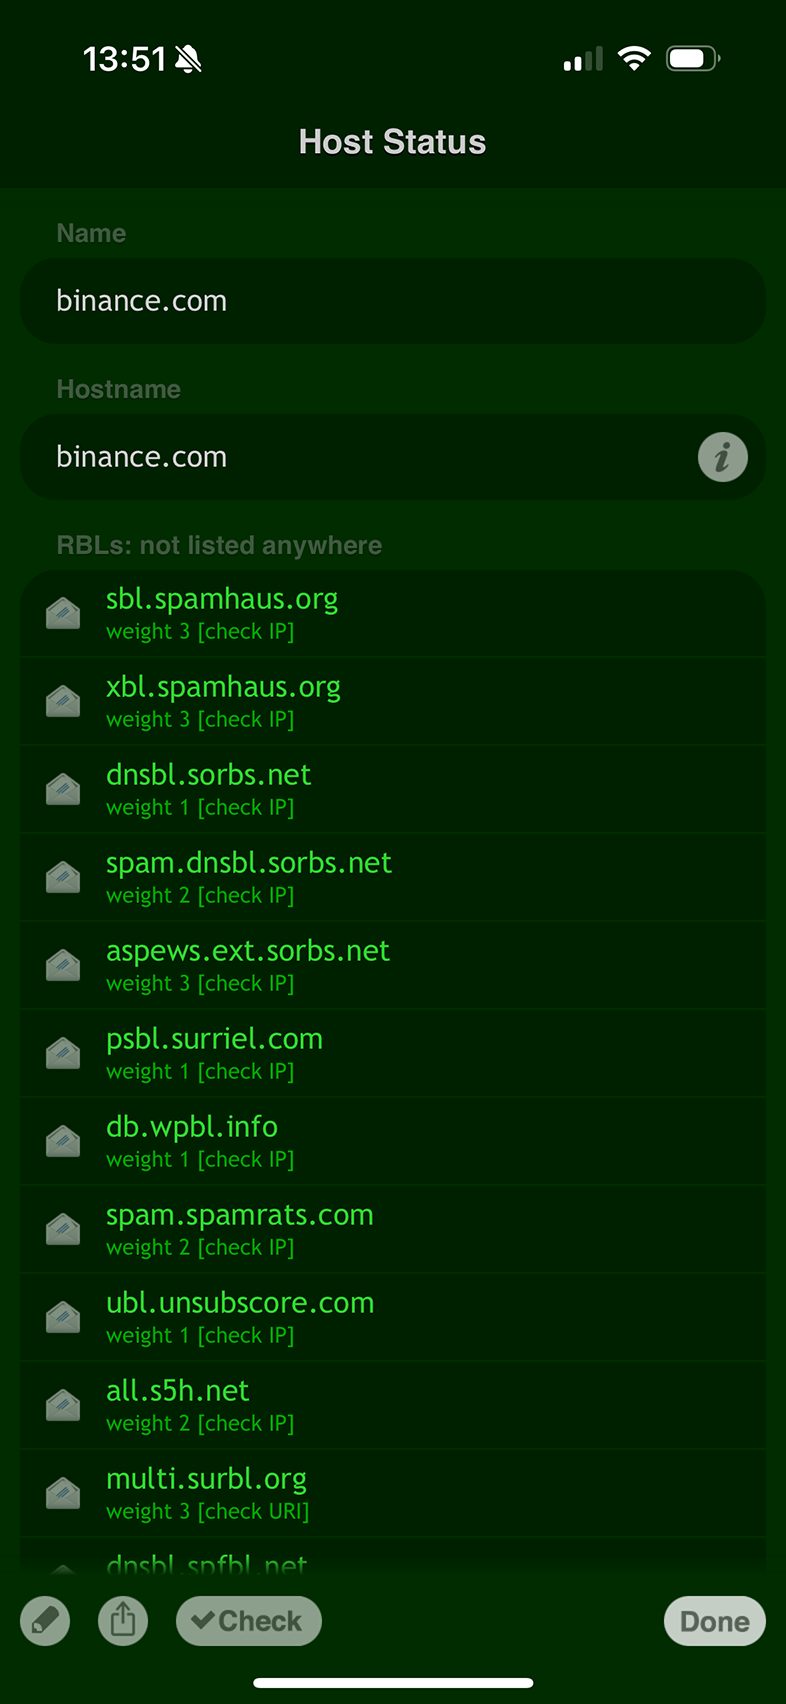
Monitoring a domain's reputation helps you take proactive steps to maintain its integrity and address any issues before they escalate.
Conclusion: Mastering Domain Whois Lookup and History
By following these expanded steps, you can conduct thorough and detailed domain investigations using Deep Whois, whether you're using the iOS app or the Terminal on macOS, Linux, or FreeBSD.
This comprehensive guide equips you with the tools and knowledge to uncover every detail about a domain, from ownership history and DNS settings to advanced data like RDAP and ENS records.
Whether you're investigating for security purposes, considering a domain purchase, or simply wanting to understand the background of a domain, this guide will help you get the most out of your Whois lookups, ensuring that you have a complete picture of the domain in question.