How to
Install Whois Lookup
on macOS
Updated Dec. 1, 2025
Whois lookup tools are vital for collecting comprehensive information on domains, IP addresses, and other network-related matters. Whether your focus is network administration, cybersecurity, or domain management, having a trustworthy Whois tools on your macOS is a must.
This guide will take you through the steps to install and configure Whois Lookup and Deep Whois on macOS. We'll also share advanced tips and troubleshooting techniques to help you get the most out of your Whois tools.
Let's move forward.
Step #1: Update Your macOS Package Manager (Optional)
Typically, macOS comes with a built-in Whois utility that allows users to perform basic Whois queries in Terminal. However, if you want to install a more up-to-date version of a basic Whois, you can use a package manager like Homebrew or MacPorts. If you only need Deep Whois, you can skip this step, as Homebrew or MacPorts are not required for its installation.
Homebrew and MacPorts are two of the most popular package managers for macOS. If you already have one of these package managers installed, it's important to update it first to ensure you're getting the latest software versions.
You can update them by running the following commands in the Terminal:
Homebrew:
sudo brew update
MacPorts:
sudo port -v selfupdate
Updating ensures that you're accessing the latest versions of available packages, which is crucial for a successful installation.
Step #2: Install Deep Whois for Advanced Features
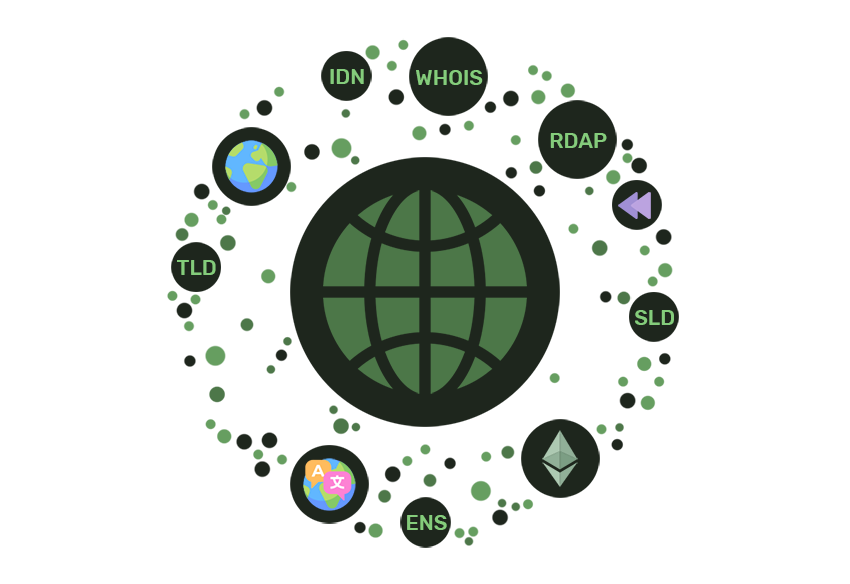
Deep Whois is an essential tool for WHOIS queries, offering advanced features like RDAP and ENS support, access to detailed domain history, and integration with a broader range of WHOIS databases.
These enhancements provide a more comprehensive Whois than the basic tool.
To install or update Deep Whois on macOS, open your Terminal and paste the following command:
bash -c "$(curl -fsSL https://deepwhois.net/install.sh)"
The installation script will guide you through each step, asking for your permission before making any changes to your system.
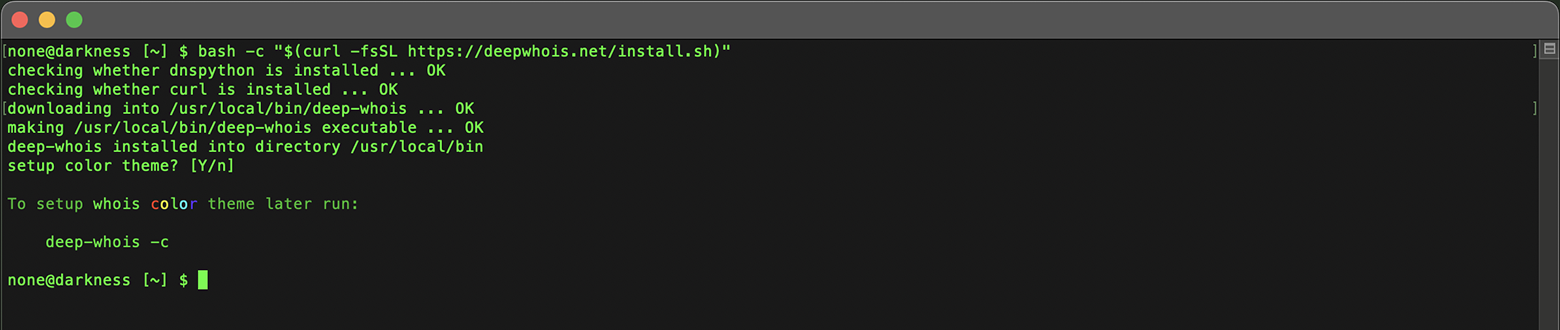
If the Command Line Developer Tools are not yet installed on your macOS, you will be prompted to install them when you start the installation.

Simply follow the on-screen instructions to install these tools using the popup that appears.
Once the installation of the Command Line Developer Tools is complete, restart the Deep Whois installation process to proceed smoothly.
Step #3: Set Up Deep Whois Color Themes for Terminal
Deep Whois offers customizable color themes to enhance your terminal experience, making it easier to distinguish different types of data during your Whois lookups.
During Initial Installation:
When you first install Deep Whois, the installation script will prompt you to choose a color theme.
Simply follow the on-screen instructions to select from the available themes.
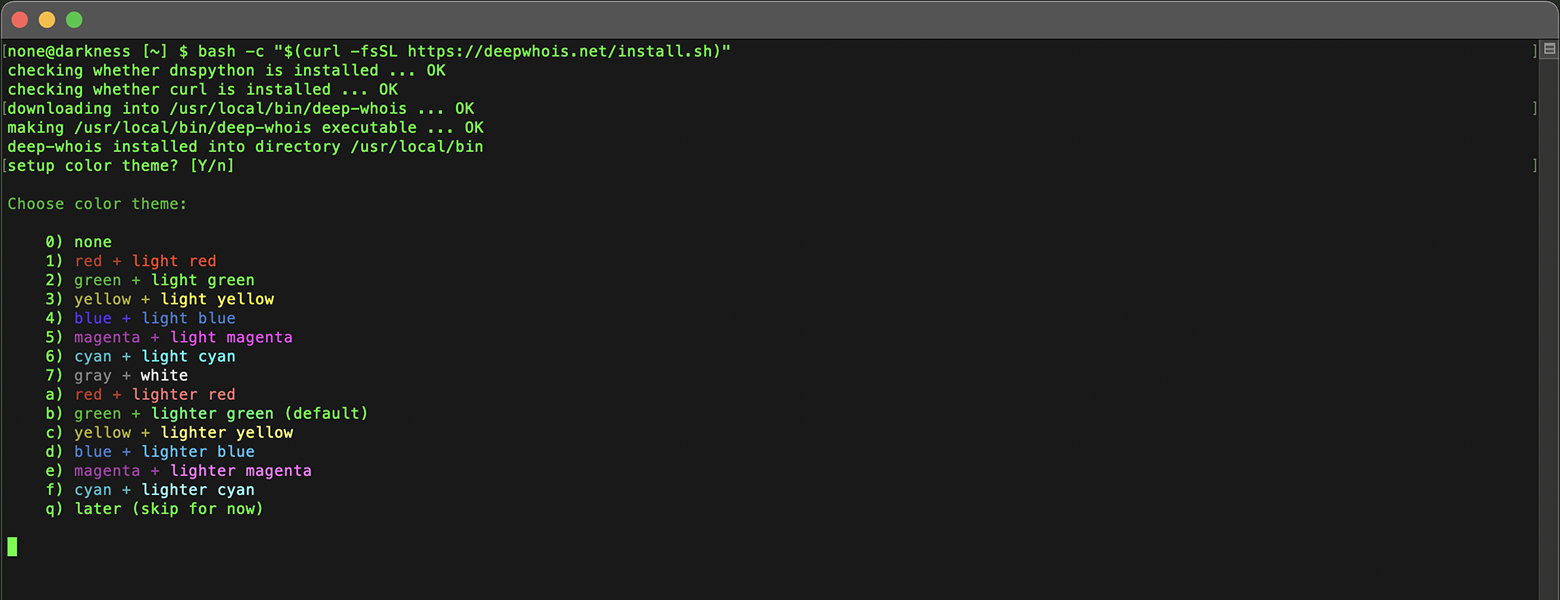
The script will apply your chosen theme automatically once the installation is complete.
Setting Up or Changing Themes Later:
If you want to change the color theme after the initial installation, you can easily do so by running the following command in your terminal:
deep-whois -c
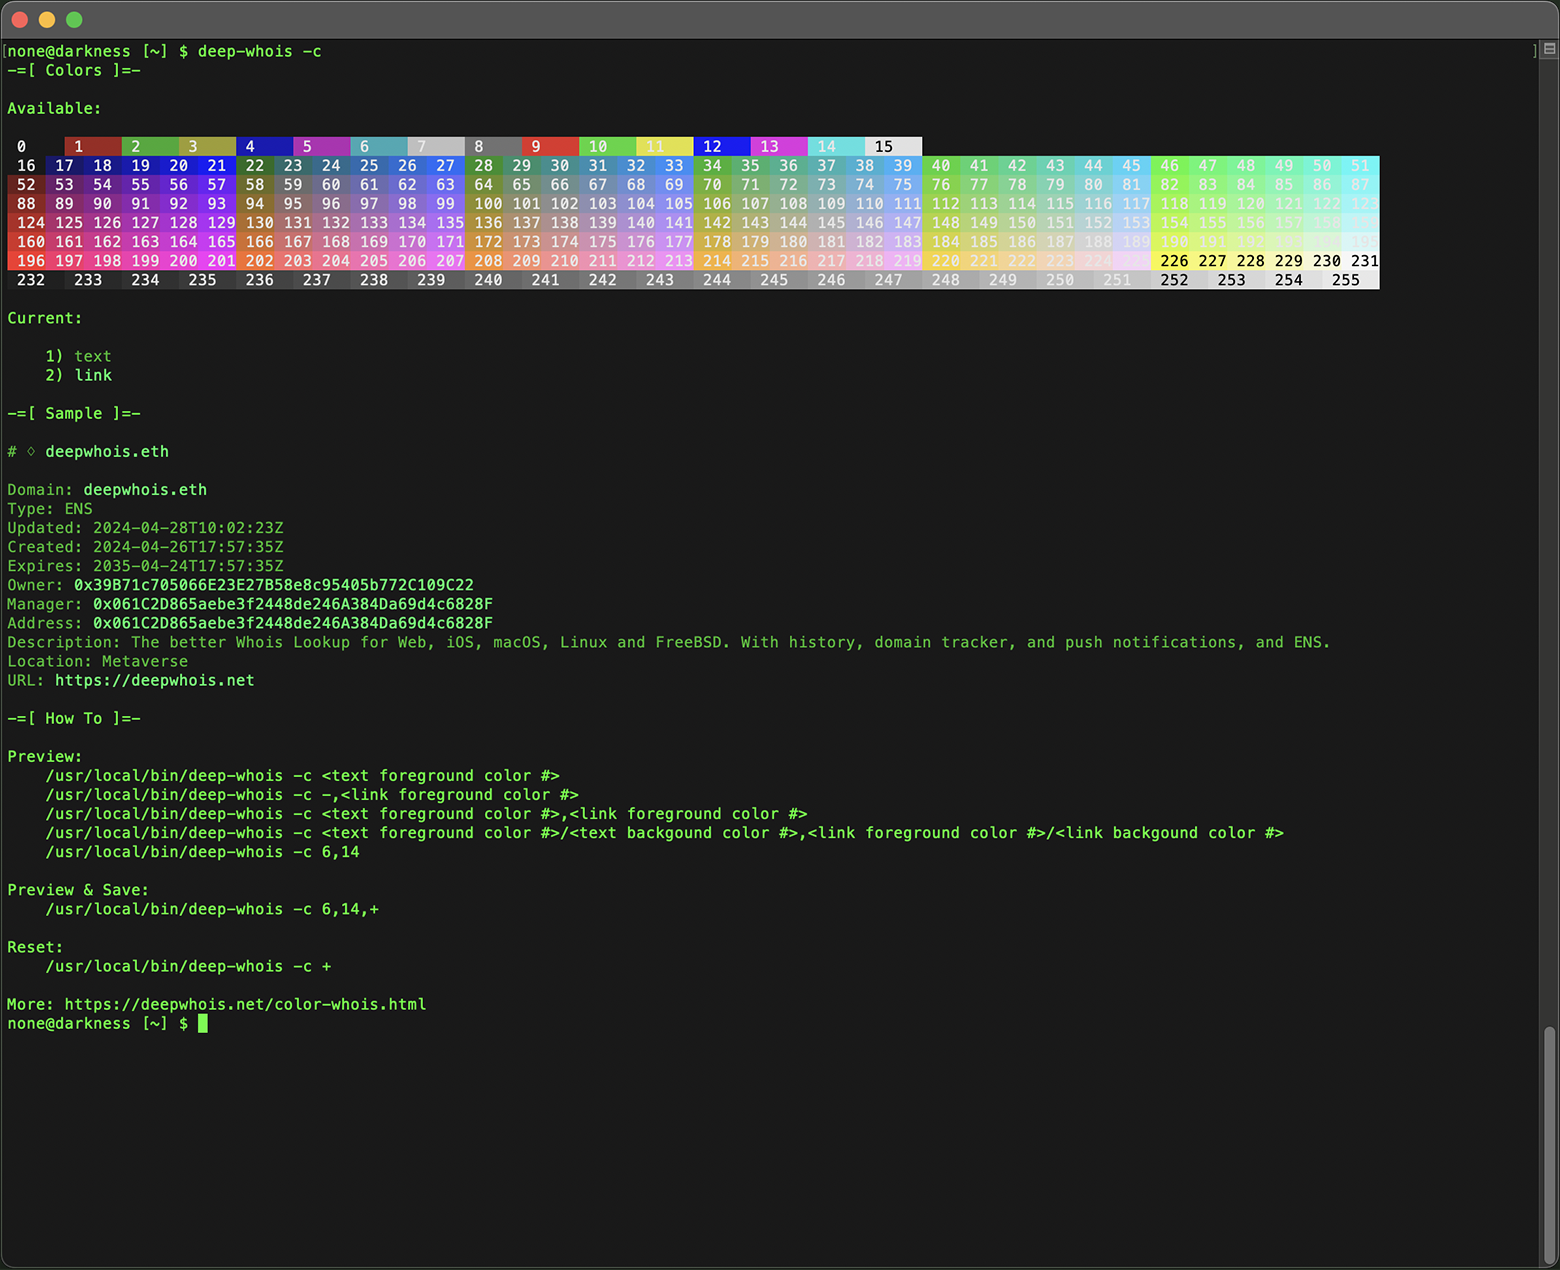
You can experiment with different themes to find the one that best suits your preferences, ensuring an optimized and visually pleasing terminal experience with Deep Whois.

Step #4: Install the Basic Whois (Optional)
The basic WHOIS package is a lightweight command-line tool that provides essential WHOIS lookup functionality.
On macOS, you can install this package using either Homebrew or MacPorts, depending on which package manager you prefer.
Using Homebrew:
If you have Homebrew installed, run the following command in Terminal:
sudo brew install whois
Using MacPorts:
If you prefer MacPorts, use the following command:
sudo port install whois
These commands will install the Whois tool on your system, enabling you to perform basic Whois lookups for domains and IP addresses directly from the terminal.
Step #5: Verify Your macOS Whois Installation
Now that you've installed the Whois tools, it's time to confirm they're working properly by running a series of commands.
Below are examples of basic, advanced, and pro Whois commands to help you gather data for domains, IP addresses, and more.
Deep Whois
Basic Examples:
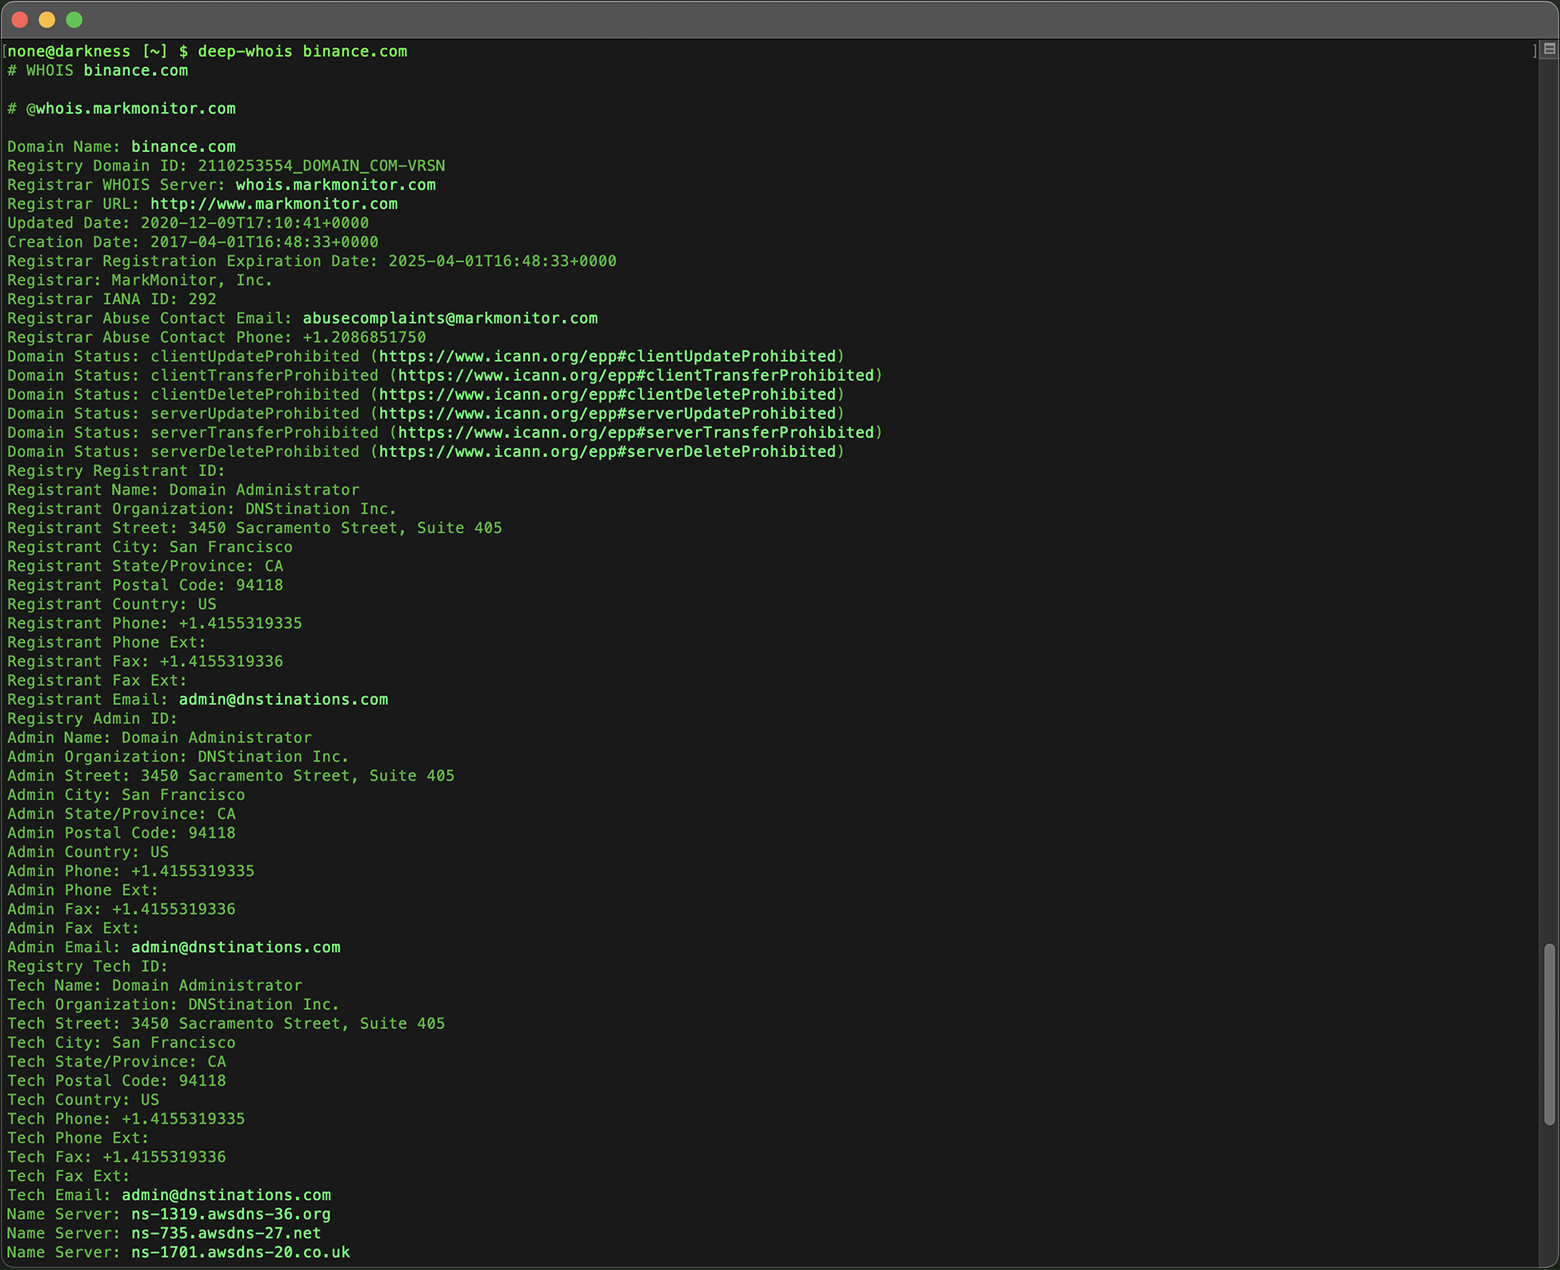
Domain:
deep-whois binance.com
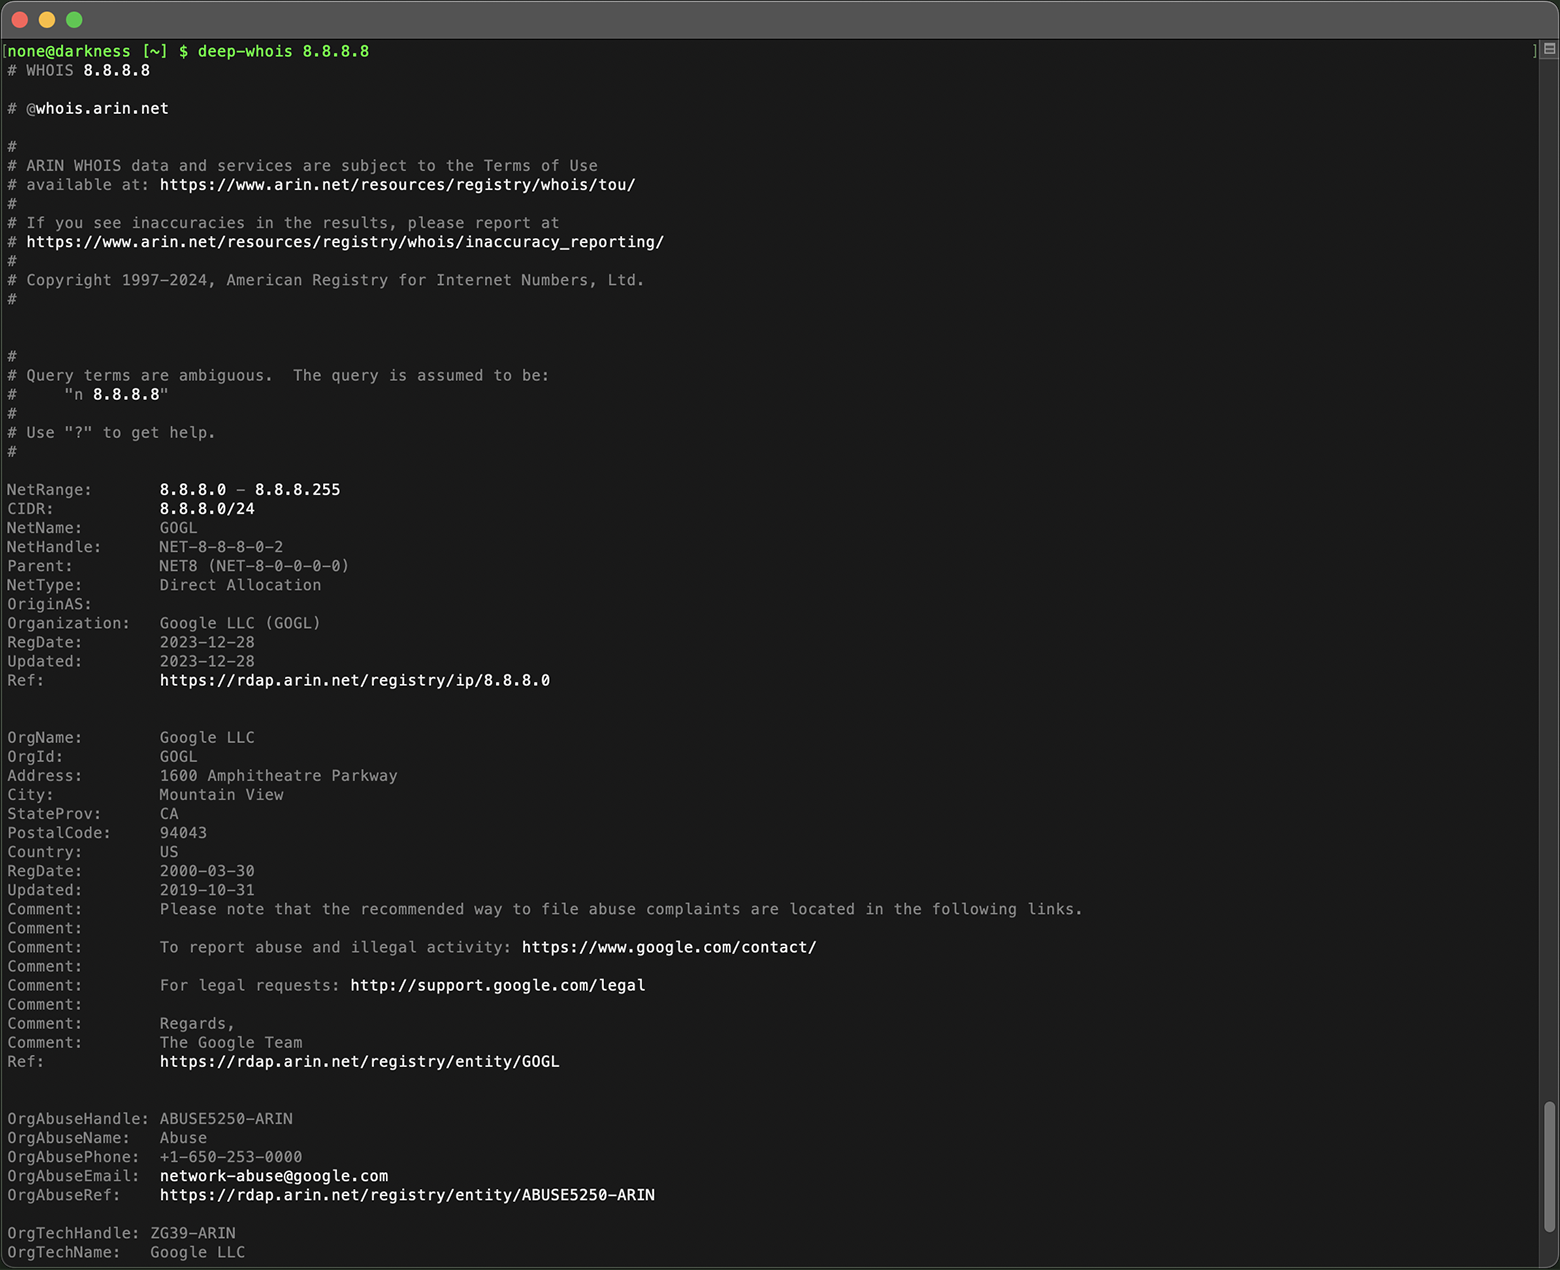
IPv4 Address:
deep-whois 8.8.8.8
IPv4 Network:
deep-whois 8.8.8.0/24
IPv6 Address:
deep-whois 2a00:1450:401b:800::200e
IPv6 Network:
deep-whois 2a00:1450:4000::/37
Advanced Examples:
Complex Hostname:
deep-whois ns-234.awsdns-29.com
Website URL:
deep-whois https://www.binance.com/en
Email:
deep-whois inquiries@binance.us
RDAP as Primary Source:
deep-whois google.ch
RDAP as Alternative Source:
deep-whois -f @rdap https://rdap.registro.br/domain/google.com.br
Abuse Contacts for a Domain:
deep-whois --no-trace wix.com | grep -i abuse
Abuse Contacts for an IP:
deep-whois --no-trace 8.8.8.8 | grep -i abuse
Pro Examples:
Domain History:
deep-whois @history binance.com
Ethereum ENS Domain:
deep-whois deepwhois.eth
On-Chain DNS from ENS:
deep-whois @ens deepwhois.net
Off-Chain DNS from ENS:
deep-whois @ens opscurum.me
Ethereum Wallet:
deep-whois 0x39B71c705066E23E27B58e8c95405b772C109C22
Ethereum Wallet Address:
deep-whois 0x061C2D865aebe3f2448de246A384Da69d4c6828F
Basic Whois
Domain:
whois binance.com
IP Address:
whois 8.8.8.8
These commands help ensure that your Whois tools are installed correctly and ready to provide detailed information on domains, IP addresses, and more.
Conclusion: Maximizing Whois Lookup on macOS
By following the steps in this guide, you can efficiently install and configure Whois Lookup tools on your macOS system.
Whether you're running basic Whois commands or taking advantage of Deep Whois's advanced features, this guide provides the knowledge you need to conduct in-depth and secure Whois investigations.
For those working in network administration, cybersecurity, or domain management, setting up a robust Whois lookup system on macOS is essential for gathering critical data and making informed choices.