How to
Install Whois Lookup
on Windows 11 and 10
Updated Dec. 1, 2025
Whois lookup tools are crucial for collecting detailed information on domains, IP addresses, and other network-related data. Whether you're managing networks, enhancing security, or handling domain administration, having dependable Whois tools on your Windows system is essential.
In this guide, we'll take you through the process of installing and configuring both Whois Lookup and Deep Whois on Windows 10 and Windows 11. Additionally, we'll provide advanced tips and troubleshooting advice to ensure you maximize the effectiveness of your Whois tools.
Let's get started.
Step #1: Install Python from the Microsoft Store
To install and run Deep Whois on your Windows system, you'll need Python, as Deep Whois is a Python-based tool. The easiest way to install Python on Windows is via the Microsoft Store.
Open the Command Prompt:
Search for 'cmd' or 'PowerShell' in the search bar.
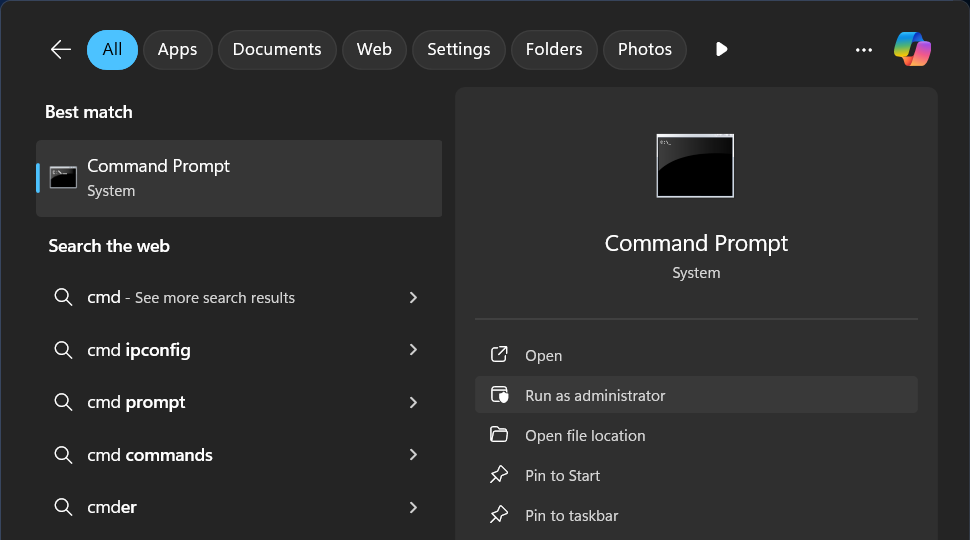
Choose Run as administrator if you need to install the Whois tools for all users on the system (administrator mode isn't required if you're installing it only for the current user).
Check if Python is already installed:
In the Command Prompt, type 'python3' and press Enter.

If Python is installed, you will see the version displayed.

Exit by pressing CTRL + Z, followed by Enter.
If Python is not installed, the Microsoft Store will open, prompting you to download the latest version (currently Python 3.12).
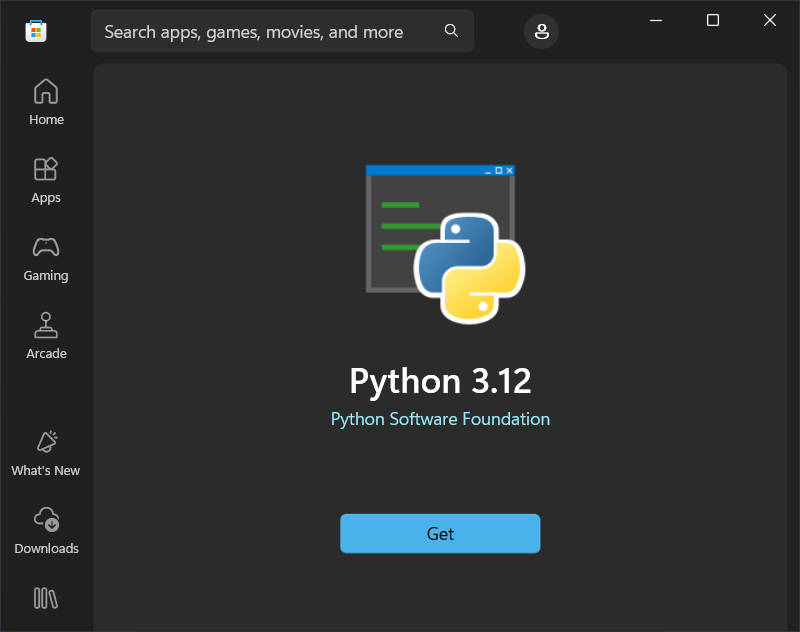
Press the GET button in the Microsoft Store to install Python.
Step #2: Install Deep Whois for Advanced Features
Deep Whois is a powerful tool for conducting Whois queries, offering advanced features such as RDAP and ENS support, access to detailed domain history, and integration with a wider range of Whois databases. These features provide far more detailed and comprehensive data than the basic Whois tool.
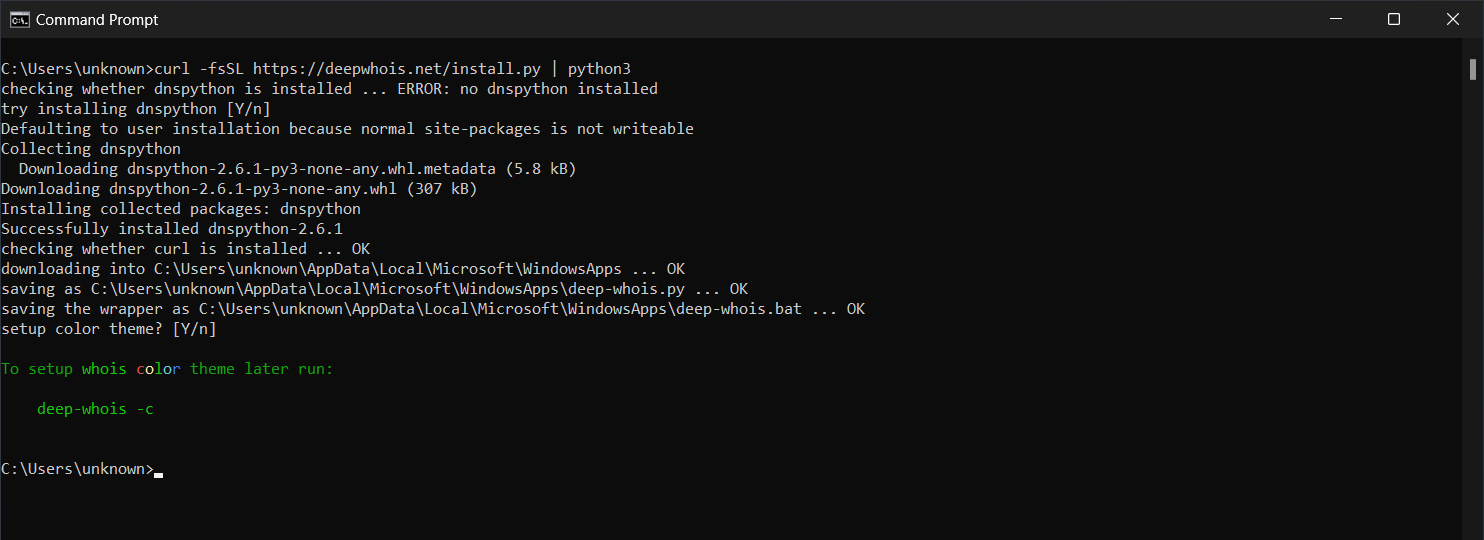
To install or update Deep Whois on Windows 11 or Windows 10, open Command Prompt or PowerShell and enter the following command:
curl -fsSL https://deepwhois.net/install.py | python3
Note: In PowerShell use 'curl.exe' instead of just 'curl'. In PowerShell, 'curl' is an alias and doesn't support all options.
The installation script will guide you through each step, requesting your confirmation before making any changes to your system.
If Python is not installed, please refer back to Step #1 for instructions on how to install Python.
Step #3: Customize Color Themes for Command Prompt or PowerShell
Deep Whois offers customizable color themes to enhance your command-line experience, making it easier to differentiate various types of data during your Whois lookups.
During Initial Installation:
When you first install Deep Whois, the installation script will prompt you to select a color theme.
Simply follow the on-screen instructions to choose from the available options.
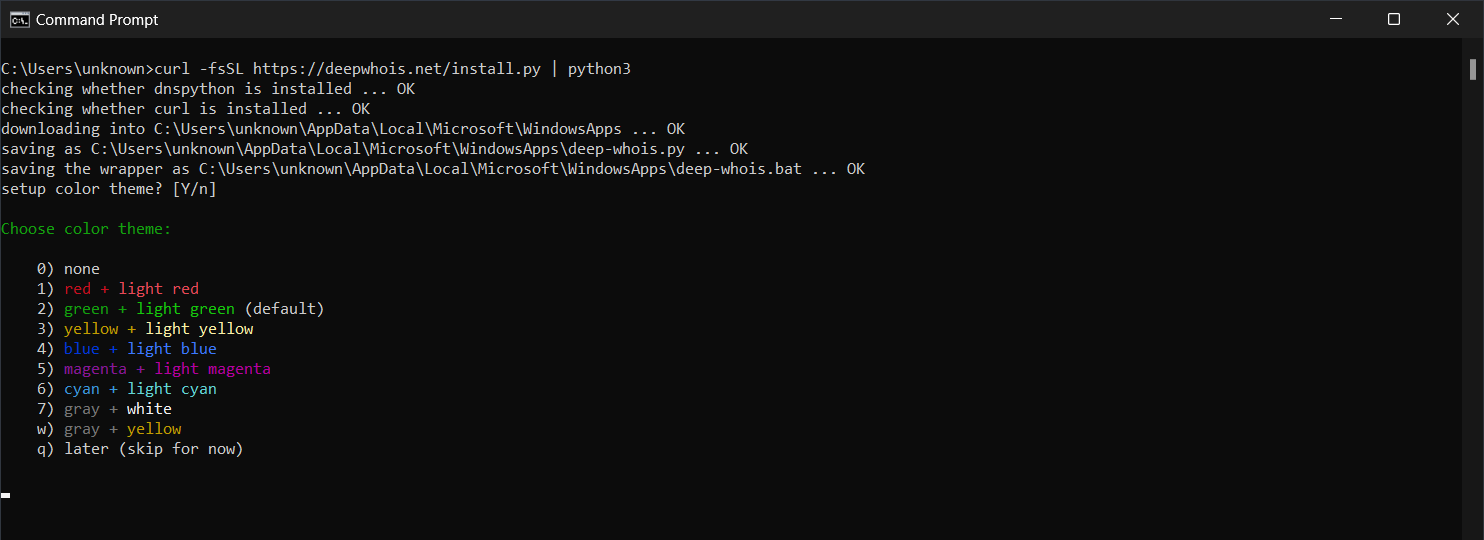
The script will automatically apply your selected theme once the installation is complete.
Changing or Setting Up Themes Later:
If you'd like to change the color theme after installation, you can easily do so by running the following command in Command Prompt or PowerShell:
deep-whois -c
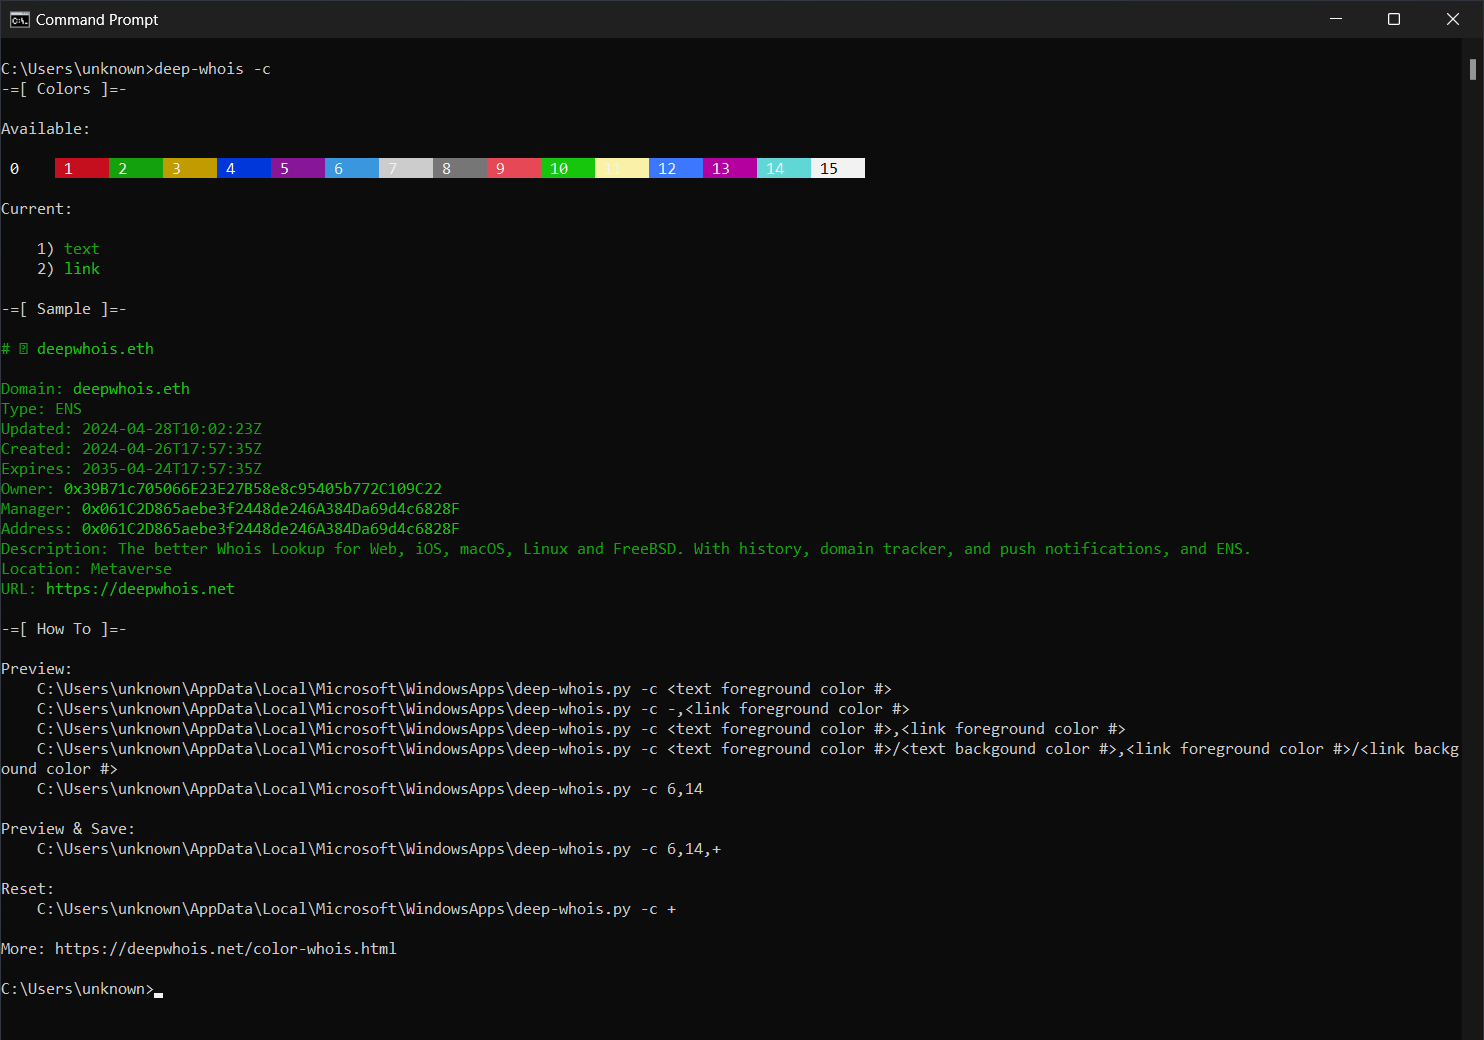
Feel free to try different themes to find the one that best fits your preferences, providing an optimized and visually appealing command-line experience with Deep Whois.

Step #4: Install Basic Whois (Optional)
The basic Whois tool is a command-line tool that provides base WHOIS lookup functionality. If you'd like to install the basic Whois tool, you can download it directly from the official Microsoft website using this link:
→ Download page at Microsoft website
Step #5: Verify Your Windows Whois Installation
Now that you've installed the Whois tools on your Windows system, it's time to confirm that they're working correctly by running a variety of commands.
Below are examples of basic, advanced, and pro Whois commands to help you gather data for domains, IP addresses, and more on your Windows system.
Deep Whois
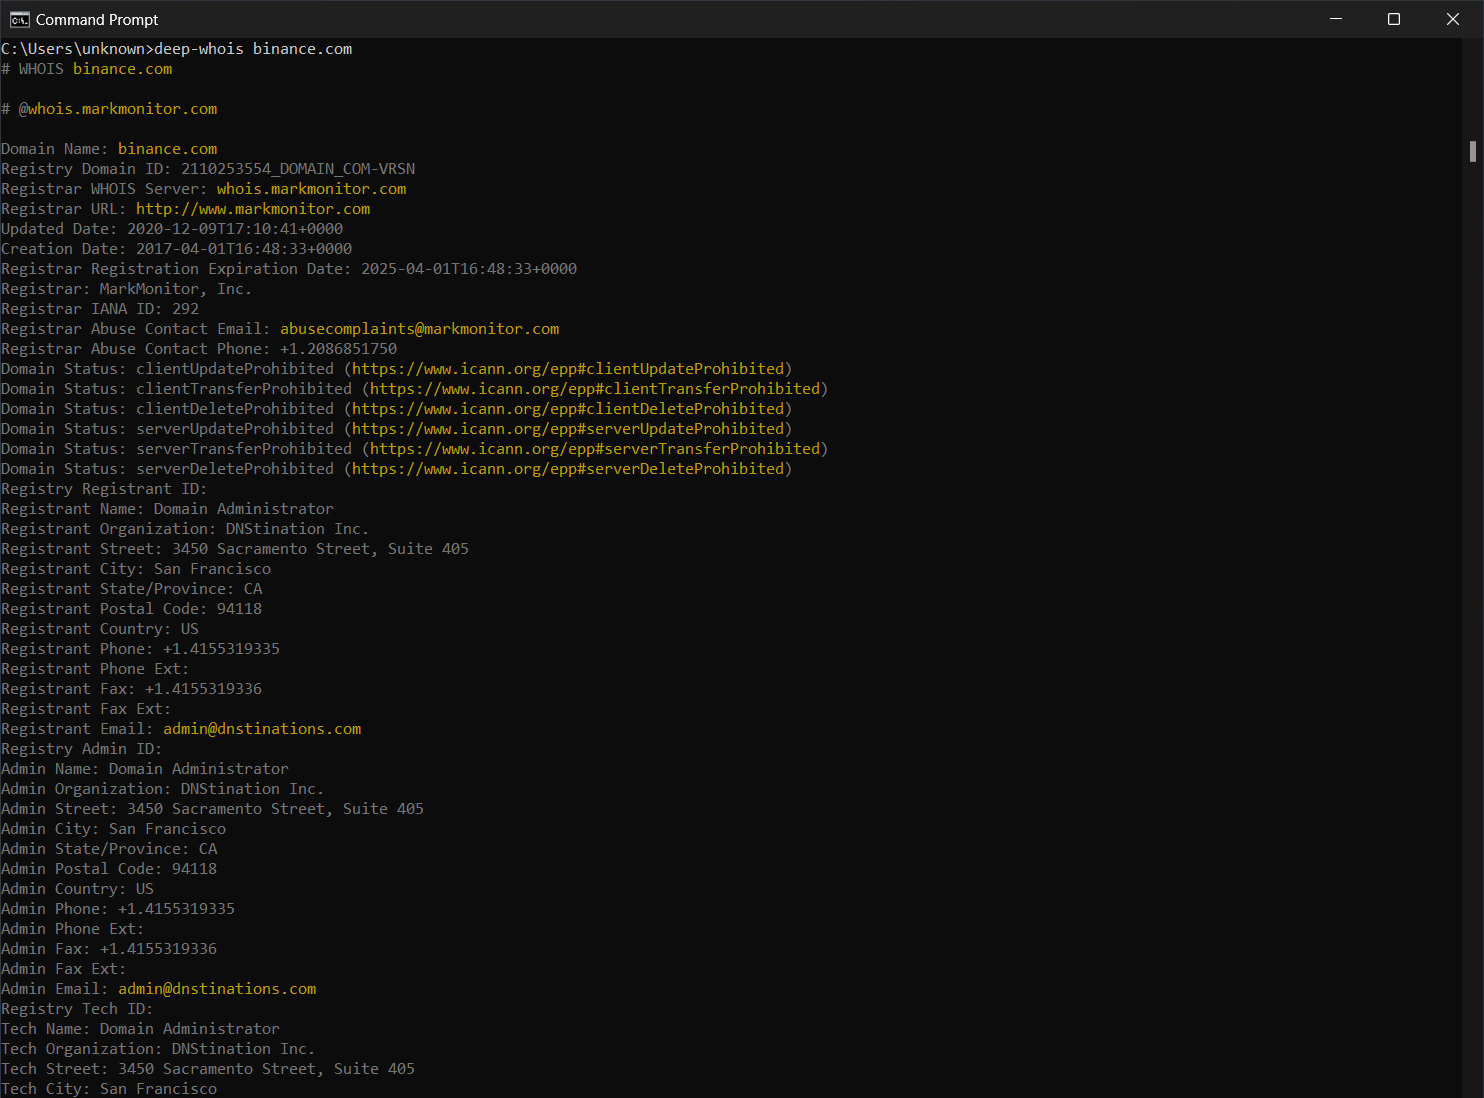
Basic Examples:
Domain:
deep-whois binance.com
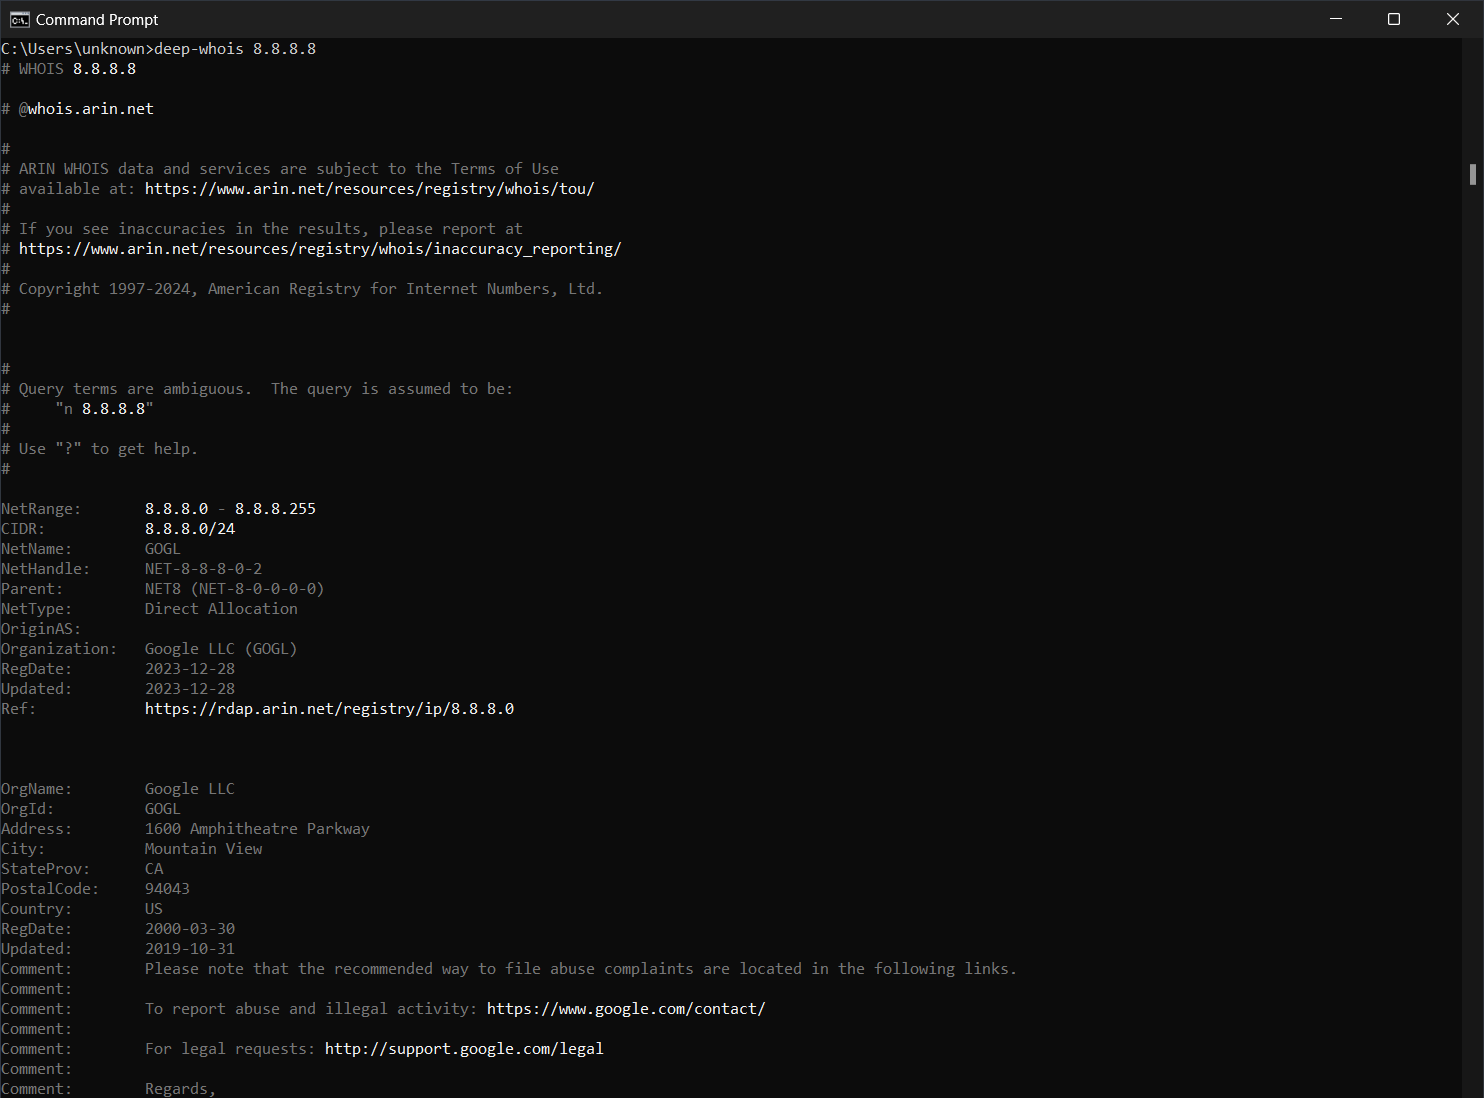
IPv4 Address:
deep-whois 8.8.8.8
IPv4 Network:
deep-whois 8.8.8.0/24
IPv6 Address:
deep-whois 2a00:1450:401b:800::200e
IPv6 Network:
deep-whois 2a00:1450:4000::/37
Advanced Examples:
Complex Hostname:
deep-whois ns-234.awsdns-29.com
Website URL:
deep-whois https://www.binance.com/en
Email:
deep-whois inquiries@binance.us
RDAP as Primary Source:
deep-whois google.ch
RDAP as Alternative Source:
deep-whois -f @rdap https://rdap.registro.br/domain/google.com.br
Abuse Contacts for a Domain:
deep-whois --no-trace wix.com | findstr /I -i abuse
Abuse Contacts for an IP:
deep-whois --no-trace 8.8.8.8 | findstr /I -i abuse
Pro Examples:
Domain History:
deep-whois @history binance.com
Ethereum ENS Domain:
deep-whois deepwhois.eth
On-Chain DNS from ENS:
deep-whois @ens deepwhois.net
Off-Chain DNS from ENS:
deep-whois @ens opscurum.me
Ethereum Wallet:
deep-whois 0x39B71c705066E23E27B58e8c95405b772C109C22
Ethereum Wallet Address:
deep-whois 0x061C2D865aebe3f2448de246A384Da69d4c6828F
Basic Whois
Domain:
whois binance.com
IP Address:
whois 8.8.8.8
These commands will help verify that your Whois tools are properly installed and ready to provide detailed information on domains, IP addresses, and more on your Windows system.
Conclusion: Optimizing Whois Lookup on Windows
By following the steps outlined in this guide, you can easily install and configure Whois Lookup tools on your Windows 10 or Windows 11 system. Whether you're performing basic Whois queries or leveraging the advanced capabilities of Deep Whois, this guide equips you with all the tools necessary to conduct comprehensive and secure Whois investigations.
For those in network administration, cybersecurity, or domain management, establishing a dependable Whois lookup system on Windows is crucial for collecting vital data and making informed, strategic decisions.