Investigate an IP Address
using Whois Lookup

Updated Dec. 1, 2025
Understanding the details behind an IP address can be essential for a variety of reasons — whether you're tracking down the source of suspicious activity, verifying the legitimacy of a website, or simply gathering information for a network audit.
In this guide, we'll walk you through a comprehensive process to investigate an IP address using Whois lookup, utilizing the powerful Deep Whois app and command line tool.
By the end, you'll have all the information you need to fully understand the background, ownership, location, and other critical data associated with an IP address.
Here is a step-by-step guide for performing an IP Whois lookup:
→ Step #1: Perform a Basic IP Whois Lookup
→ Step #2: Identify the IP Owner and Contact Information
→ Step #3: Determine the IP's Regional Internet Registry (RIR)
→ Step #4: Analyze IP Address Allocation and CIDR Notation
→ Step #5: Perform Reverse IP Lookups
→ Step #6: Check the IP's Hosting Provider
→ Step #7: Geolocate the IP Address
→ Step #8: Analyze Whois Abuse Contact Information for IP Addresses
→ Step #9: Save and Export IP Whois Data
Let's dive in.

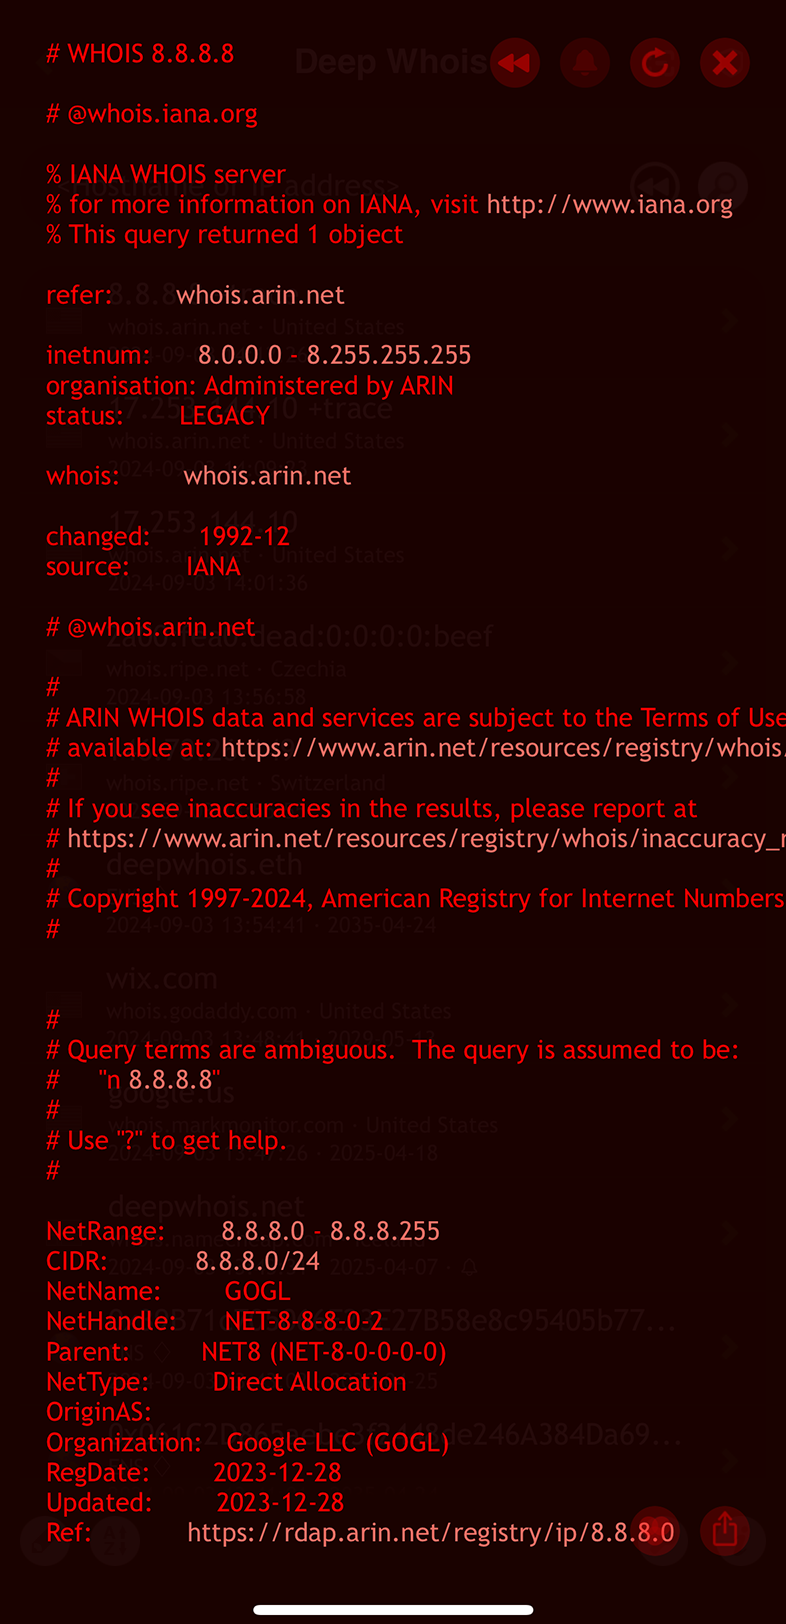
Step #1: Perform a Basic IP Whois Lookup
The first step in investigating any IP address is to perform a basic Whois lookup. This will provide you with the essential details, such as the owning organization, the contact information, the regional internet registry (RIR) responsible for the IP address, and the geographic location.
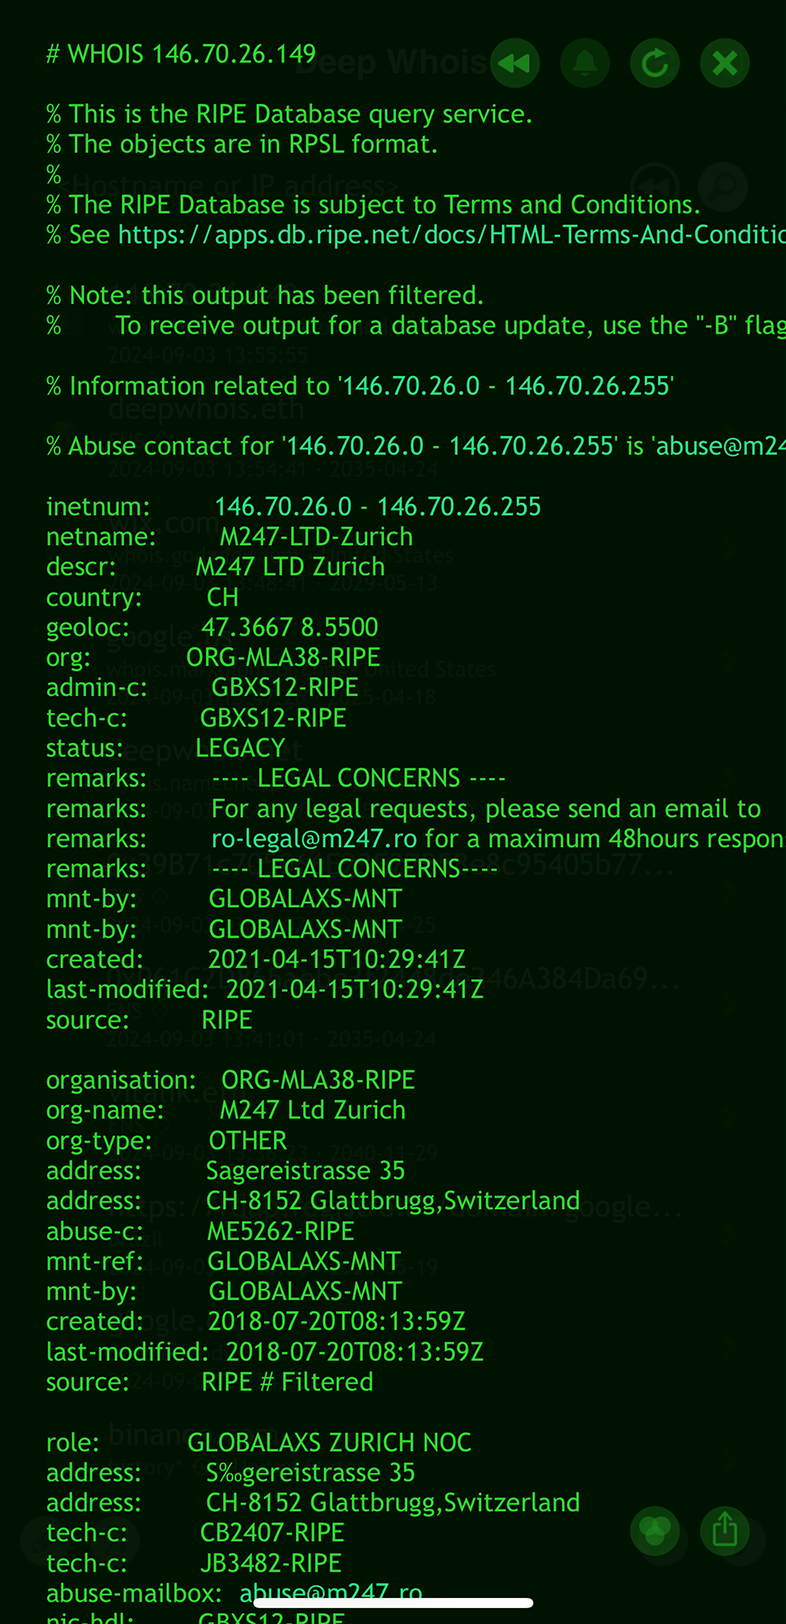
Using Deep Whois on iOS:
Open the Deep Whois app, enter the IP address in the search field.
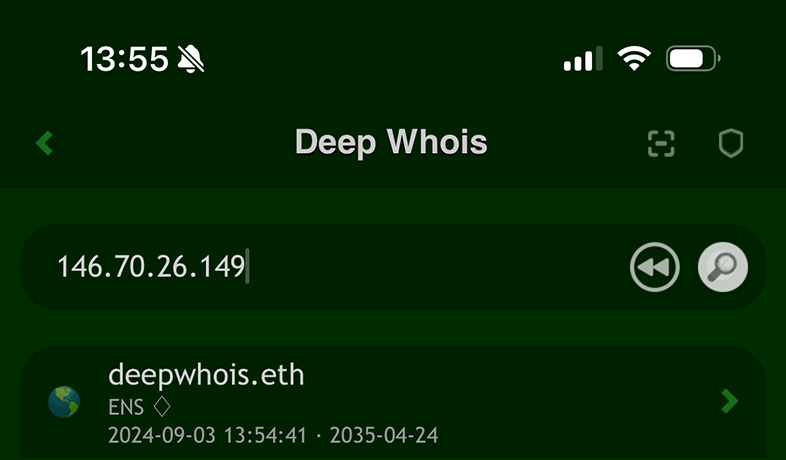
Then tap 'Lookup' to retrieve the Whois data.
Using Deep Whois in Terminal:
Execute the following command:
deep-whois 146.70.26.149
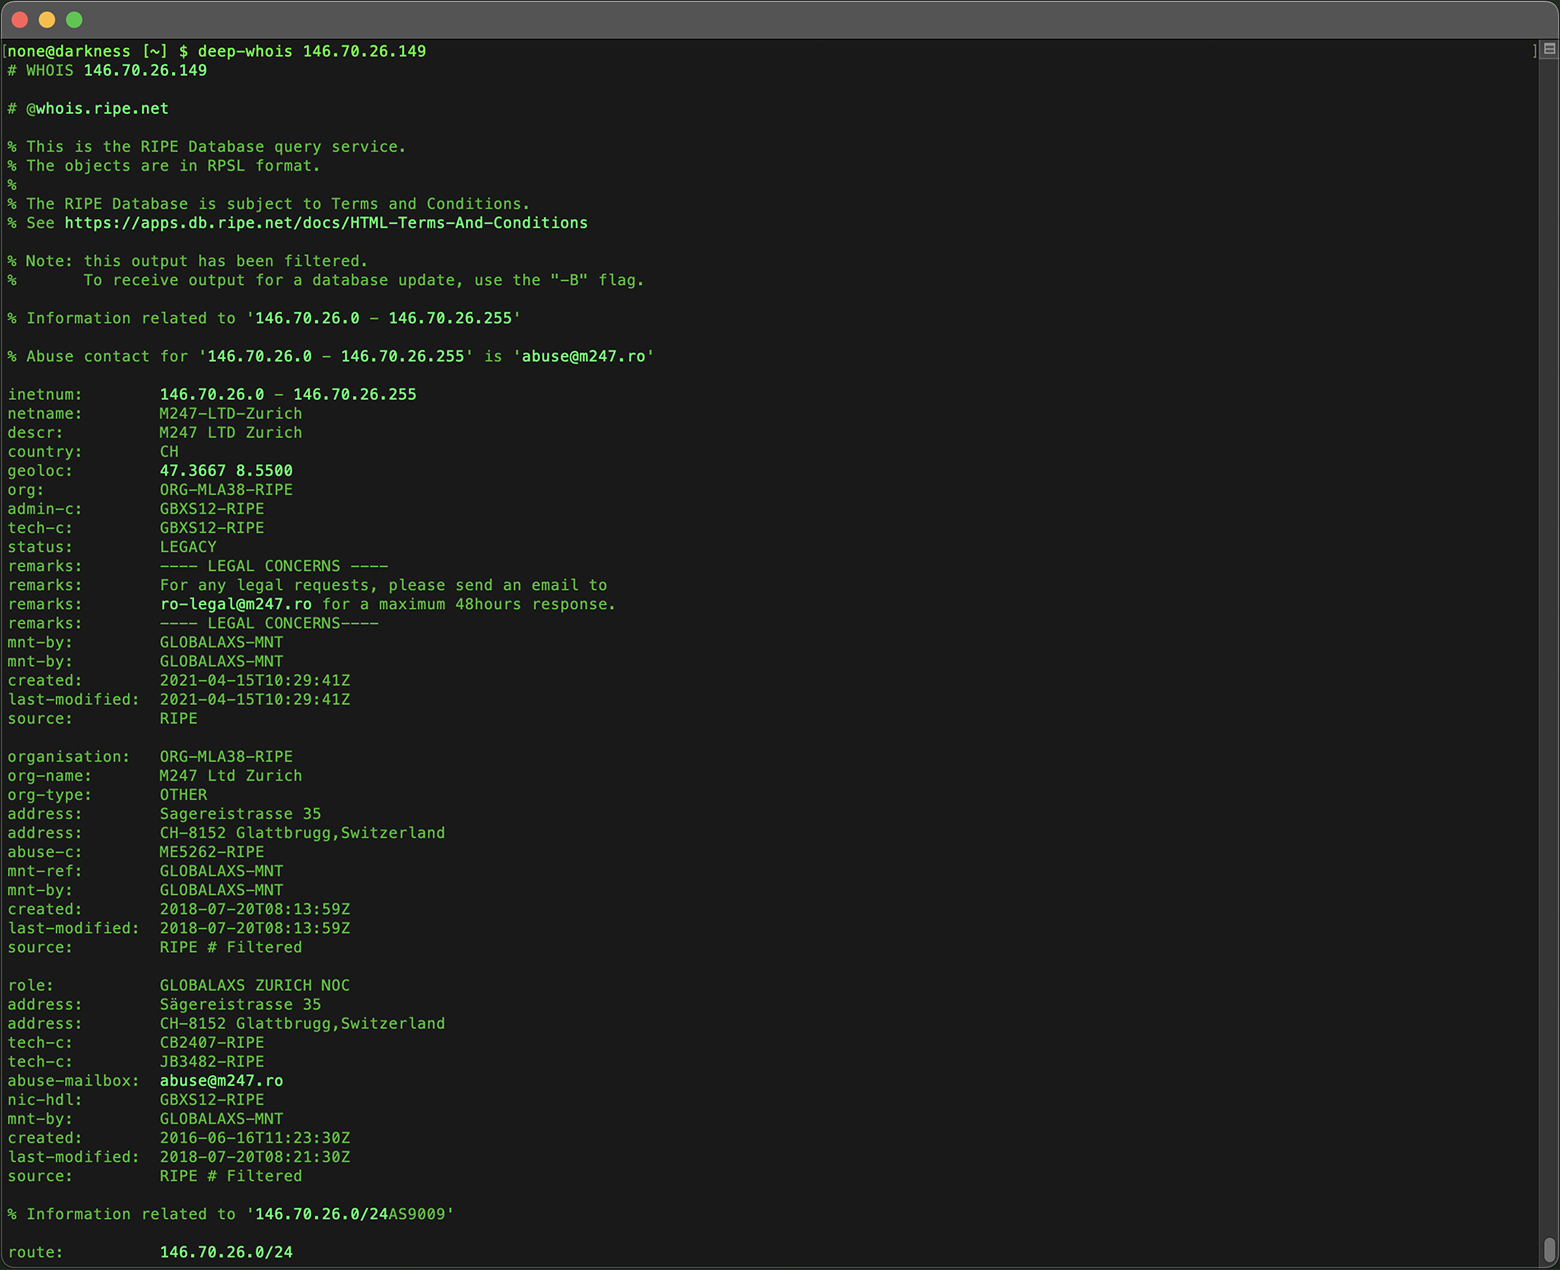
This basic lookup provides a quick overview of the IP address, offering insight into its ownership, associated organization, and geographic region.
Deep Whois simplifies the process of investigating IP addresses by automatically determining which database to query, without requiring you to specify a particular source.
It seamlessly supports all major IP Whois databases, including ARIN, RIPE, APNIC, LACNIC, and AFRINIC, as well as referral servers.
This ensures that you receive the most accurate and comprehensive information available for any IP address, regardless of its regional allocation.
Bonus Tips:
#1: Query IPv6 Whois
Deep Whois is designed to handle both IPv4 and IPv6 addresses seamlessly within a single entry interface.
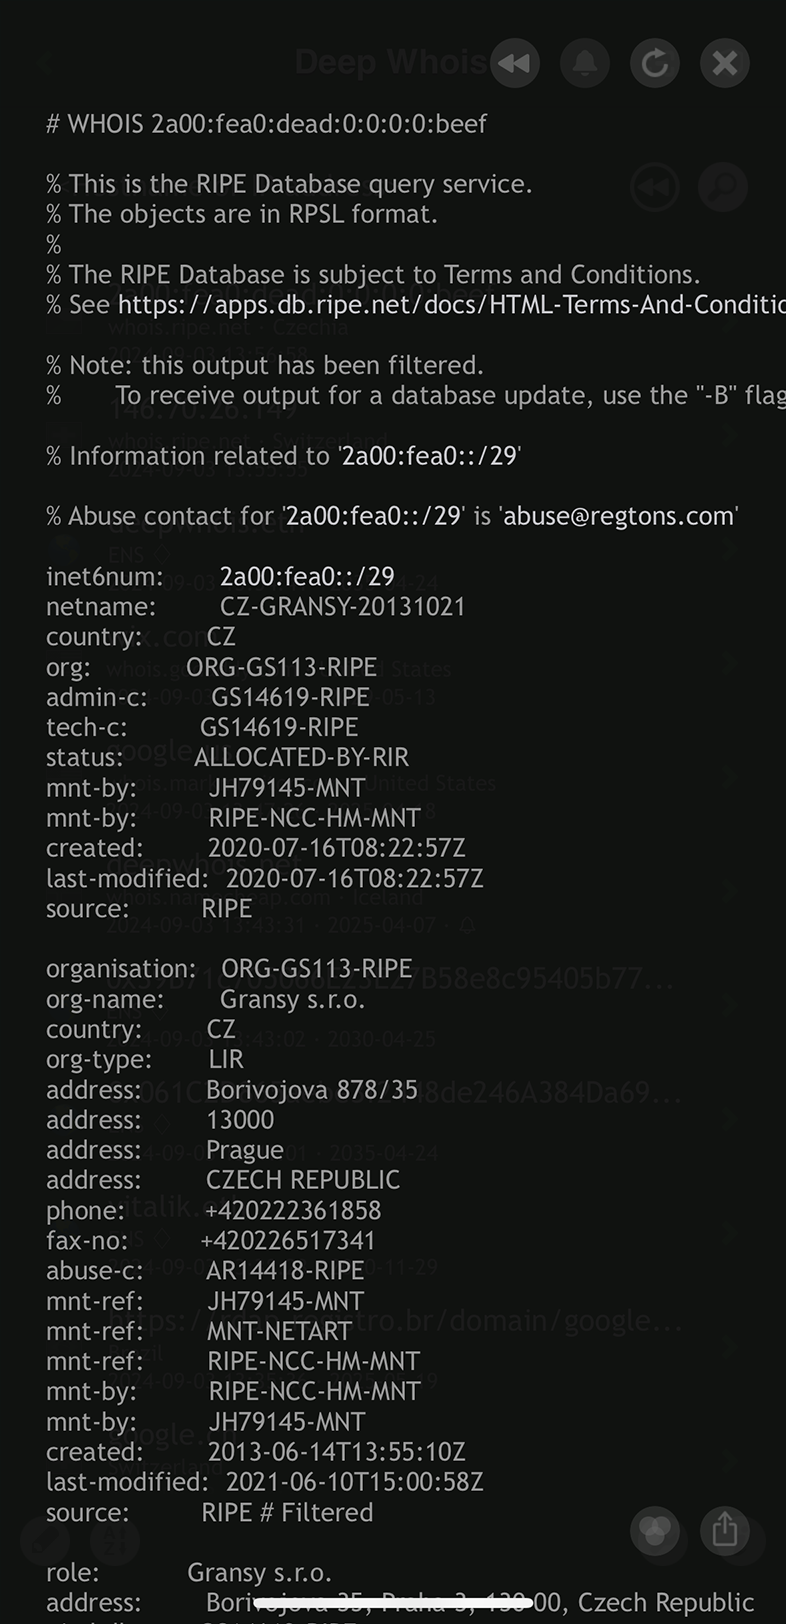
Whether you're investigating an older IPv4 address or a newer IPv6 address, Deep Whois automatically recognizes and processes the query, providing you with detailed WHOIS data.
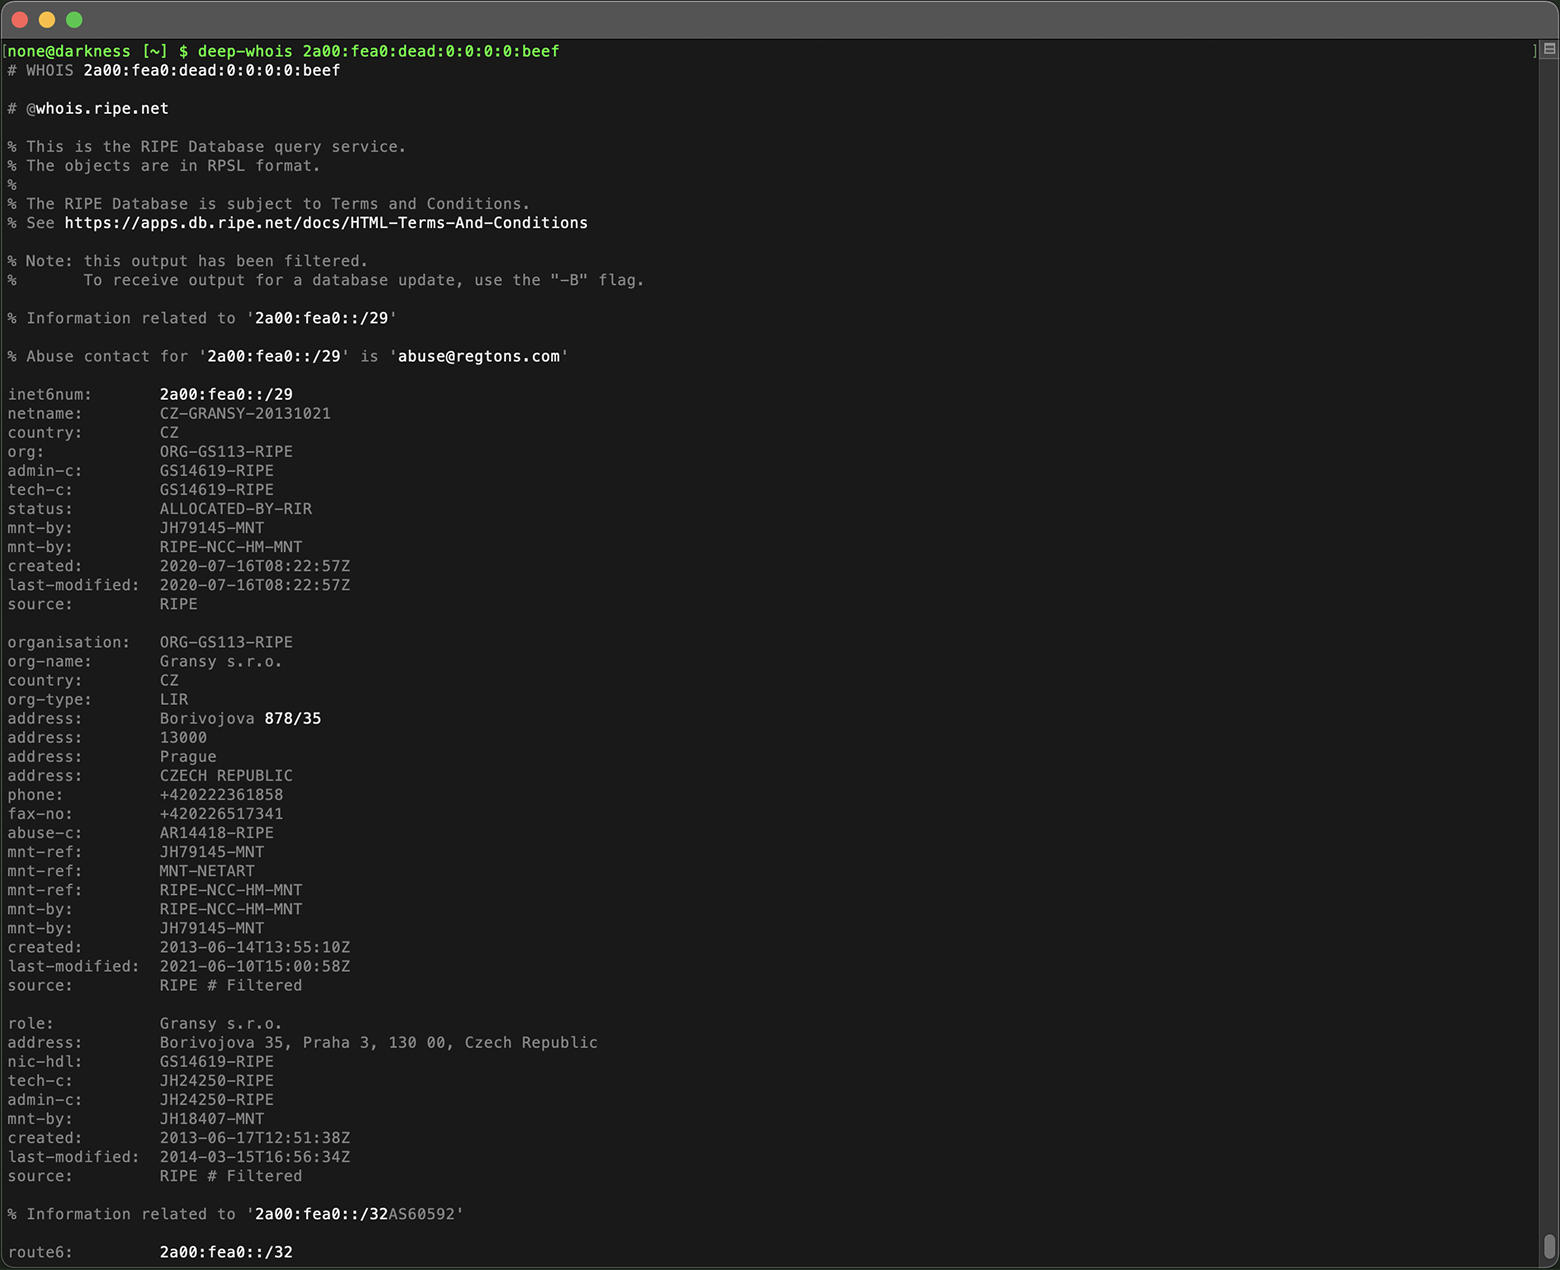
This flexibility ensures that you can conduct thorough IP investigations regardless of the protocol version, all from one easy-to-use interface.
#2: Effortless Whois Browsing on iOS
On iOS, browsing Whois information is as smooth as navigating web pages with clickable links.
The app automatically detects and highlights key data — such as domain names, hostnames, URLs, and email addresses, IPv4 and IPv6 addresses and networks — using a brighter color for easy identification.
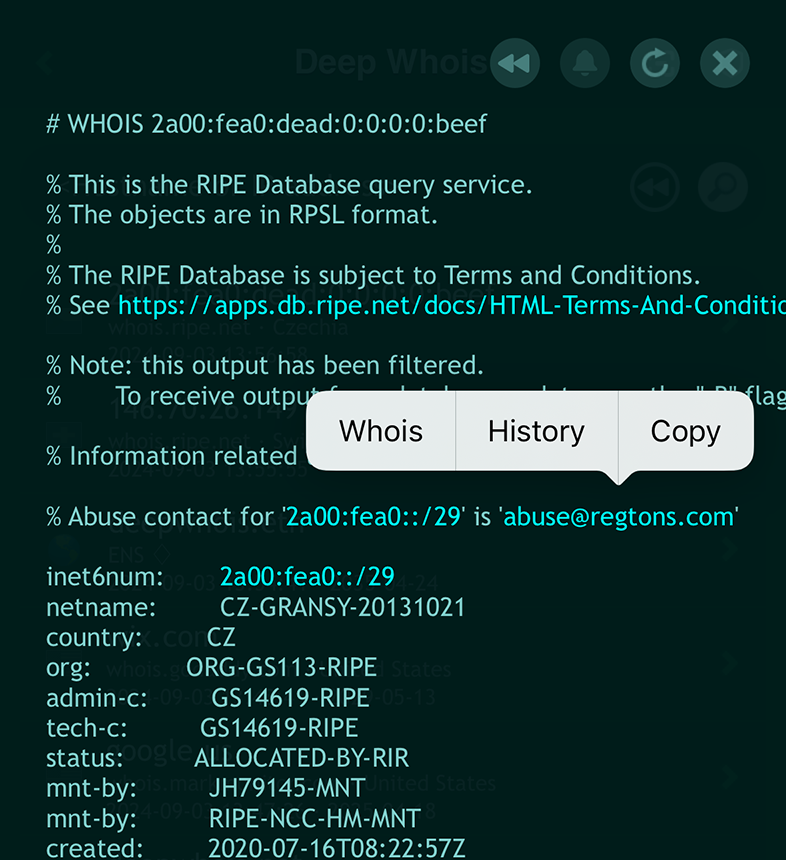
To explore further, simply tap on the highlighted link, which will bring up a context menu.
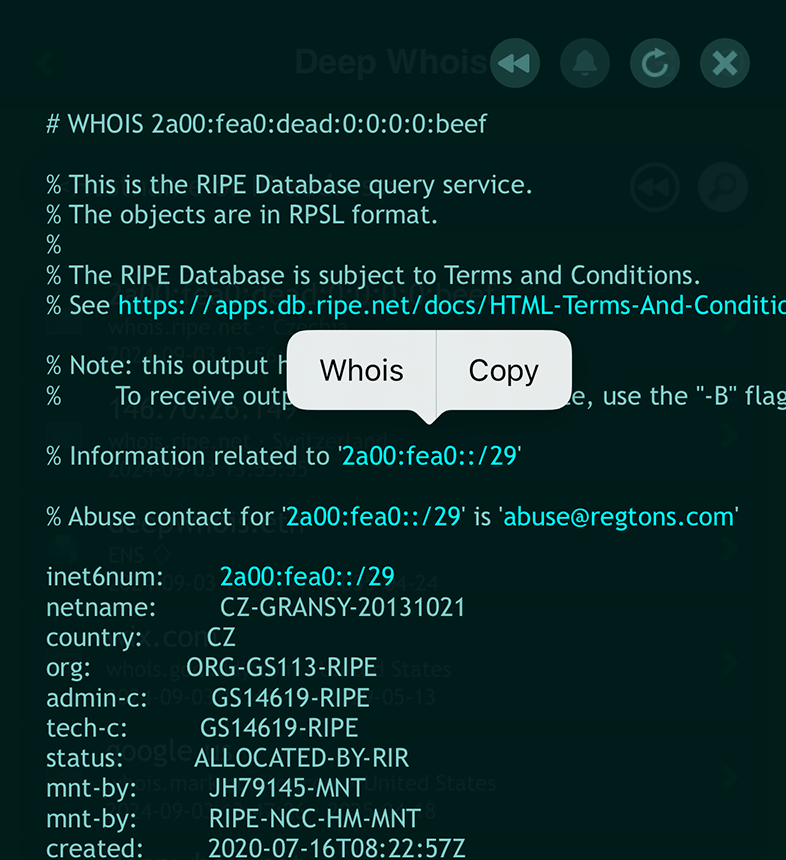
From there, choosing the 'Whois' option allows you to instantly query the relevant Whois data, making the process of investigating domain details both intuitive and efficient.
Step #2: Identify the IP Owner and Contact Information
Knowing who owns an IP address is crucial, especially in cases where you need to contact the owner for legal reasons or to address misuse or security concerns.
Whois lookup often provides this information, including the name, address, phone number, and email of the owner.
Using Deep Whois on iOS:
The ownership and contact details will be displayed as part of the Whois data.
Using Deep Whois in Terminal:
The following command reveals ownership details:
deep-whois 2620:149:af0::10
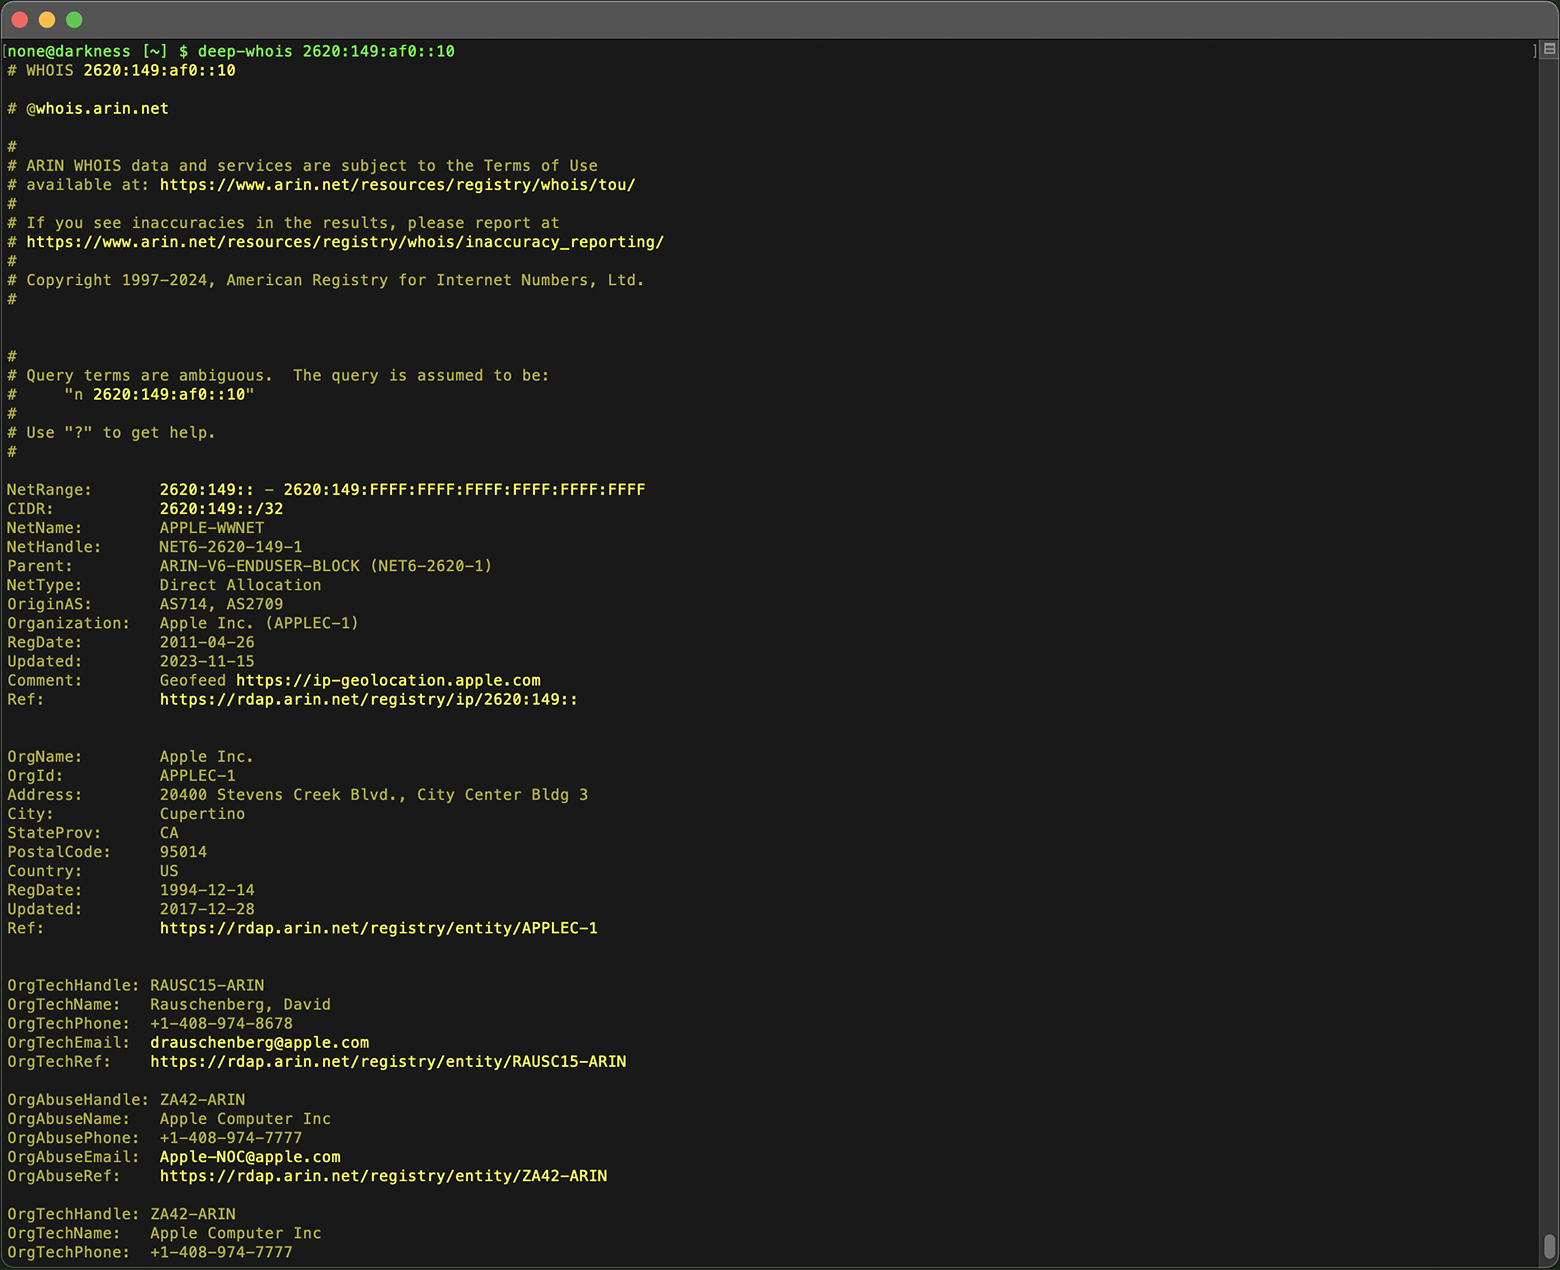
If the IP owner is a large organization, you may also see details about the department or individual responsible for managing the IP address.
Bonus Tips:
#1: Tracing Intermediary Whois Results
On iOS, you can add the '+trace' option to your query to display intermediary IPv4 and IPv6 Whois results from higher-level Whois servers.
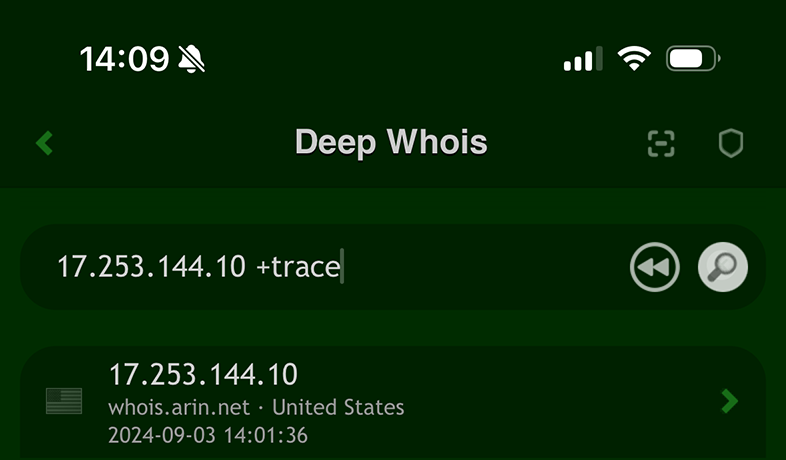
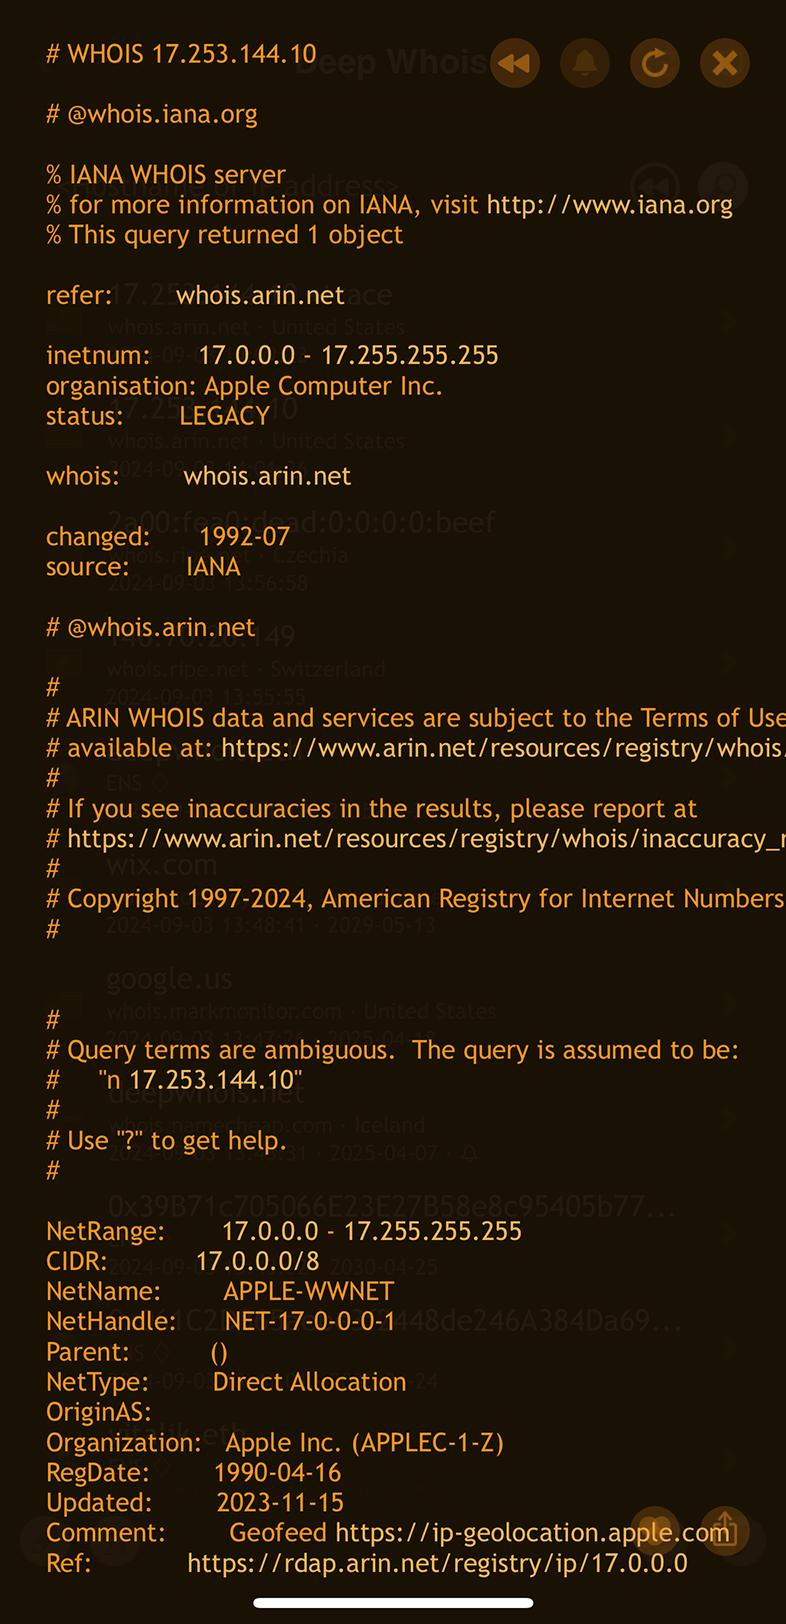
This can provide a deeper insight into the routing and ownership of IP addresses as queries pass through different servers.
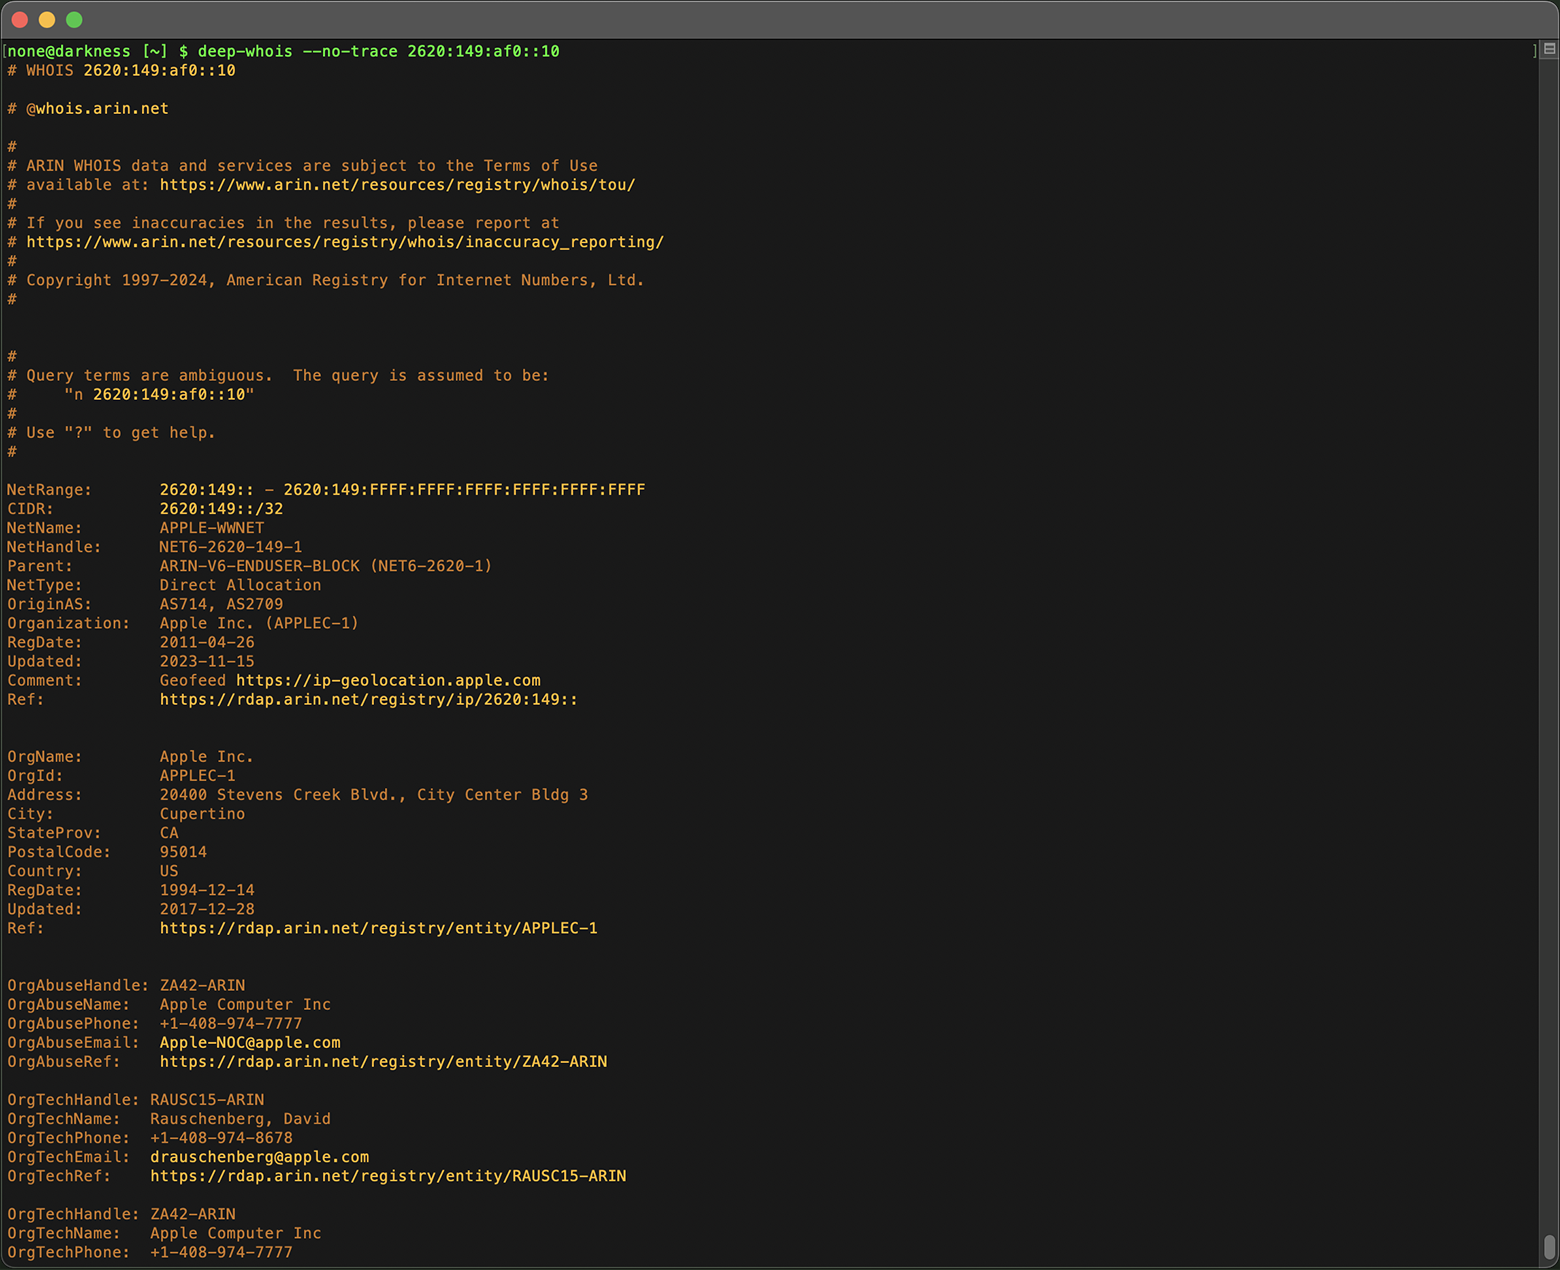
In the Terminal version on macOS, Linux, or FreeBSD this tracing information is shown by default, but if it's not necessary for your investigation, you can use the '--no-trace' option to hide this data and keep your results streamlined.
Step #3: Determine the IP's Regional Internet Registry (RIR)
Every IP address is allocated by a Regional Internet Registry (RIR) that manages a specific geographic region.
Knowing the RIR can help you understand the policies governing the IP address and can be critical in identifying the correct authority for further queries.
The RIR information is included in the Whois data, indicating whether the IP falls under ARIN, RIPE, APNIC, LACNIC, or AFRINIC.
Using Deep Whois on iOS:
Including the '+trace' option in your query on iOS can be useful for adding intermediary Whois results, allowing you to view related Whois data directly from the RIR (Regional Internet Registry) Whois server.
Using Deep Whois in Terminal:
The Whois output will specify the RIR managing the IP address:
deep-whois 2a00:1450:401b:800::200e
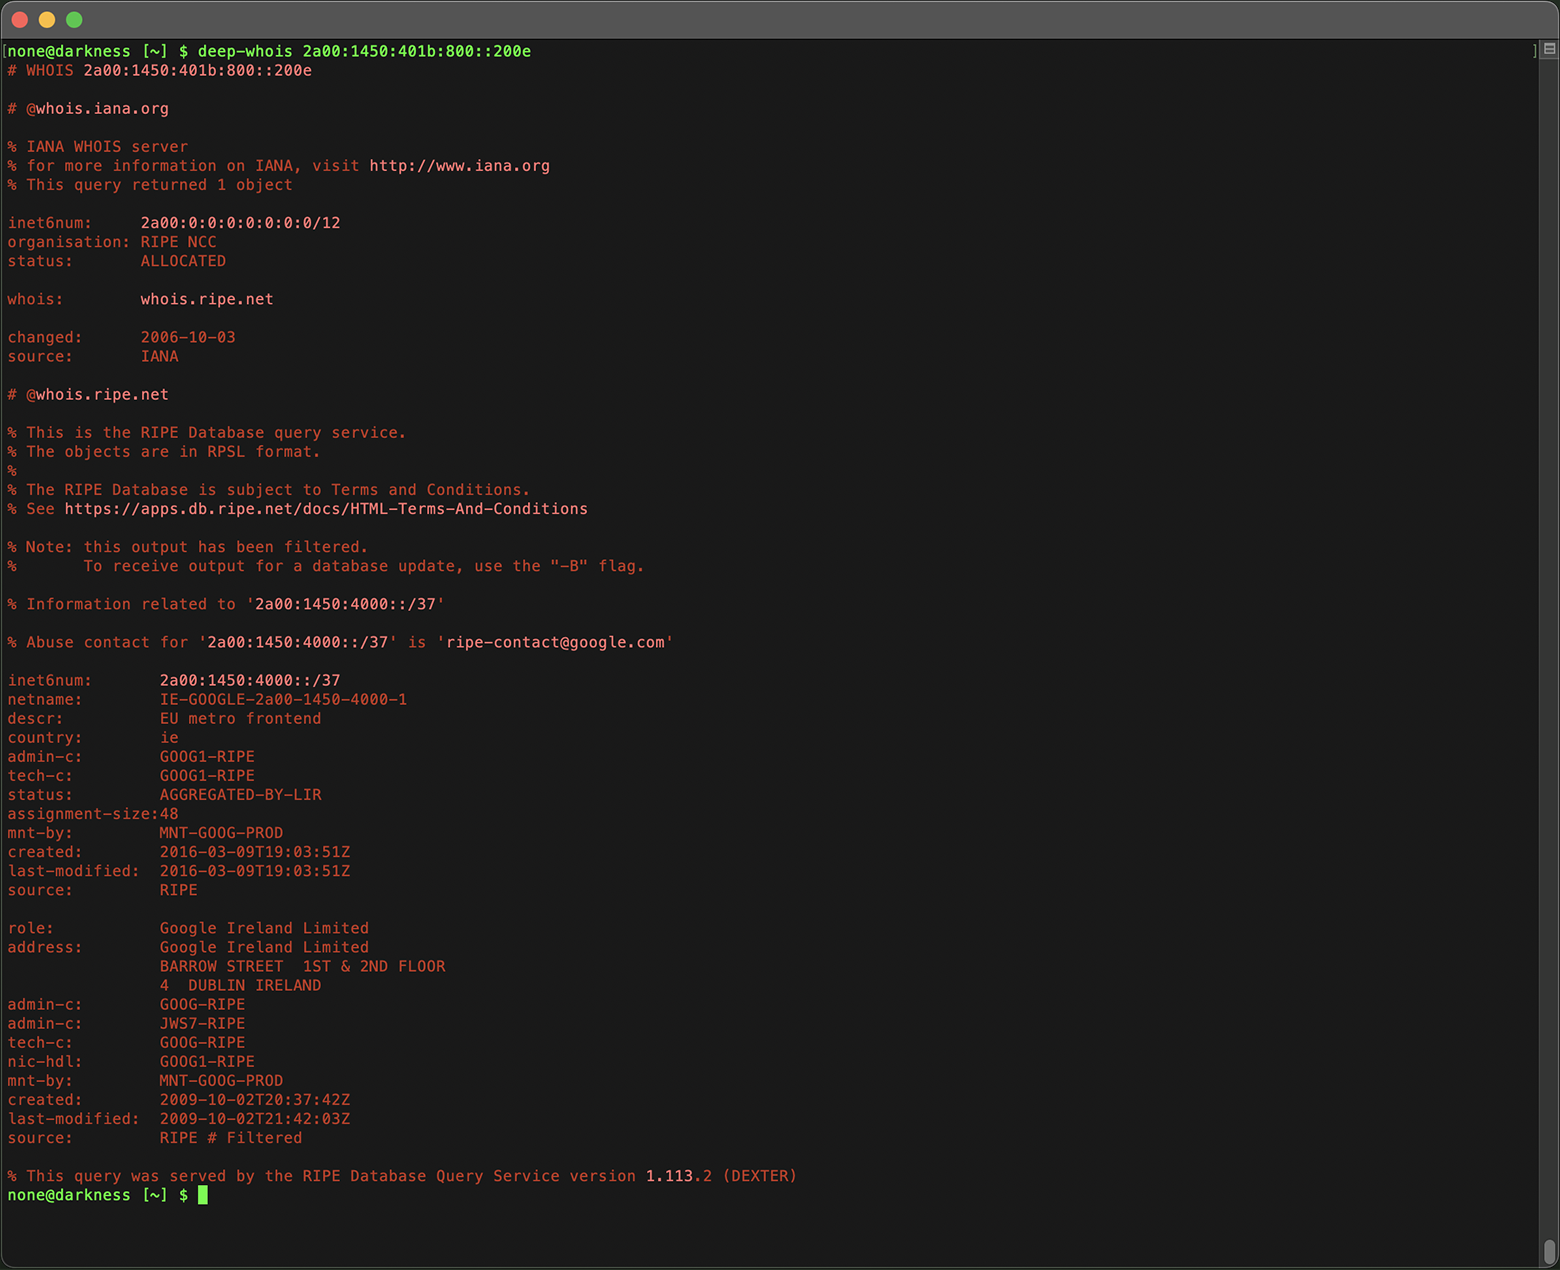
You can determine the Regional Internet Registry (RIR) handling the IP address by examining the names of the intermediate servers or by checking the owner of the Whois database.
Look for abbreviations such as ARIN, RIPE, APNIC, LACNIC, and AFRINIC, which correspond to the different RIRs responsible for specific regions.
Understanding the RIR helps in identifying the region of origin and the appropriate entity for resolving disputes or concerns related to the IP address.
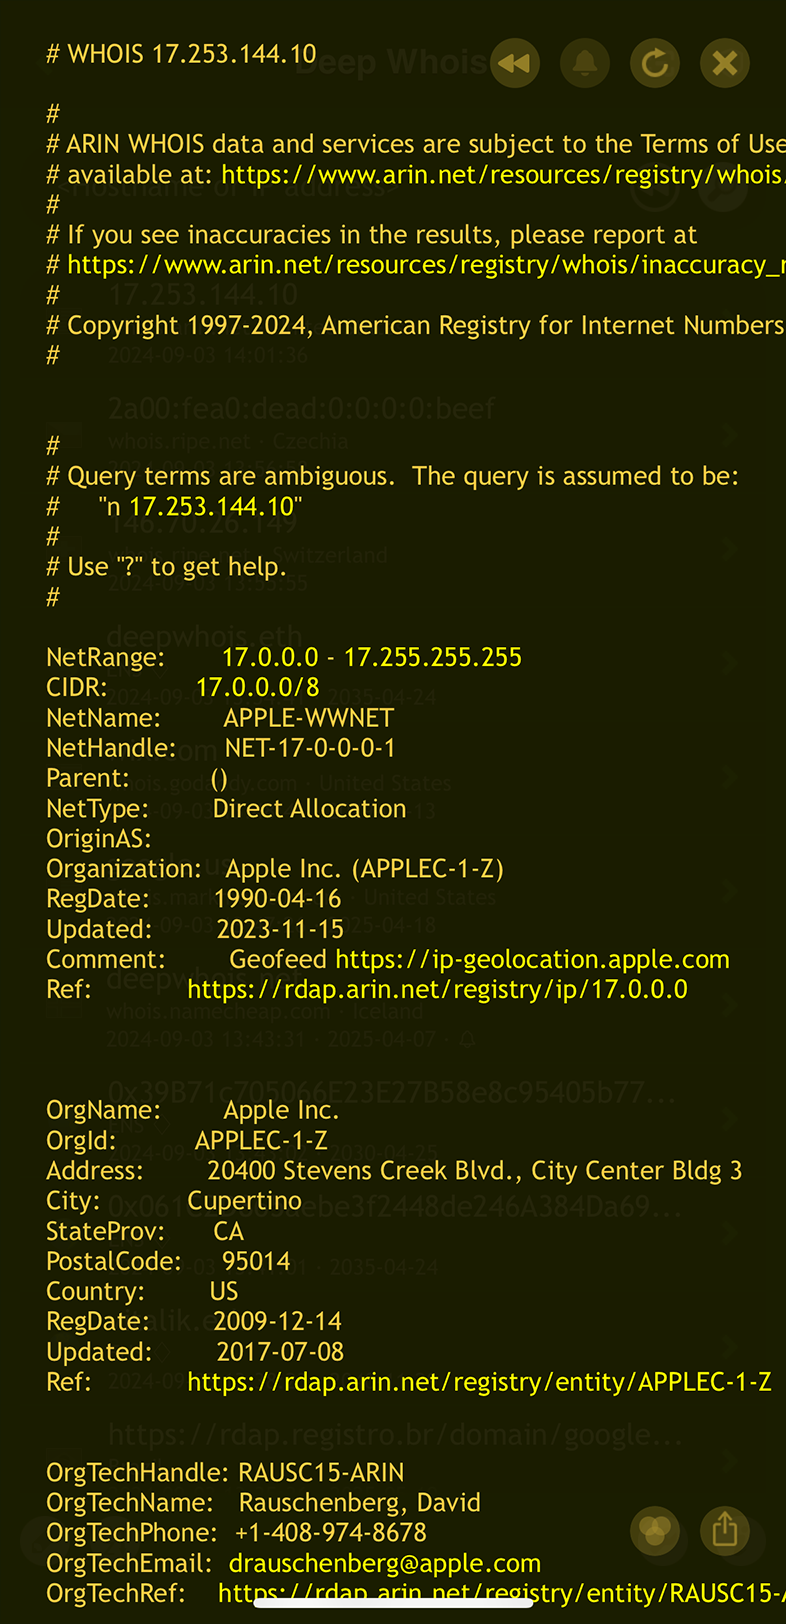
Step #4: Analyze IP Address Allocation and CIDR Notation
IP addresses are often allocated in blocks, indicated by CIDR (Classless Inter-Domain Routing) notation. By analyzing this notation, you can determine the size of the block, how the IP address fits within it, and whether it's part of a larger network.
Using Deep Whois on iOS:
The CIDR notation will be included in the IP details section.
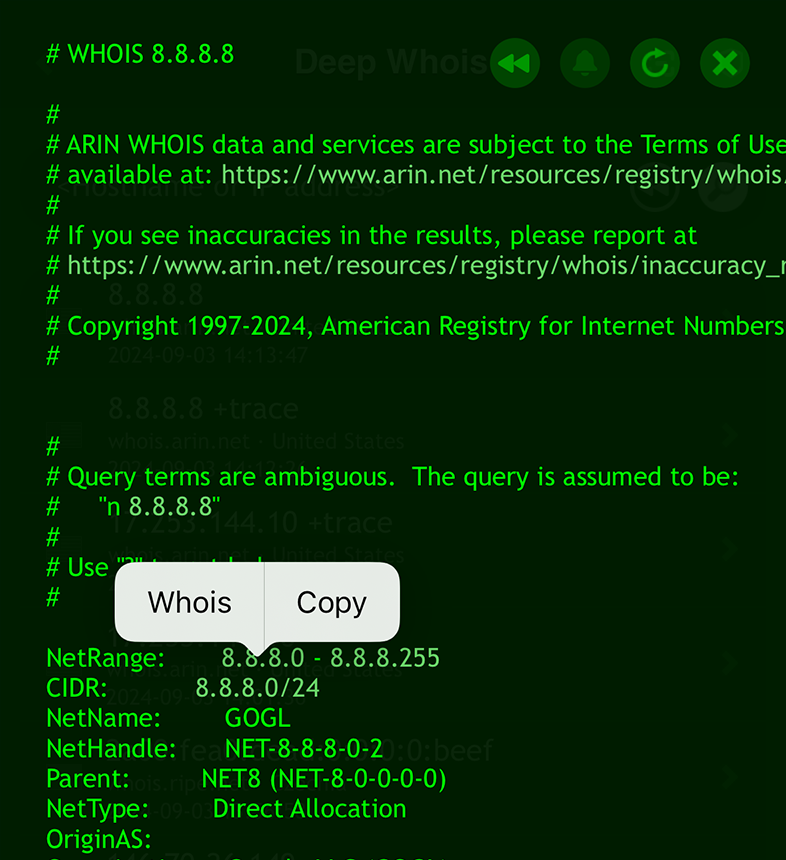
Use the context menu by tapping on the network address with CIDR notation, then choose 'Whois' to reveal its details.
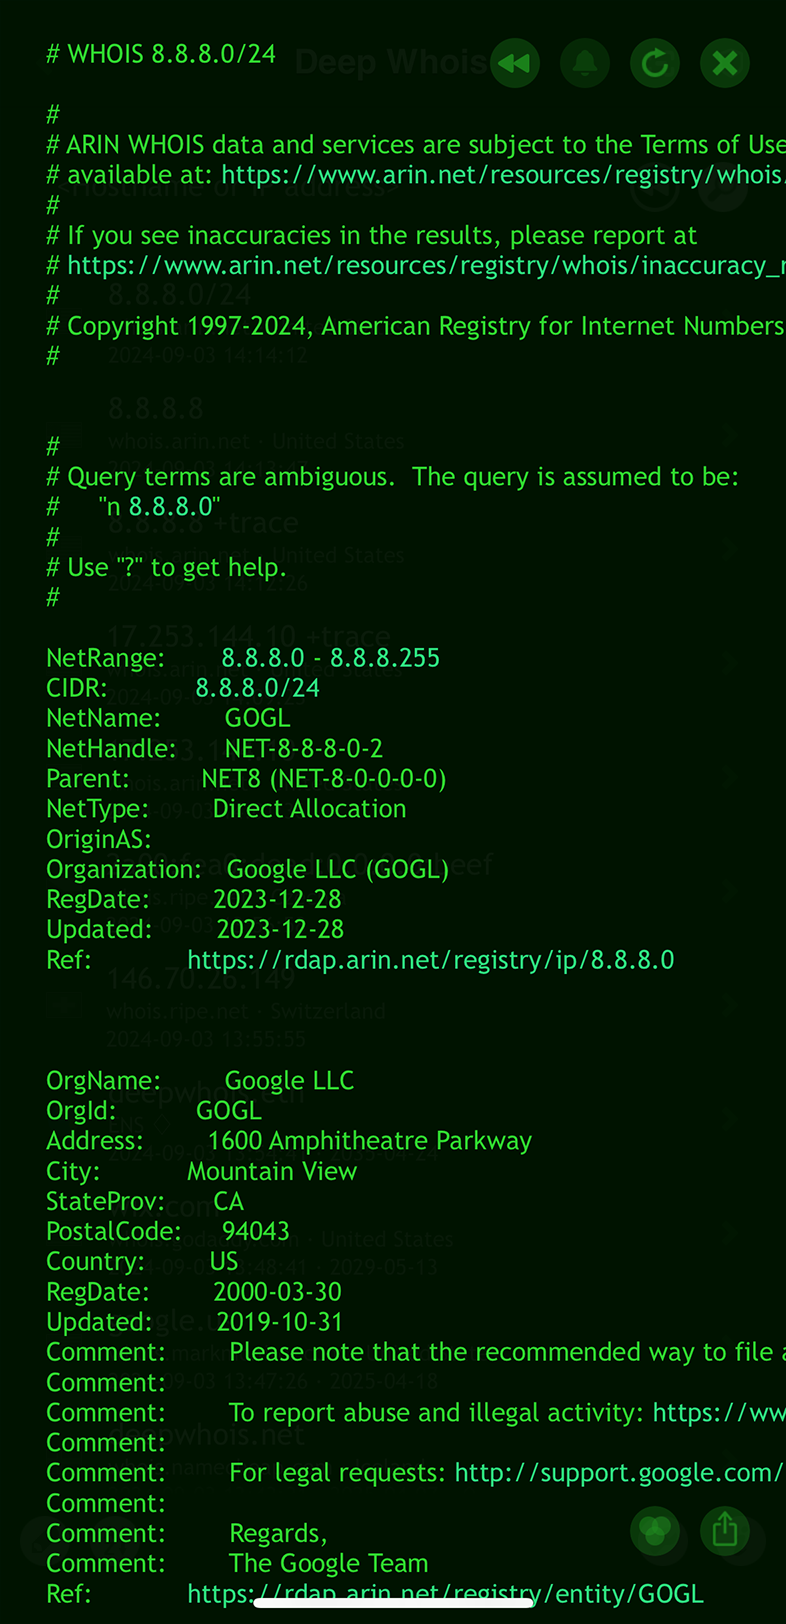
Using Deep Whois in Terminal:
Check the CIDR details in the Whois output, and use them to perform a new query if needed.
deep-whois 2a00:1450:4000::/37
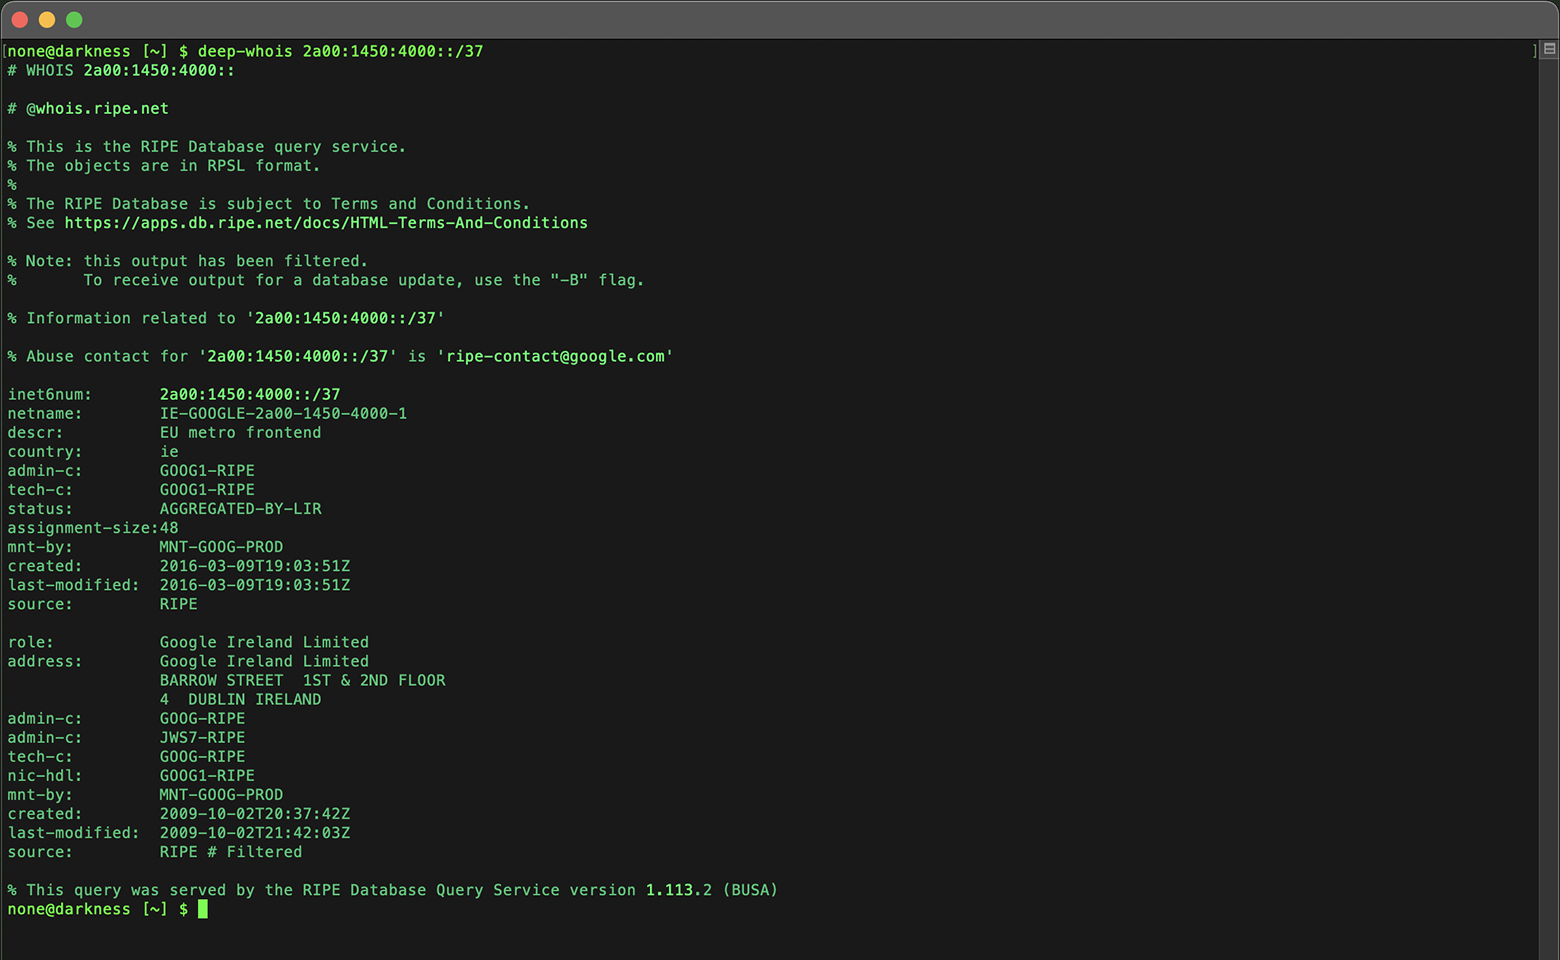
Analyzing the CIDR block helps you understand whether the IP is part of a larger network, which can be useful for network mapping and threat analysis.
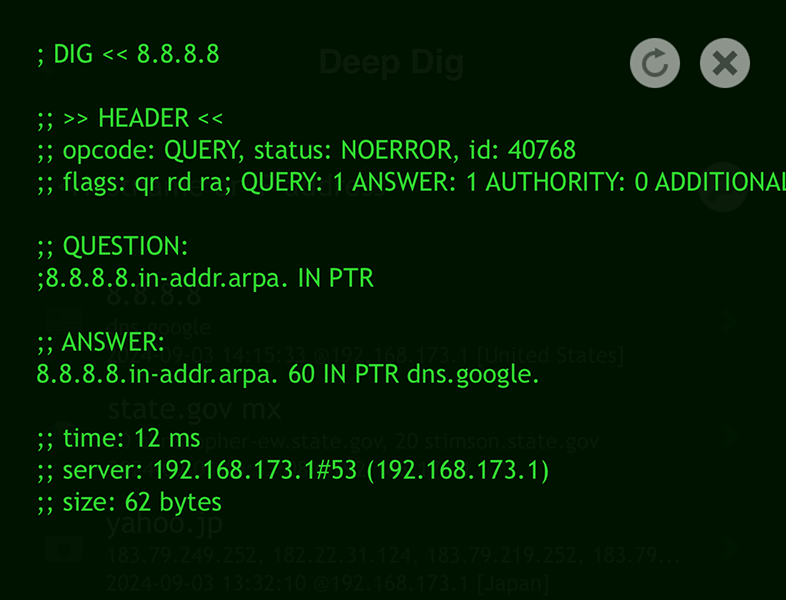
Step #5: Perform Reverse IP Lookups
Reverse IP lookups allow you to find all the domains hosted on a particular IP address.
This can be useful for identifying all assets controlled by an organization, finding related websites, or understanding the IP's full scope of use.
On iOS:
Use the 'DNS Lookup' tool in the 'Scany' app.
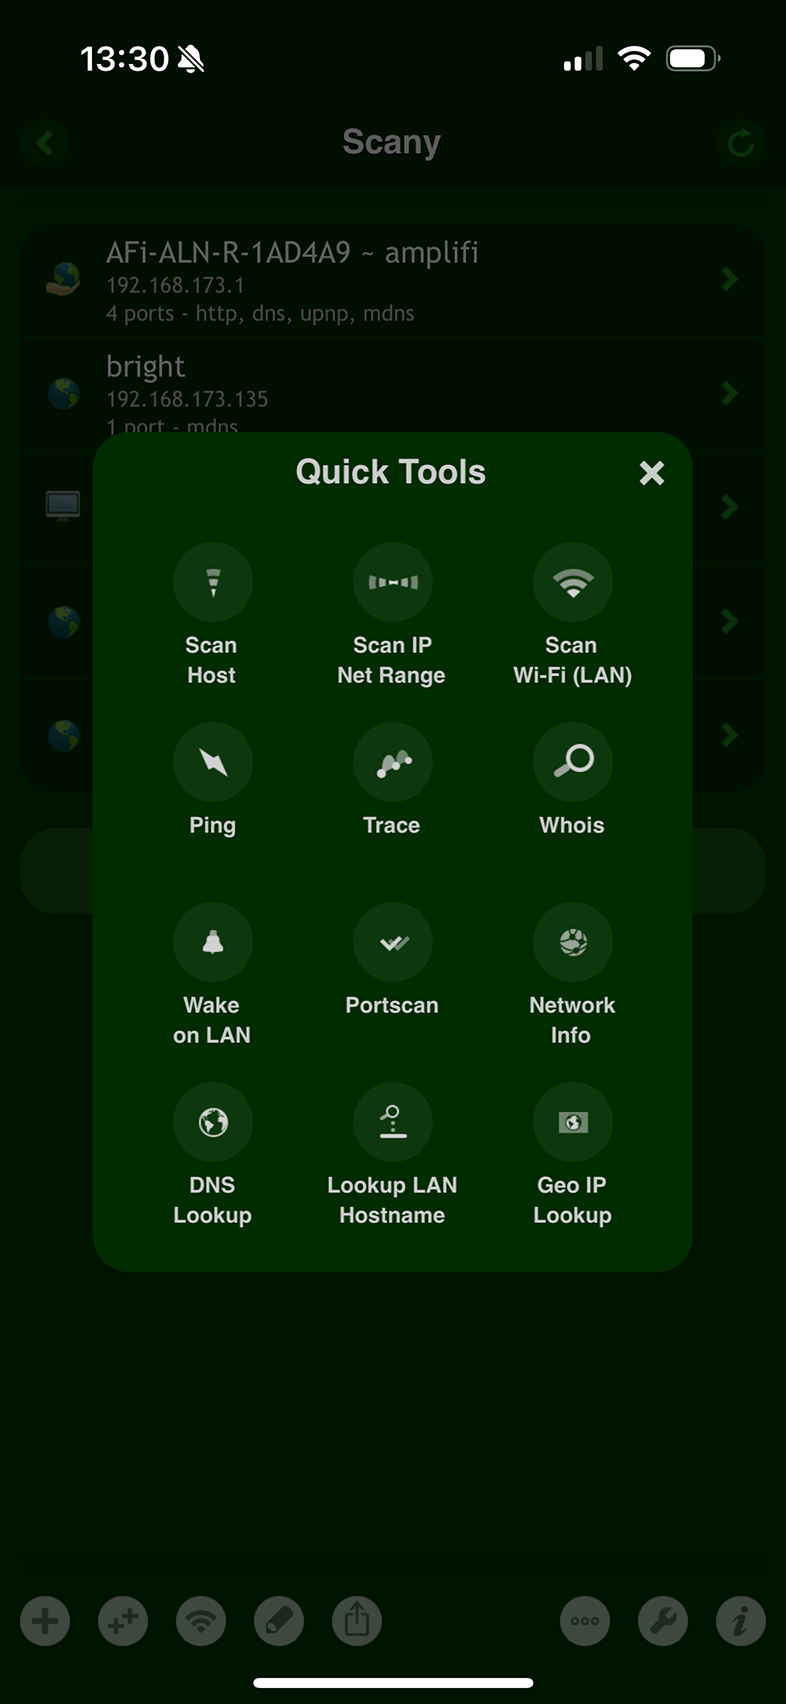

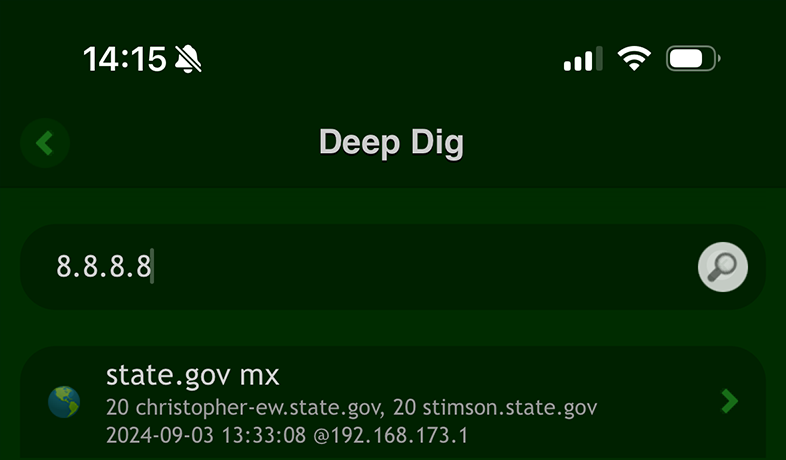
Or use simply the 'Deep Dig' app.
In Terminal:
Use the 'host' command, using the domain as the query:
host 8.8.8.8

Reverse IP lookups can reveal a network of related domains, providing deeper insights into an entity's online presence.
Once you've identified the domain name associated with the IP address, you can conduct a full investigation by performing a domain Whois lookup.
This will provide detailed information about the domain's ownership, registration, and other key details.
Step #6: Check the IP's Hosting Provider
Knowing the hosting provider can give you insights into the IP's infrastructure and potential vulnerabilities.
It can also help you determine if the IP is hosted on a reputable service or one known for hosting malicious content.
For most websites, the IP address owner is typically their hosting provider.
However, this isn't the case for larger organizations that manage their own private IP address blocks.
In such instances, you might want to determine the closest routing hop to the IP being investigated.
This hop is usually associated with the hosting provider or a data center, giving you more precise information about the infrastructure behind the website.
On iOS:
You can use the Trace tool in the Scany app or simply use the Nice Trace app.
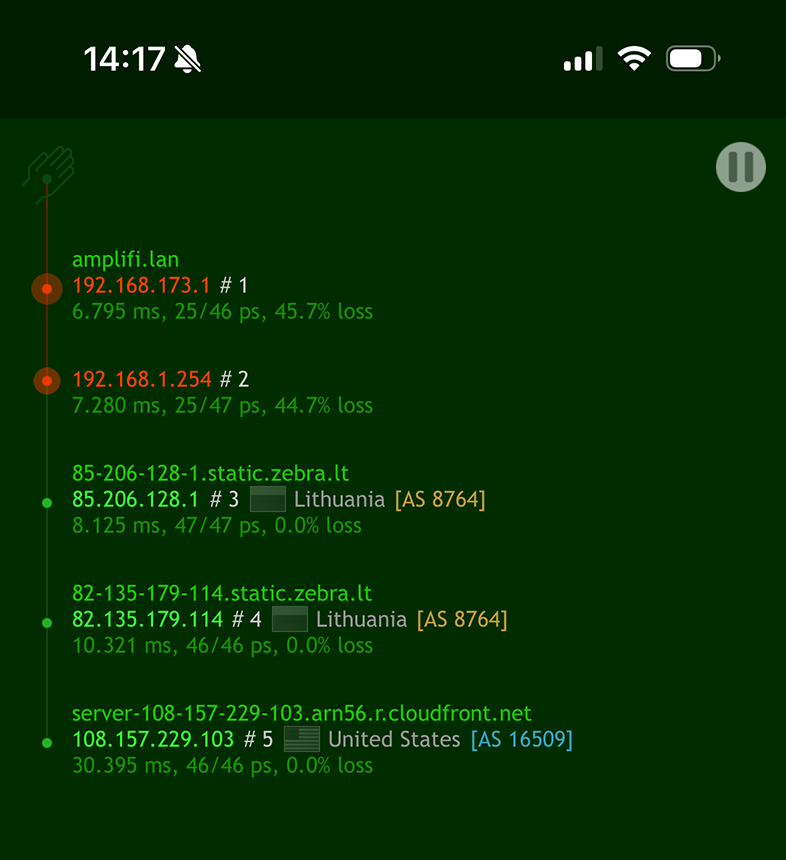
In Terminal:
Use the traceroute command line tool.
traceroute one.one.one.one

Understanding the hosting environment can inform your decisions, especially when assessing the security and reliability of an IP address.
Step #7: Geolocate the IP Address
Understanding the geographical location of an IP address is crucial, particularly when investigating suspicious activity or verifying the legitimacy of a connection.
Geolocation can reveal where the IP is based, down to the city or even neighborhood level in some cases.
Users can quickly determine the country of an IP address by using the 'IP Country Lookup' tool in the 'Scany' app on iOS:
Simply type in IP adress:
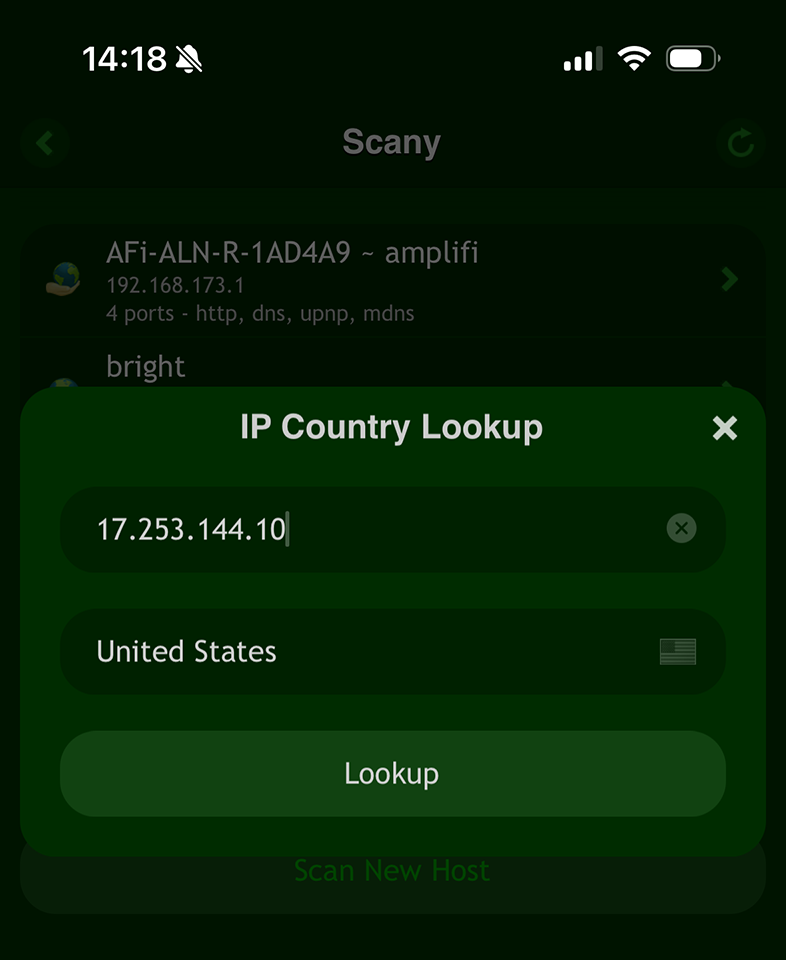
Geolocating the IP address is particularly useful for identifying the origin of cyber threats or understanding the physical location of servers.
IP address geolocation can also be useful for checking discrepancies between the Whois data and the detected location.
While a difference might seem suspicious, it often occurs due to the slow speed of database updates.
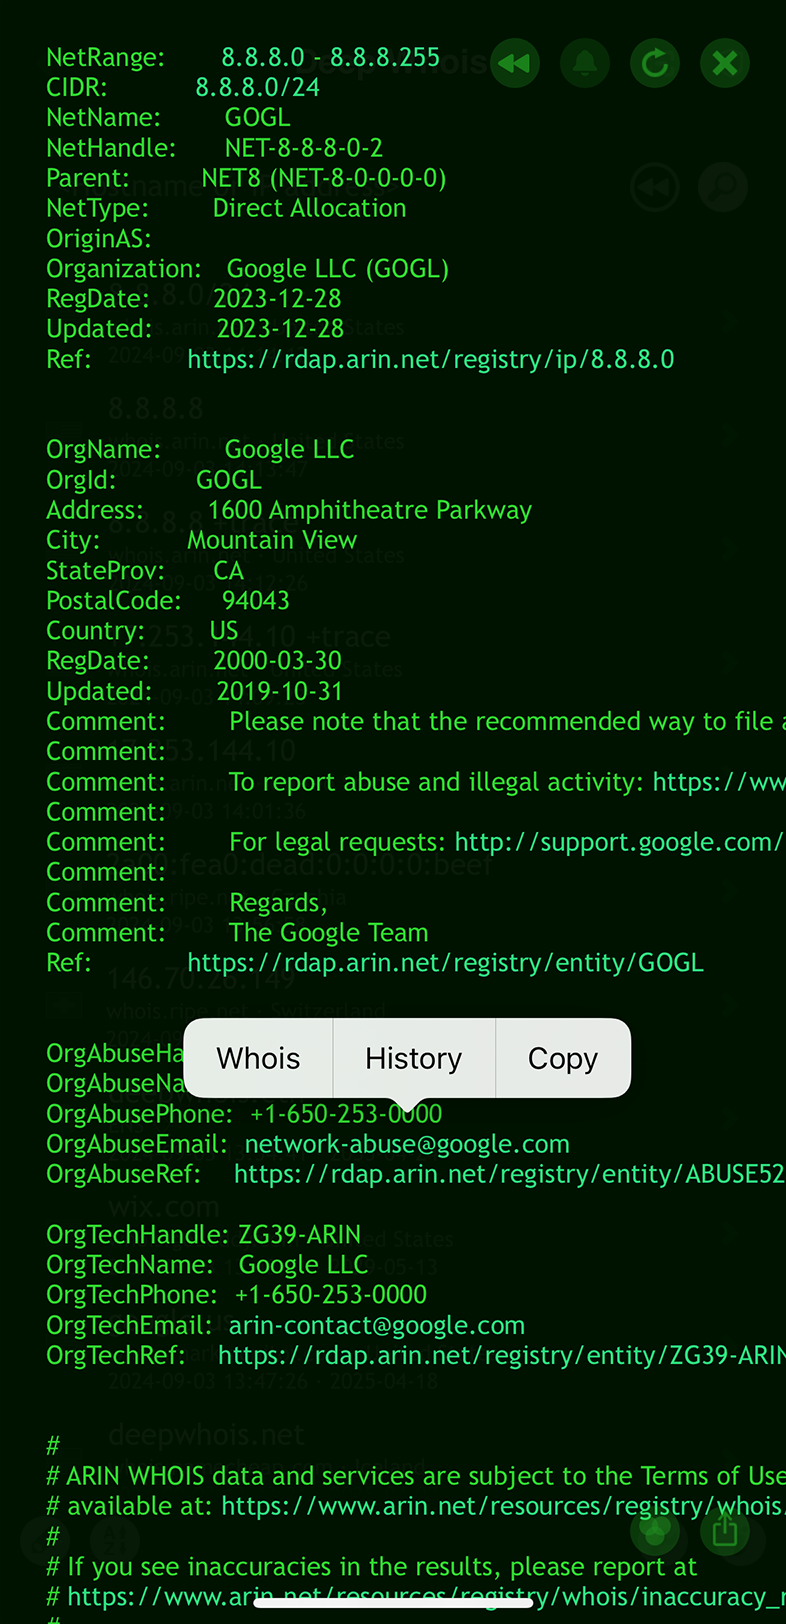
Step #8: Analyze Whois Abuse Contact Information for IP Addresses
Abuse contact information is often included in Whois records for IP addresses, allowing you to report issues such as spam, phishing, or other malicious activities associated with the IP.
Accessing and using this information is essential for effectively handling security incidents.
Using Deep Whois on iOS:
Look for the abuse contact details in the Whois data when performing a query on an IP address.
Using Deep Whois in Terminal:
You can find abuse contacts by running the following command:
deep-whois --no-trace 8.8.8.8 | grep -i abuse

Reporting abuse to the appropriate contacts helps mitigate risks associated with malicious IP addresses and improves overall network security.
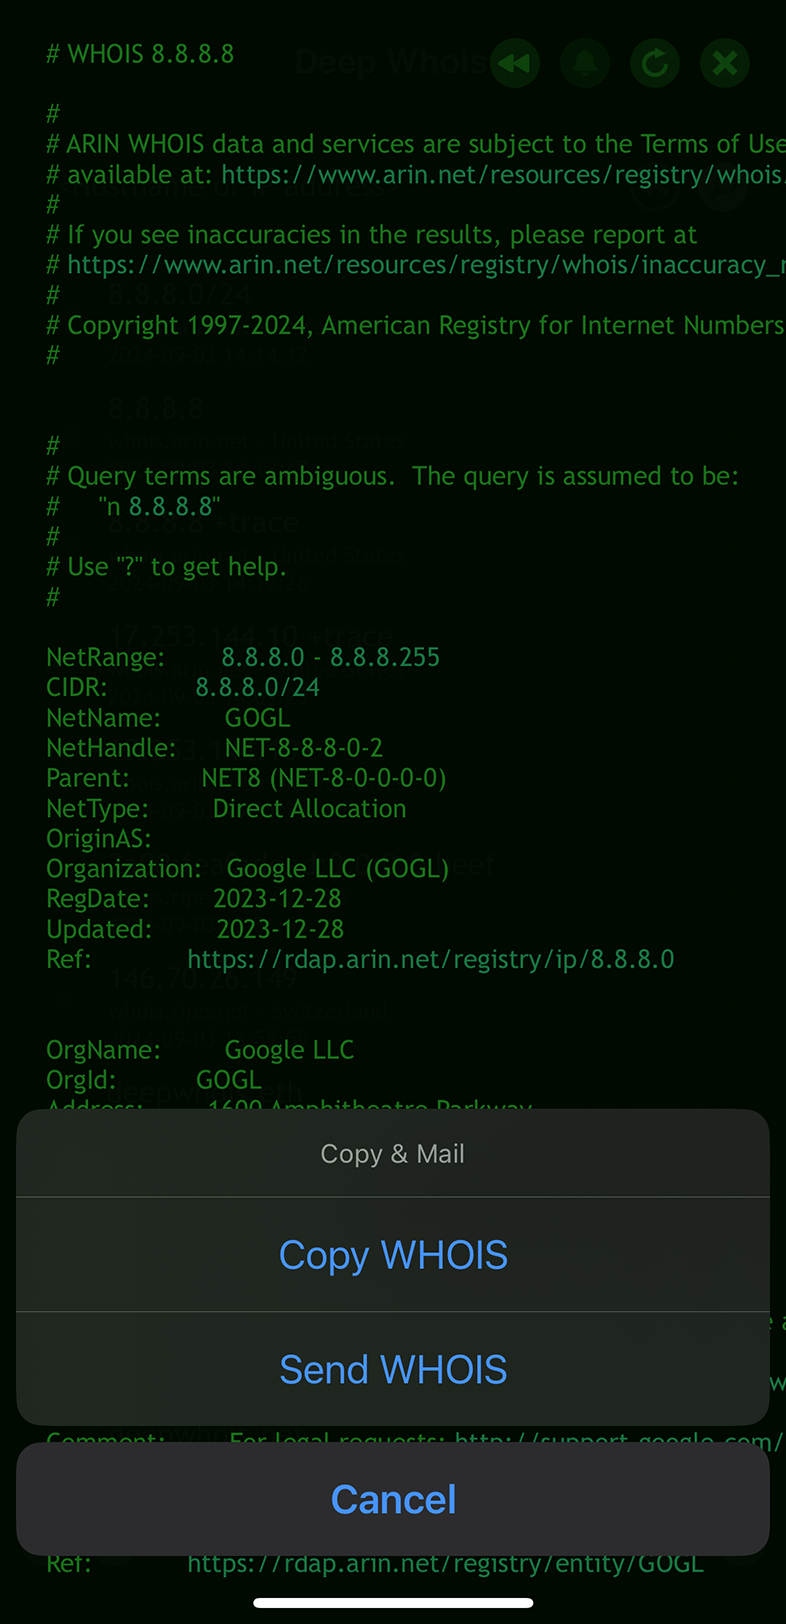
Step #9: Save and Export IP Whois Data
After completing your IP address analysis, it's crucial to save and export the Whois data for future reference or reporting purposes.
This documentation can be invaluable when making decisions about the IP address or presenting your findings.
Using Deep Whois on iOS:
Export the results directly from the app in a format that suits your needs.
Using Deep Whois in Terminal:
Save the Whois output to a file for easy reference with the following command:
deep-whois 8.8.8.8 > whois-ip-results.txt
Saving a record of your findings allows you to revisit the data whenever needed and ensures that your analysis is well-documented.
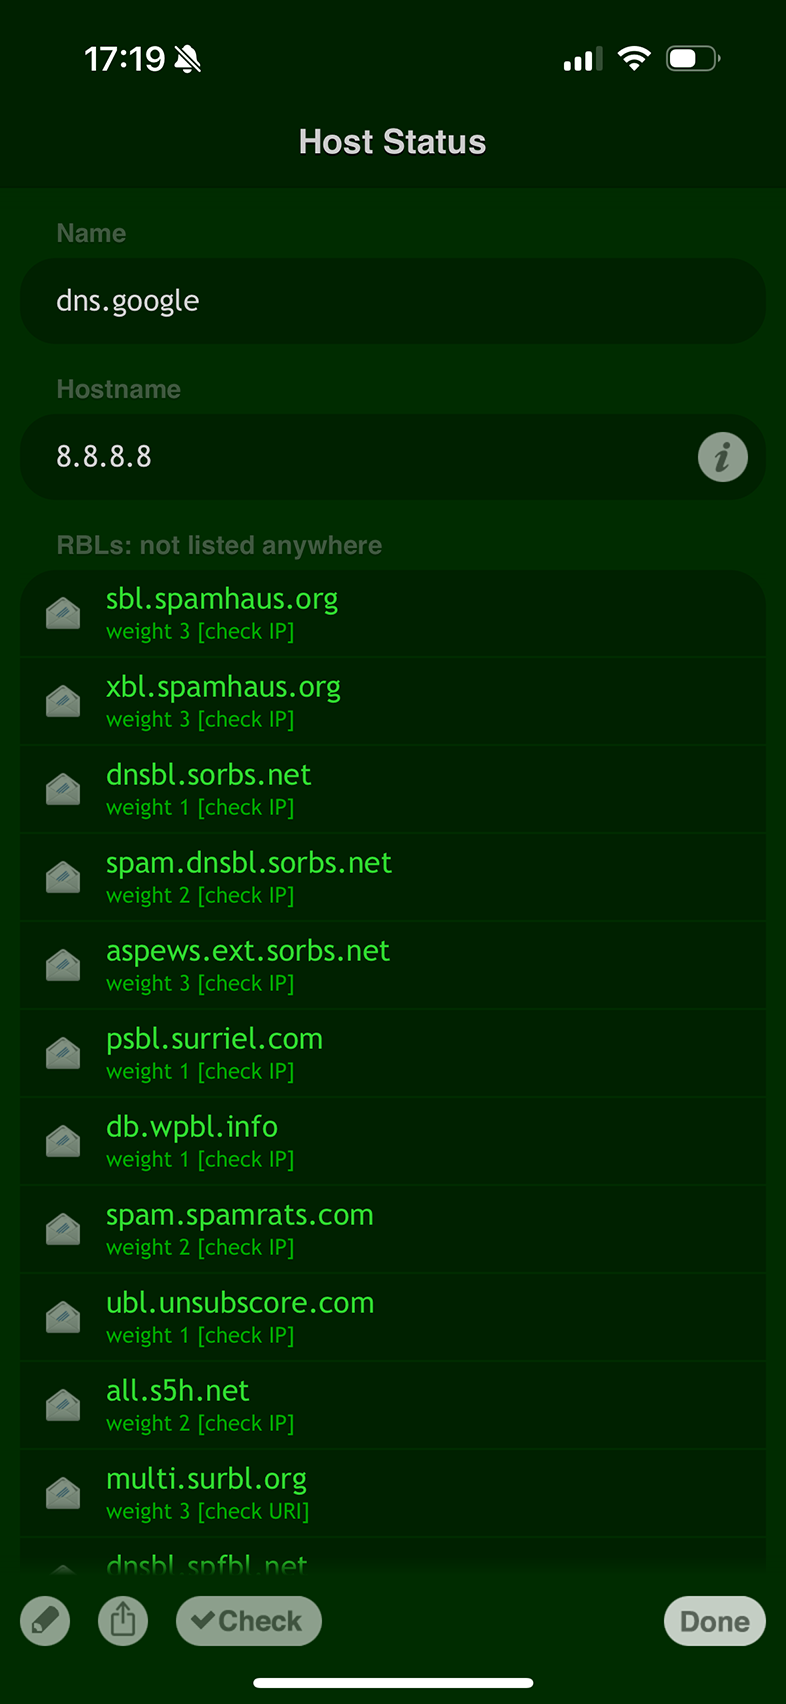
Bonus Step: Regularly Review IP Address Reputation and Blacklist Status
The reputation of an IP address can fluctuate over time, particularly if it's associated with activities like spamming or phishing.
It's important to regularly monitor the IP address's reputation and blacklist status to ensure it remains reliable and doesn't pose a risk to your business or security.
On iOS, you can use the RBL Status app to easily track the reputation and blacklist status of an IP address.
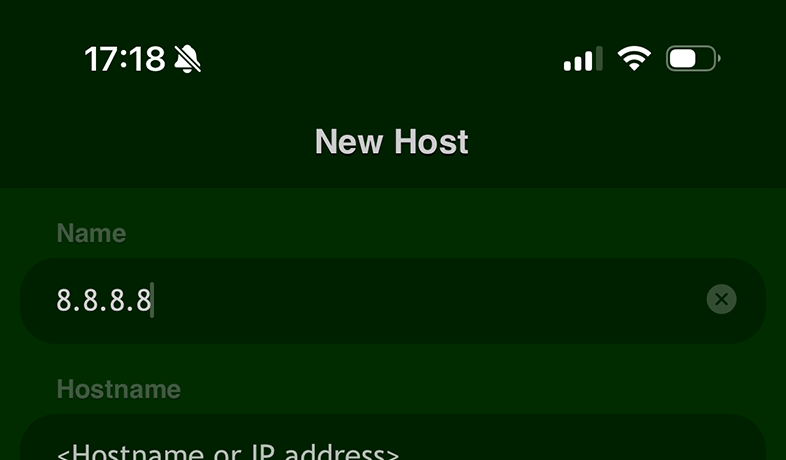
The app offers real-time overlook on whether an IP address has been flagged on any blacklists, helping you maintain a secure and trustworthy online presence.
By keeping an eye on an IP address's reputation, you can take proactive measures to safeguard its integrity and resolve potential issues before they become problematic.
Conclusion: Enhancing Your IP Address Investigations with Whois Lookup
By following these detailed steps, you can perform comprehensive IP address investigations using Deep Whois, whether you're utilizing the iOS app or the Terminal on macOS, Linux, or FreeBSD.
This guide provides you with the essential tools and insights needed to explore every aspect of an IP address, from ownership and geolocation to more advanced details.
Whether your goal is to enhance security, conduct a network audit, or simply gain a deeper understanding of an IP address, this guide ensures you maximize the effectiveness of your Whois lookups, giving you a thorough understanding of the IP address in question.